How to Develop with the OpenEye Java Toolkit in IntellJ IDEA
IntelliJ IDEA is a Java IDE available from JetBrains. See the JetBrains site for downloads and installation instructions. IDEA is available on multiple platforms. The macOS version is used in this guide.
Creating a New Project
IDEA creates projects, which consist of modules.
To create a new IDEA project, select File/New/Project.., displaying the New Project
dialog.
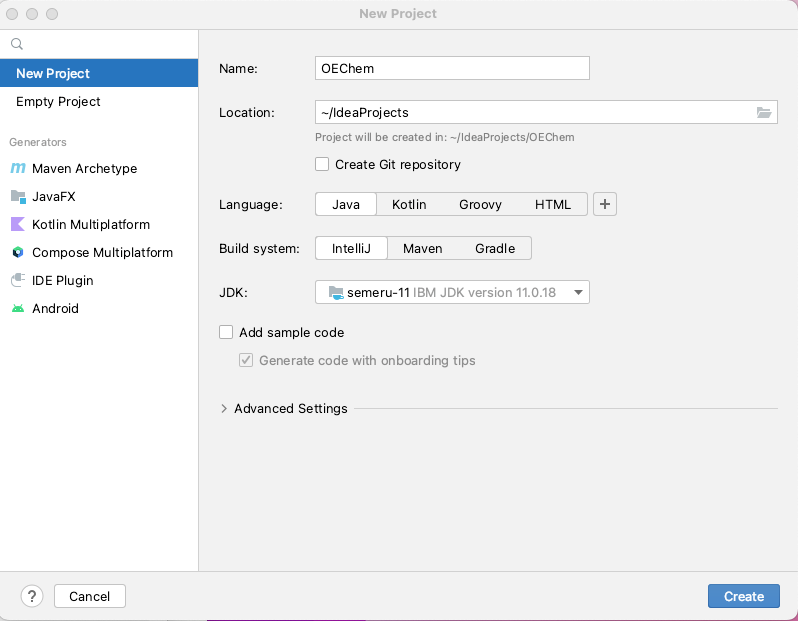
New Project in IDEA
Select IntelliJ as the build system, for this simple example. Then click Create.
Next, you need to add the OpenEye JAR to the environment. The OpenEye Java toolkit is added as a “project” library.
Select File/Project Structure.., and select Libraries. The Project Structure dialog
should look like the picture.
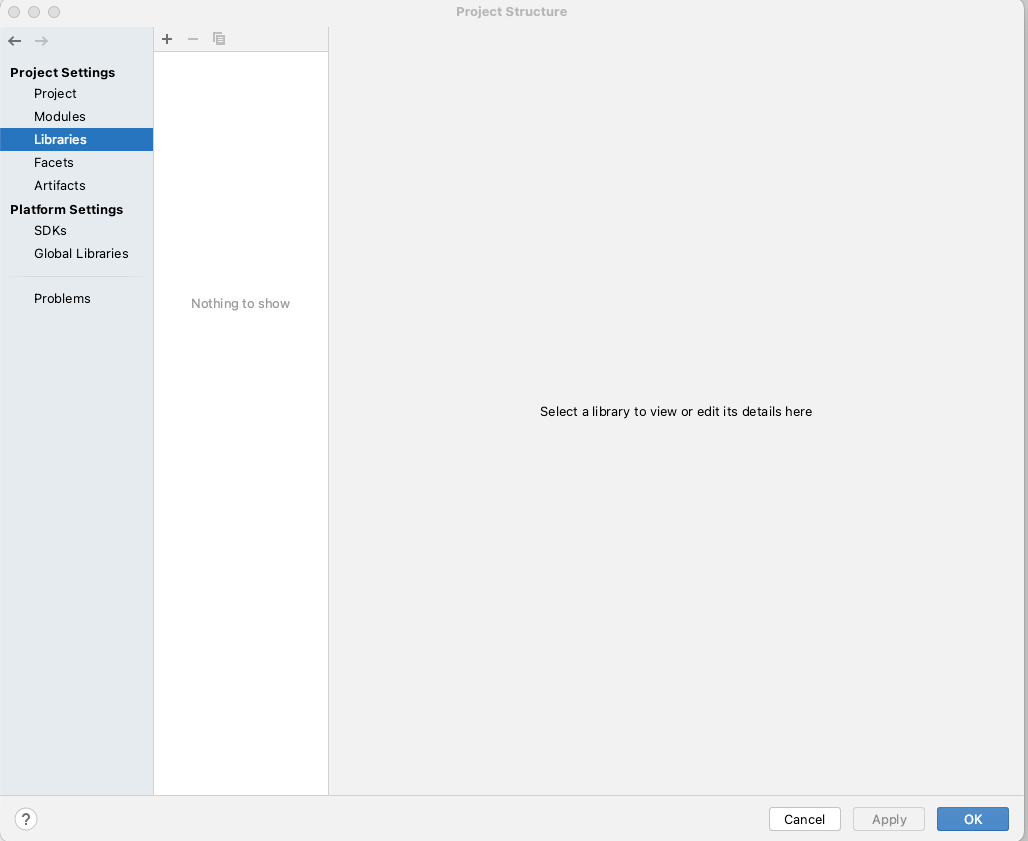
Preparing to Add the OpenEye Toolkit to the Environment
Select the + button to add a library, select Java, and navigate to the location
containing the OpenEye JAR files. The picture here shows the selection of
the JAR files in the OpenEye lib subdirectory.
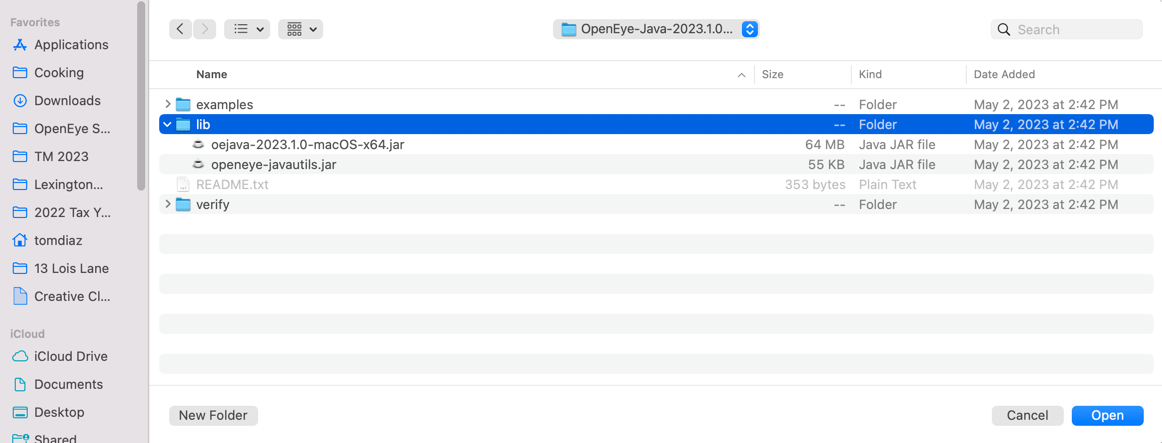
Selecting the OpenEye JARs
Select Open to confirm the selection. Click OK to add these files as external libraries. You should now be able
to import software from these libraries in Java classes, as in import openeye.oechem.*;.
Create a Package and a Class
Next we need to add a Java class to hold our sample code. Right-click on the src folder in the
Project pane, and select New/Java Class. Be sure you have the src folder selected when you right-click.
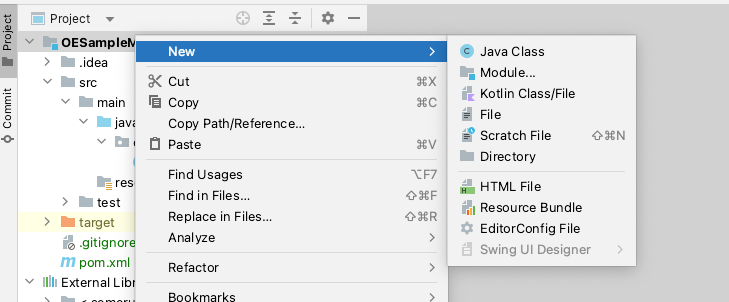
Adding a New Class
For the name, enter com.example.oechem.Example1. This will add the new package and new class in the editor, ready for your code.
Near the top of the file, add the import for oechem.
import openeye.oechem.*;
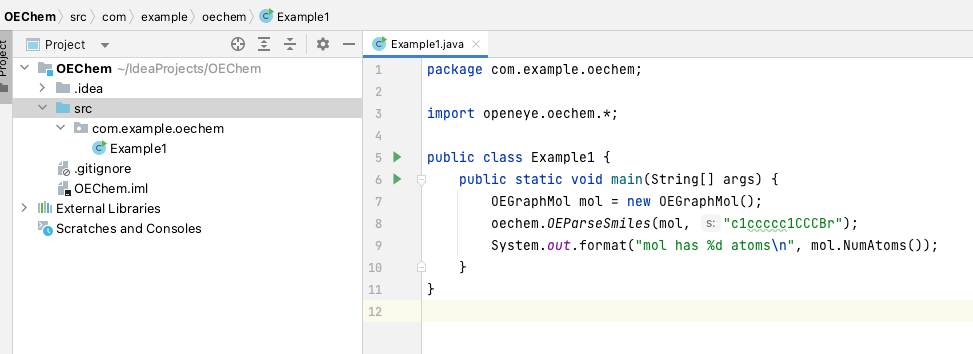
Then add our sample code inside the class.
public static void main(String[] args) {
    OEGraphMol mol = new OEGraphMol();
    oechem.OEParseSmiles(mol, "c1ccccc1CCCBr");
    System.out.format("mol has %d atoms\n", mol.NumAtoms());
}
When you are finished, your sample should look like the figure.
Editing in IDEA
Running Our Example inside IDEA
We can now run our program in IDEA. In the toolbar, click the “Run” button as shown in the figure.

Running Our Example in IDEA
This should produce some output in the Run window, as shown in the figure.
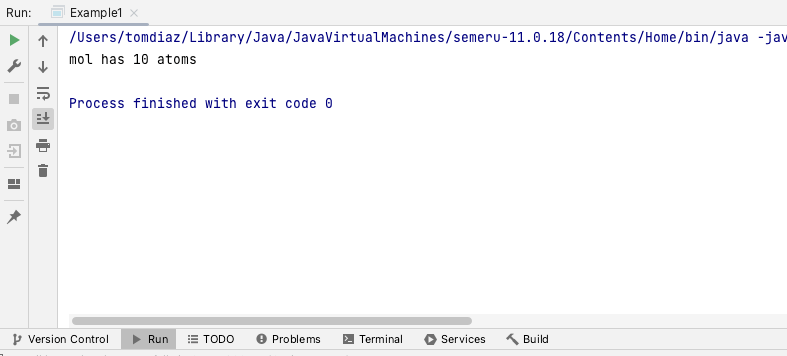
Output from Our Example
And now you’ve created your first OEChem Java sample. You can now add code and continue to run inside IDEA to try out more of the OEChem API.
Creating an Executable JAR
At some point, you may want to run your example outside of IDEA,
or you may want to deploy the application to another machine. An easy
tool for this purpose is an Artifacts option built into IDEA.
Create an Artifact Configuration
To create a standalone JAR executable, select File/Project Structure. Click Artifacts, click +, choose
JAR, and select From modules with dependencies....
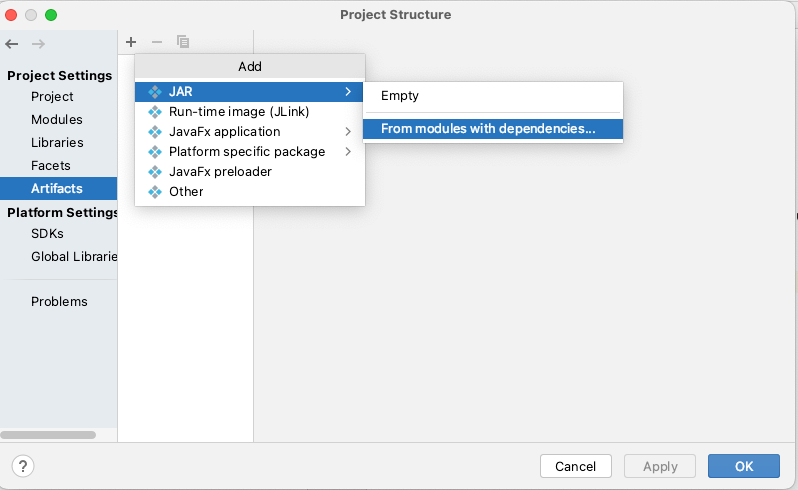
Preparing to Create a JAR
Then in the next dialogs:
Select the main class (
Example1in our example). (You can click the folder icon to browse files in the project.)Make your choice about how libraries should be packaged.
Click
OK.
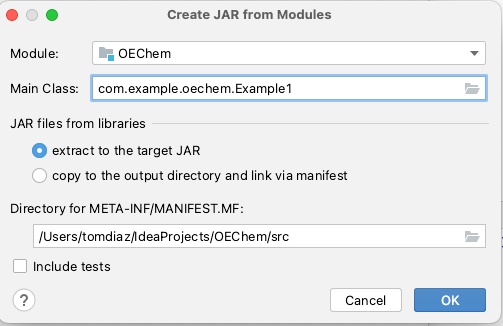
Create a JAR from a Module
Create a Run Configuration
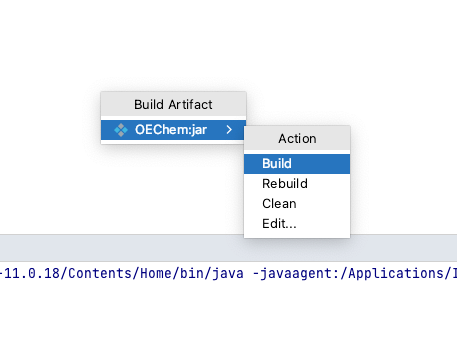
Build the artifact you just created, with the Build/Build Artifacts... command.
You can see the finished artifact in the out subdirectory in the project.
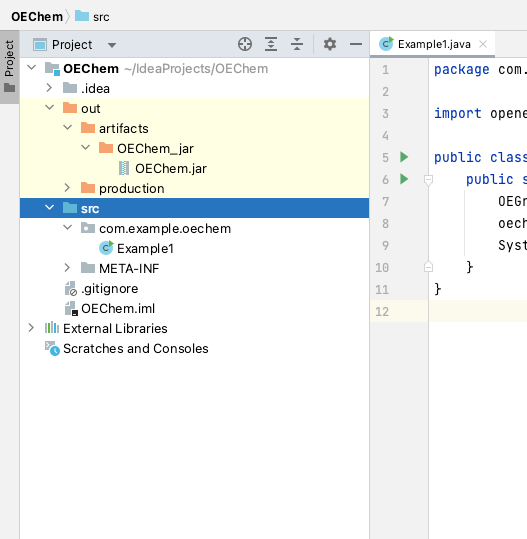
A Finished JAR Artifact
Now build a configuration to run the JAR as an application. IDEA uses configurations of this kind to run and
to debug programs. Select the command Run/Edit Configurations.... Click the + button and select
JAR Application. Name the application, and, in the Path to JAR field, enter the path to the JAR file on your
computer. In the Before launch area, click + and select Build Artifacts and your JAR application. This
means that the JAR is built every time you execute this run configuration. Learn more about run configurations in the
IDEA documentation.
When you are finished entering the information, your screen should like like the figure.
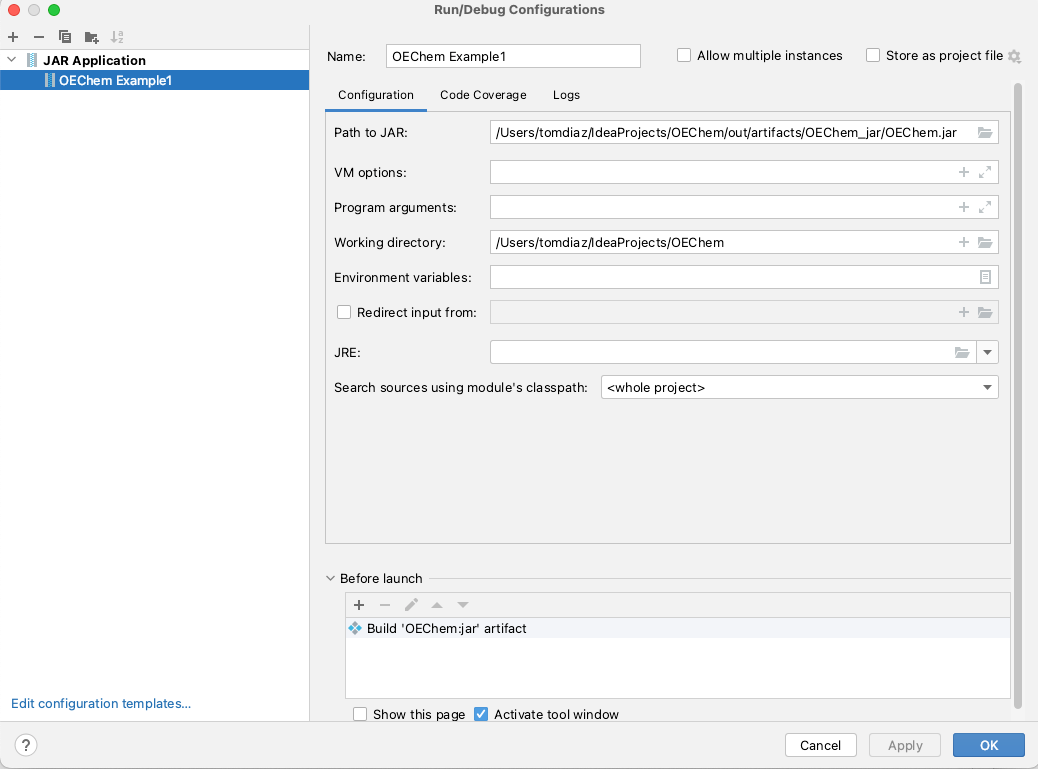
A Run Configuration for a JAR Application
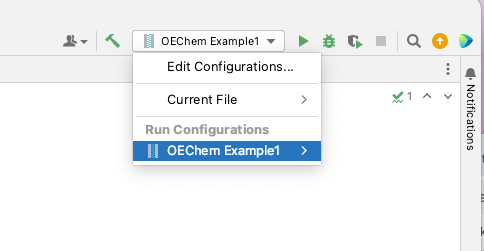
Run the Application with the Run Configuration
Now you can use the drop-down at the top of the screen to execute the JAR application via the run configuration you just created.
Execute the program, and you should see the same output as before.