Enabling and Modifying Receptor Constraints (June 6, 2023)
What you will learn: How to enable, modify, and add receptor constraints from the Orion user interface.
Estimated read time: 2 minutes.
Receptor constraints now can be managed via Orion’s 3D Modeling page, like the functionality available in OpenEye’s
MakeReceptor command-line application.
Protein receptor constraints can play a crucial role in docking calculations, by incorporating prior knowledge to predict ligand–receptor binding. Orion provides three options to set up receptor constraints:
Enable automatically generated potential constraints.
Modify existing constraints.
Add protein or custom constraints.
1. Enable Automatically Generated Potential Constraints
Automatically generated potential constraints may already exist when you generate design units (DUs) using SPRUCE (from the Orion Floe or the command-line application). These constraints are initially set to ‘disabled’ by default. To enable these constraints, simply click on the respective constraints, as shown in the image below:
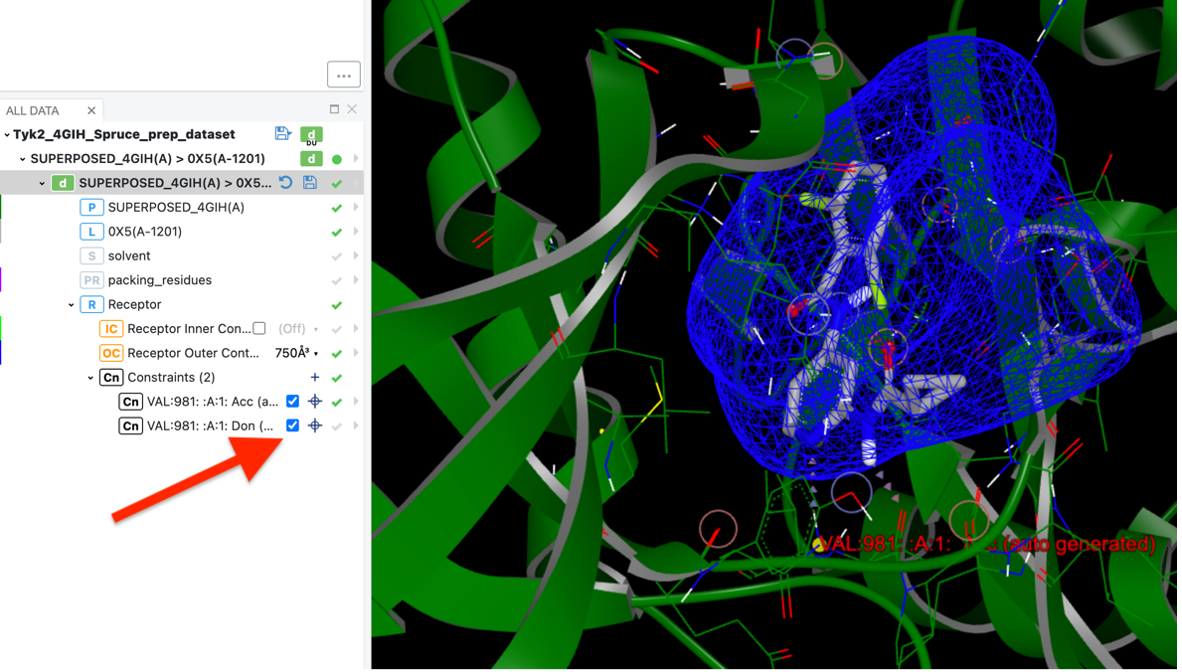
Click to enable each constraint, in the Orion UI.
2. Modify Existing Constraints
Make changes to the existing constraints in the receptor, such as constraint type, label, and so forth.
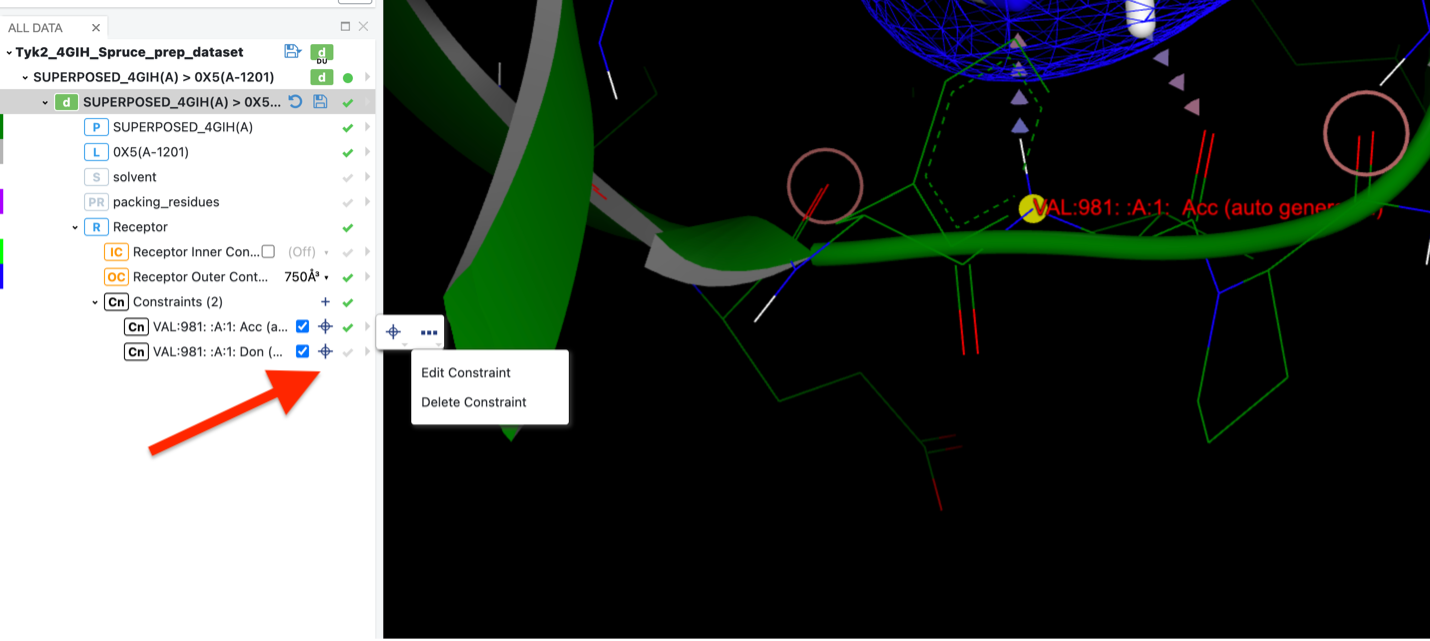
Click the plus sign to modify a constraint.
3. Add Protein or Custom Constraints
By selecting the desired atom in the protein, you can add a specific protein constraint. You also may add a specific custom constraint, such as a hydrophobic charge. You also can apply a SMARTS pattern.
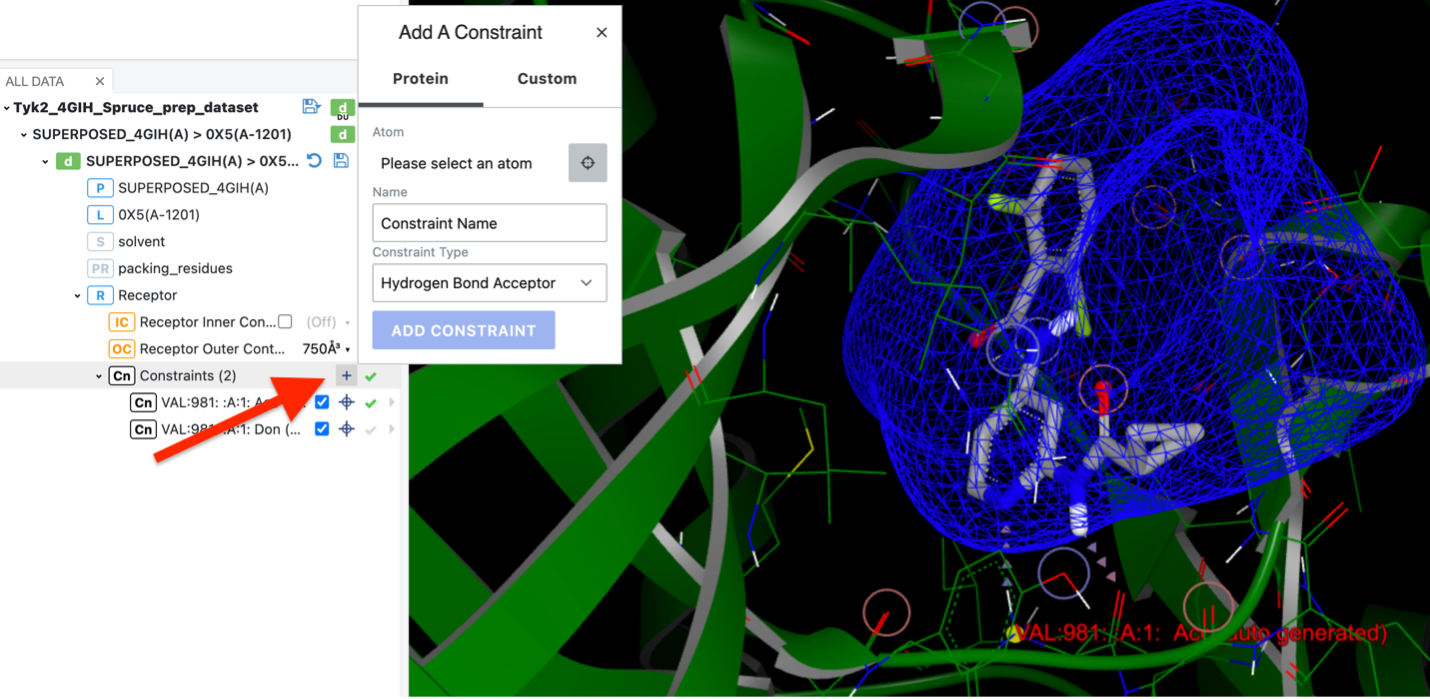
Click the upper plus sign to add a constraint.
Important
After making the necessary adjustments to the receptor constraints, you must save the dataset or record before using it.