How to Develop with the OpenEye Java Toolkit in Eclipse
Eclipse is a Java IDE available from eclipse.org.
Creating a New Project
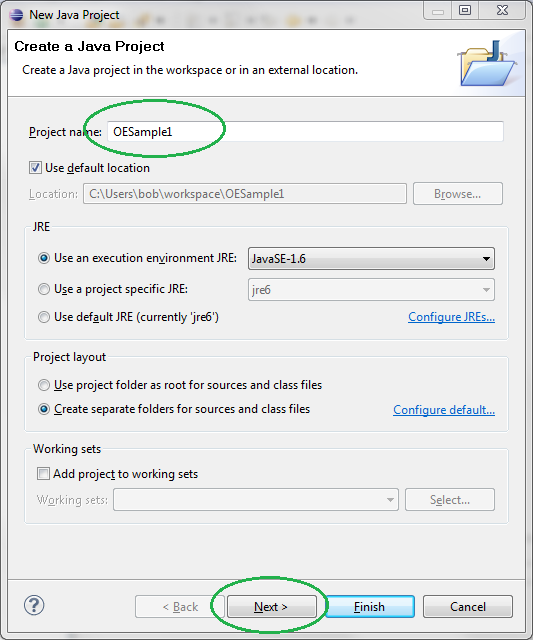
To create a new project, we choose from the File menu, File->New->Java Project. This will bring up a dialog like New Eclipse Project 1. Type in a name for this project, like “OESample1”, and then press the “Next” button.
New Eclipse Project 1
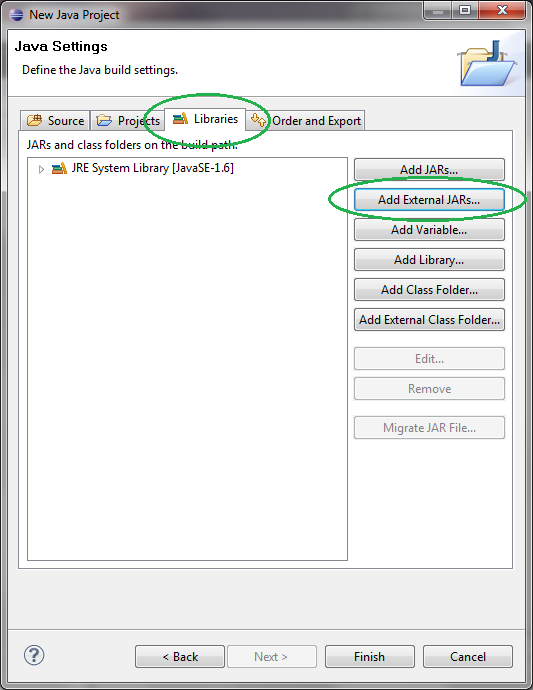
Next, we need to add the OpenEye JAR to our project. Click the “Libraries” tab at the top of the dialog, then choose “Add External JARs…”. Browse to the location where you expanded the distribution you downloaded above and pick the appropriate “oejava-*-jar” for your platform. See New Eclipse Project 2.
New Eclipse Project 2
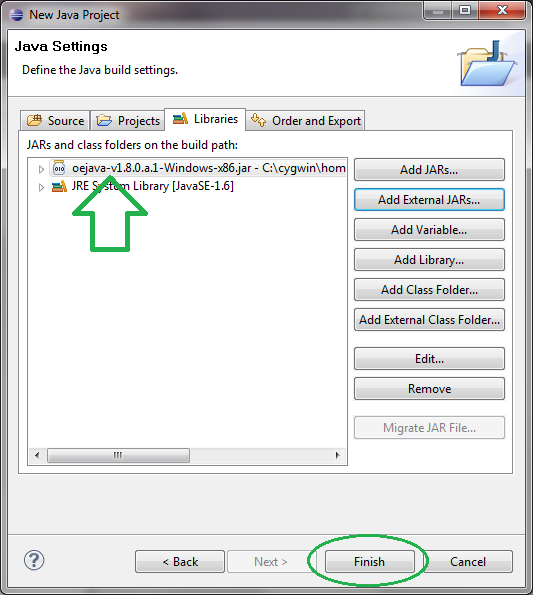
You should then see something like: New Eclipse Project 3. Click the “Finish” button.
New Eclipse Project 3
Adding a Class to Our Project
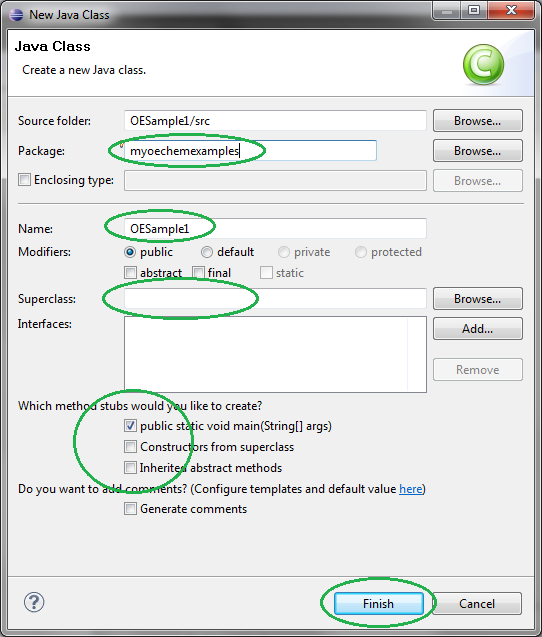
Next we need to add a Java class to hold our sample code. Click File->New->Class to bring up the “New Class” dialog as in Eclipse New Class.
Eclipse New Class
There are several things we want to do on this dialog.
Choose a package name for this class. For example, “myoechemexamples”.
Choose a name for the class: “OESample1”.
Remove the default “Superclass” entry, since it is not required.
Check the box to add a “main” to our class. And uncheck the box for “Inherits abstract methods”.
Then click the “Finish” button.
This will take you back to Eclipse and open the new class in the editor, ready to add code.
Near the top of the file, add the import for oechem.
import openeye.oechem.*;
Then add our sample code inside the main method.
public static void main(String[] args) {
    OEGraphMol mol = new OEGraphMol();
    oechem.OEParseSmiles(mol, "c1ccccc1CCCBr");
    System.out.format("mol has %d atoms\n", mol.NumAtoms());
}
When you are finished, your sample should look something like Editing in Eclipse.
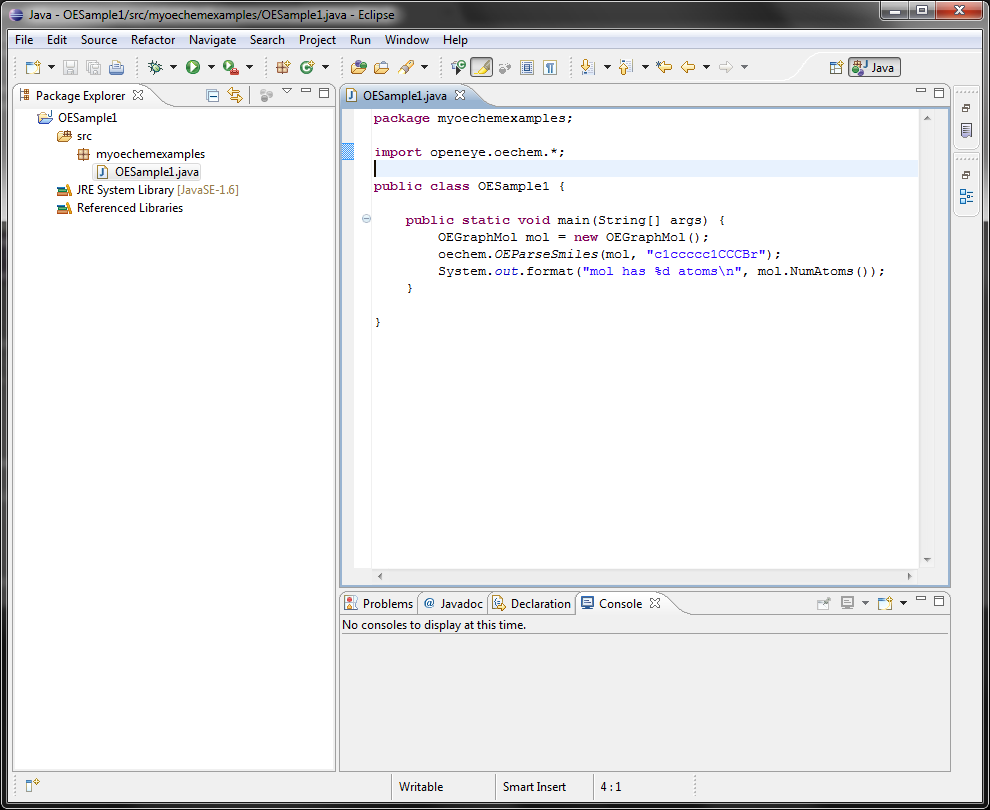
Editing in Eclipse
Running Our Example inside Eclipse
We can now test run our program in Eclipse. In the toolbar, click the “Run” button as shown in Running in Eclipse.
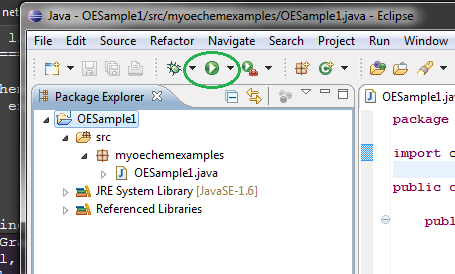
Running Our Example in Eclipse
This should produce some output in the “Console” window like Console output.
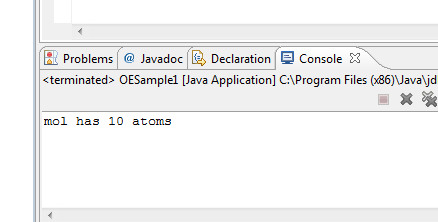
Console Output from Our Example
And now you’ve created your first OEChem Java sample. You can now add code and continue to run inside Eclipse to try out more of the OEChem API.
Creating an Executable JAR
At some point, you may want to run your example outside of Eclipse, or you may want to deploy the application to another machine. An easy tool for this purpose is an export option built into modern versions of Eclipse.
To create a standalone JAR executable, right-click on the project
and select Export....
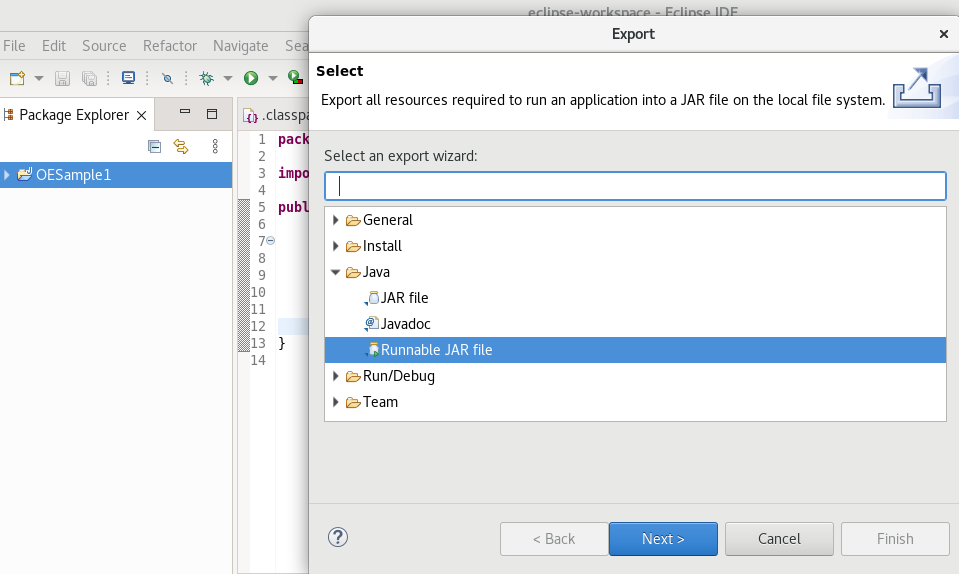
Exporting a Runnable JAR
Then in the next dialog:
Pick a name for your and destination for the new JAR
Make your choice about how libraries should be packaged.
Click “Finish”.
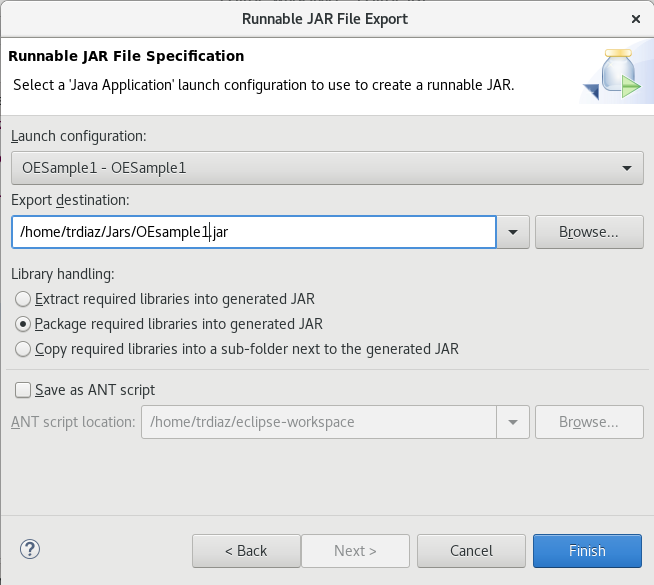
Set Options for the New JAR
You should now be able to open a terminal in the location where you saved the JAR file and run it from the command-line.
$> java -jar ./OESample1.jar
mol has 10 atoms