Gameplan Tutorial
The Gameplan Floe uses SZMAP to analyze ways to modify ligand chemistry based on water structure and energetics in the immediate environment of the ligand. By testing a limited number of coordinates based on the structure of the ligand and the binding site, the Floe quickly generates:
A description of how compatible the ligand is with the binding site.
A series of hypotheses for ligand variants, and stabilizing or destabilizing waters.
Floes used in the Tutorials
The floe used in this tutorial is documented here: GamePlan - Ligand Design with Water Analysis using SZMAP.
Prepare Protein and Bound Ligand from PDB Codes
The input to Gameplan is a prepared protein-ligand system in the form of a design units. Design units can be generated using the Spruce Floe(s). The steps are are detailed in a separate tutorial here: Spruce Floe(s) tutorial.
Run the Gameplan Floe
To run the Gameplan Floe, in the Floe tab on Orion
Select “OpenEye Classic Floes” in the dropdown list.
Type “Gameplan” in the search box.
Click “Gameplan” to open the Job Form.
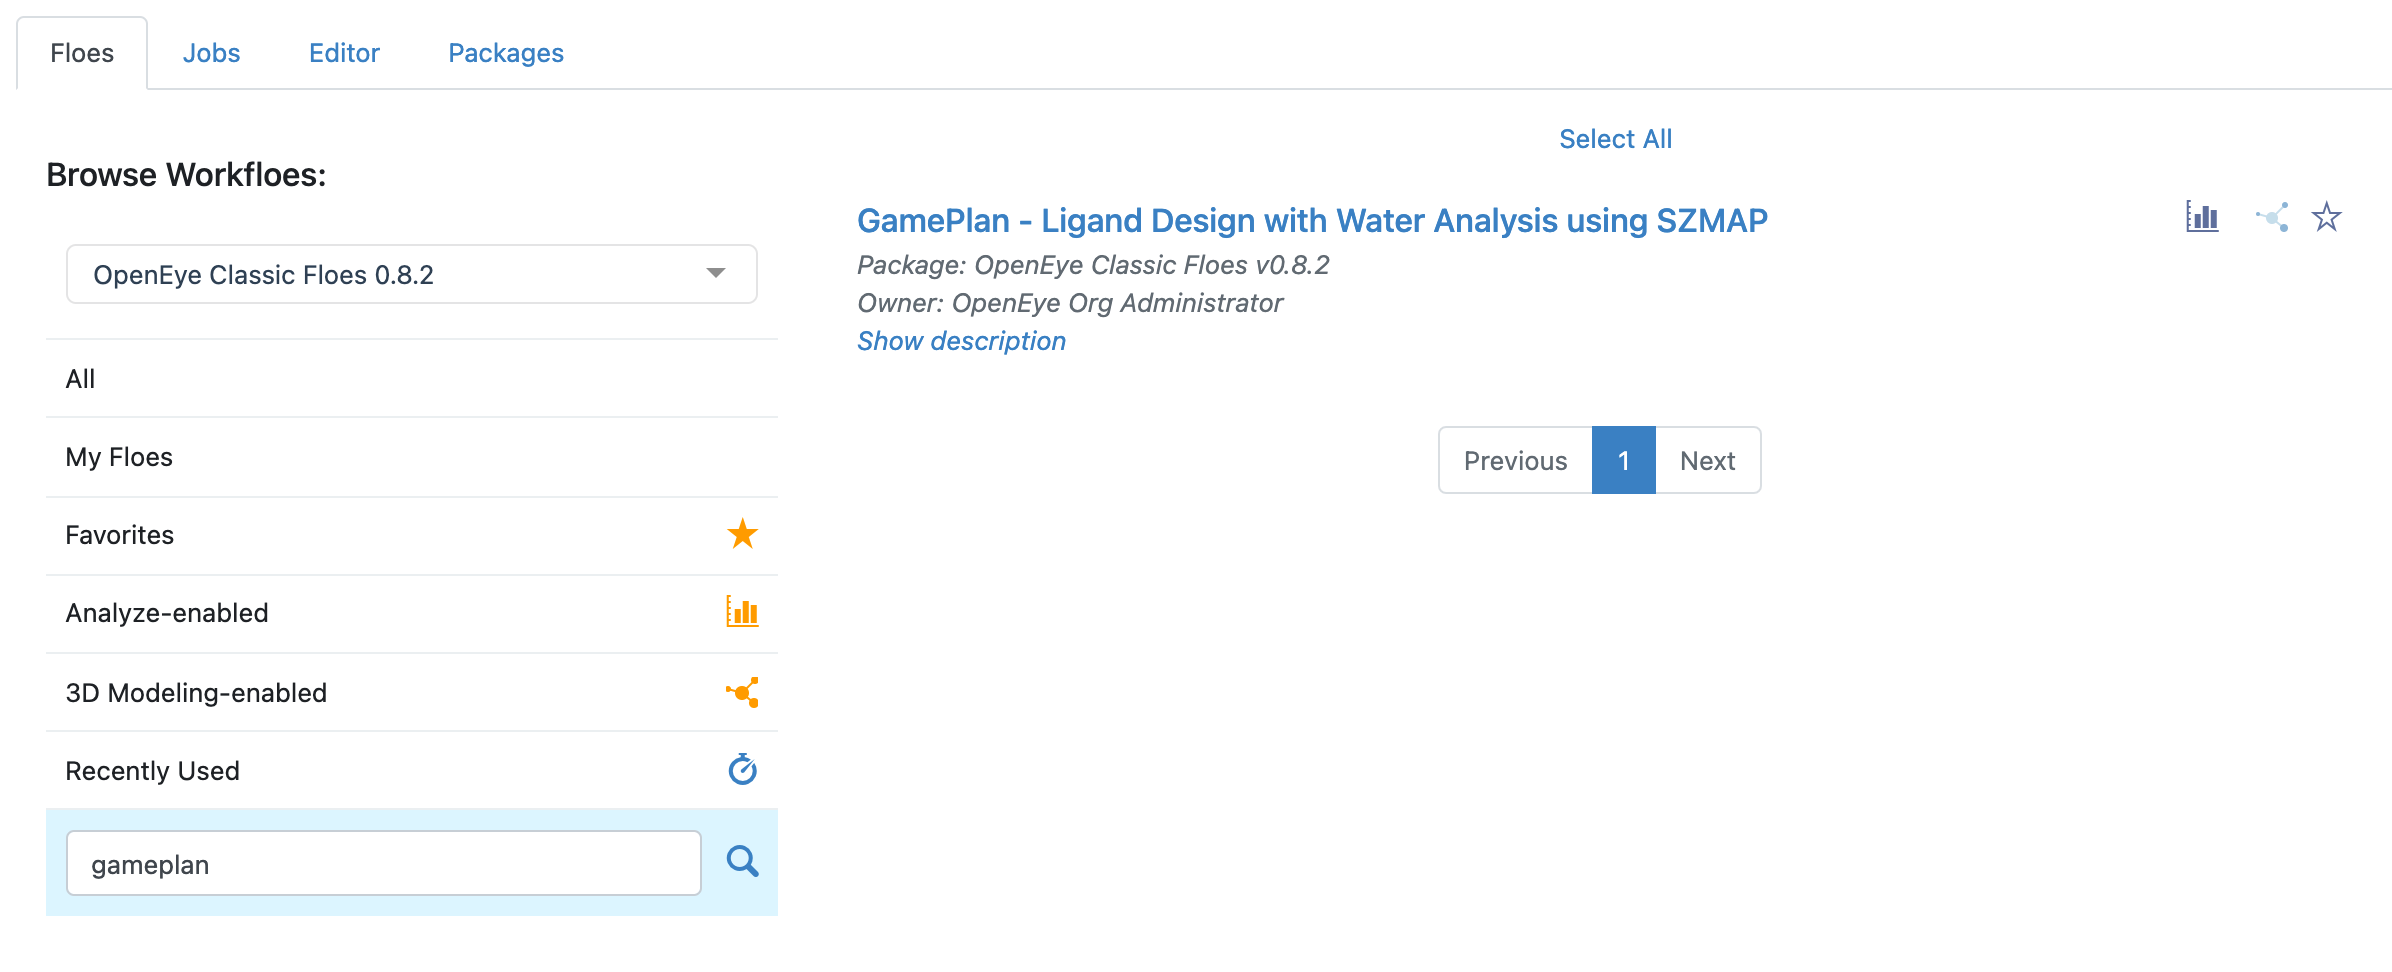
Run the Gameplan Floe
There are two required inputs: protein and ligands. Click “Choose input…” and select Spruce_prep_dataset_5K4J as input for both the protein and ligands.
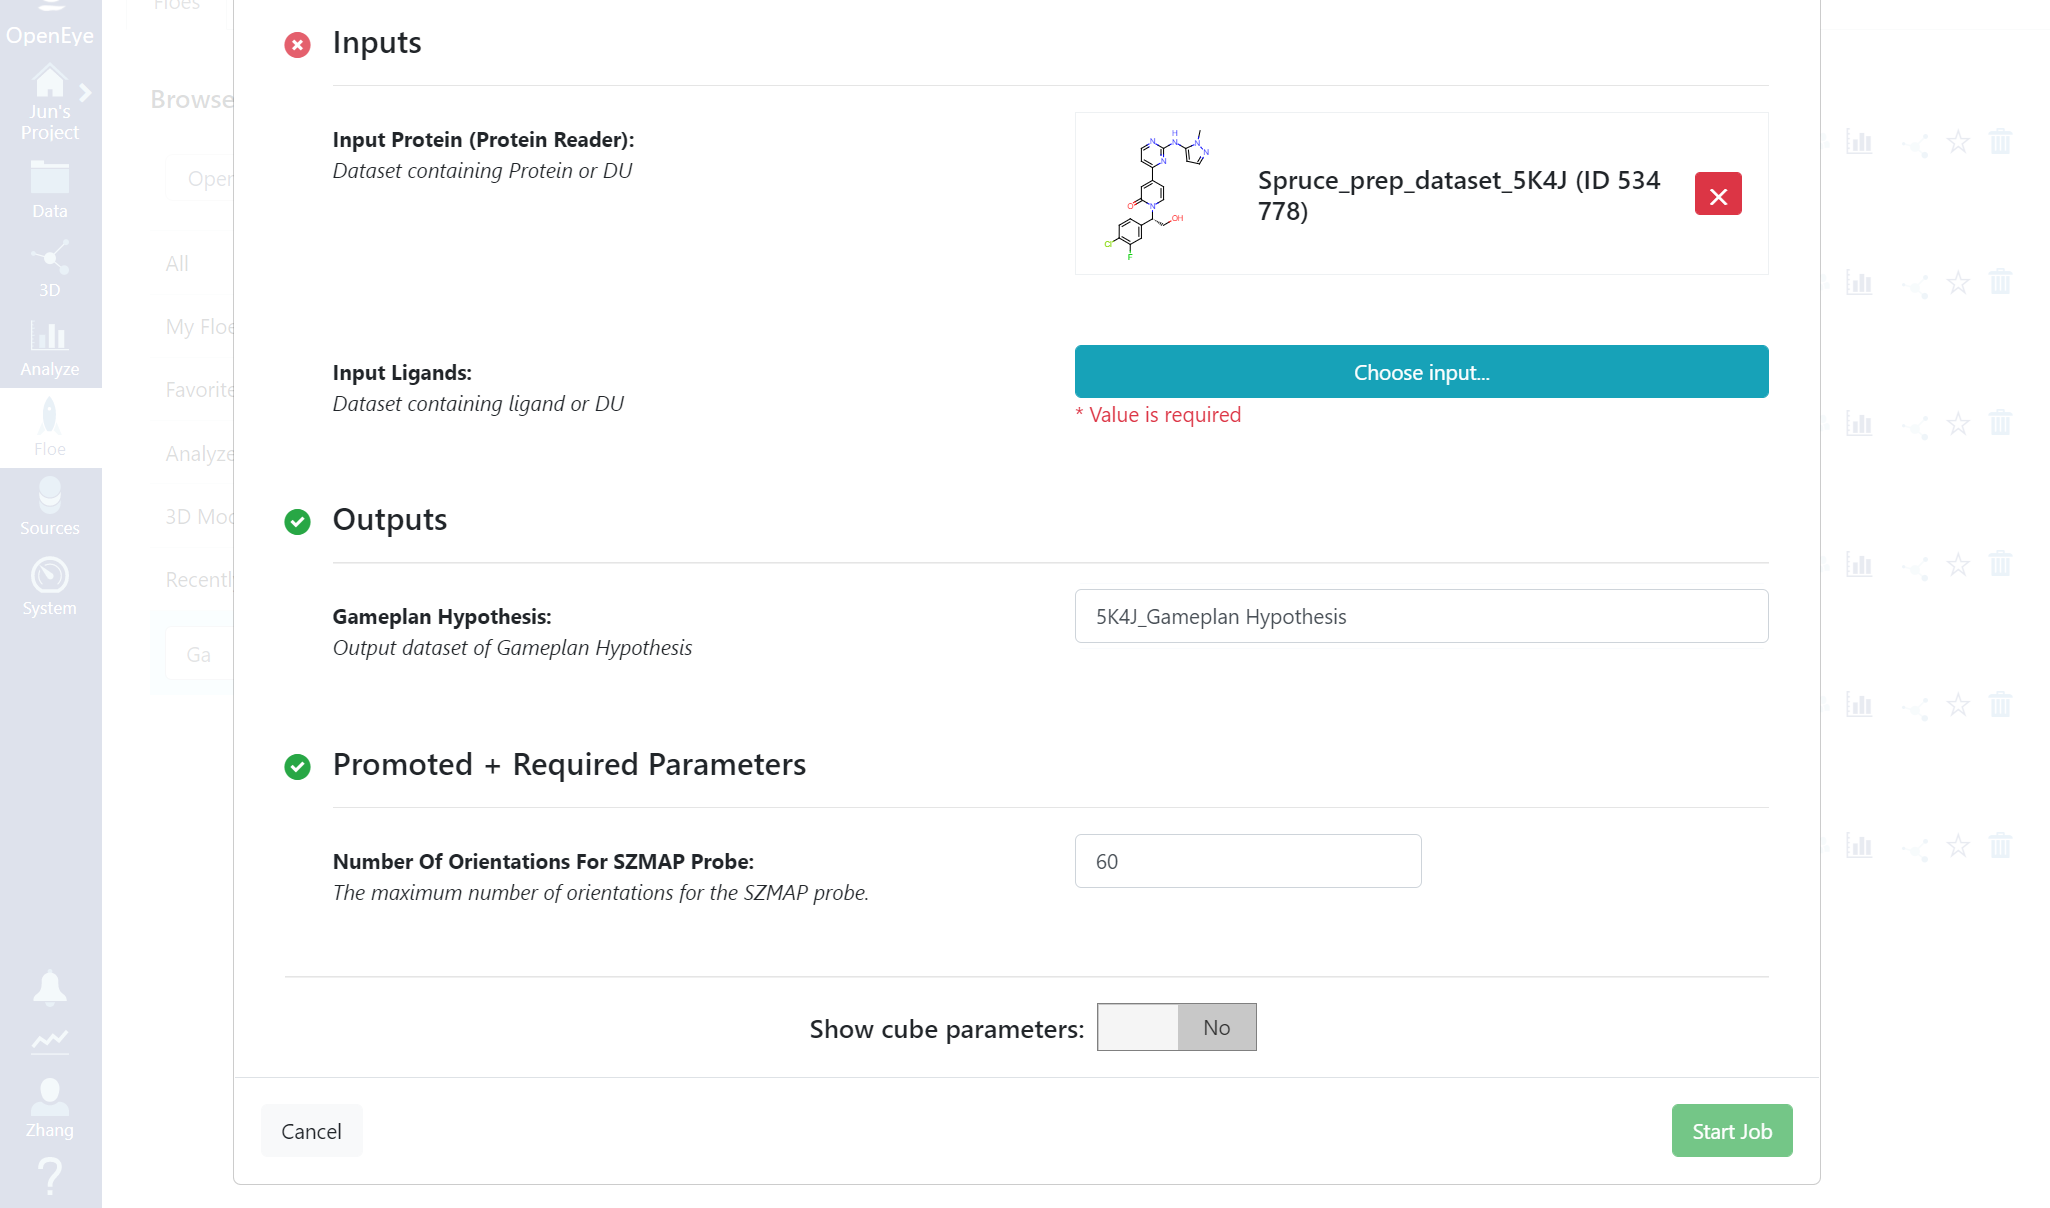
Select Inputs for the Gameplan Floe
By default, the Gameplan Floe hypotheses respect the hybridization of aromatic atoms in the input ligand. Specifying the switch “Sample Sp3 Hybridization” will permit the Floe to explore the effect of a change of hybridization of aromatic atoms. Note that only the local hybridization at the attachment site is altered, often leading to odd-looking geometry. But the point is to generate fresh ideas for how you might modify your ligand. To turn this option on,
Turn “Show cube parameters” on
Select “Gameplan” Cube
Turn “Sample Sp3 Hybridization” on. And then click “Start Job” to run the Floe.
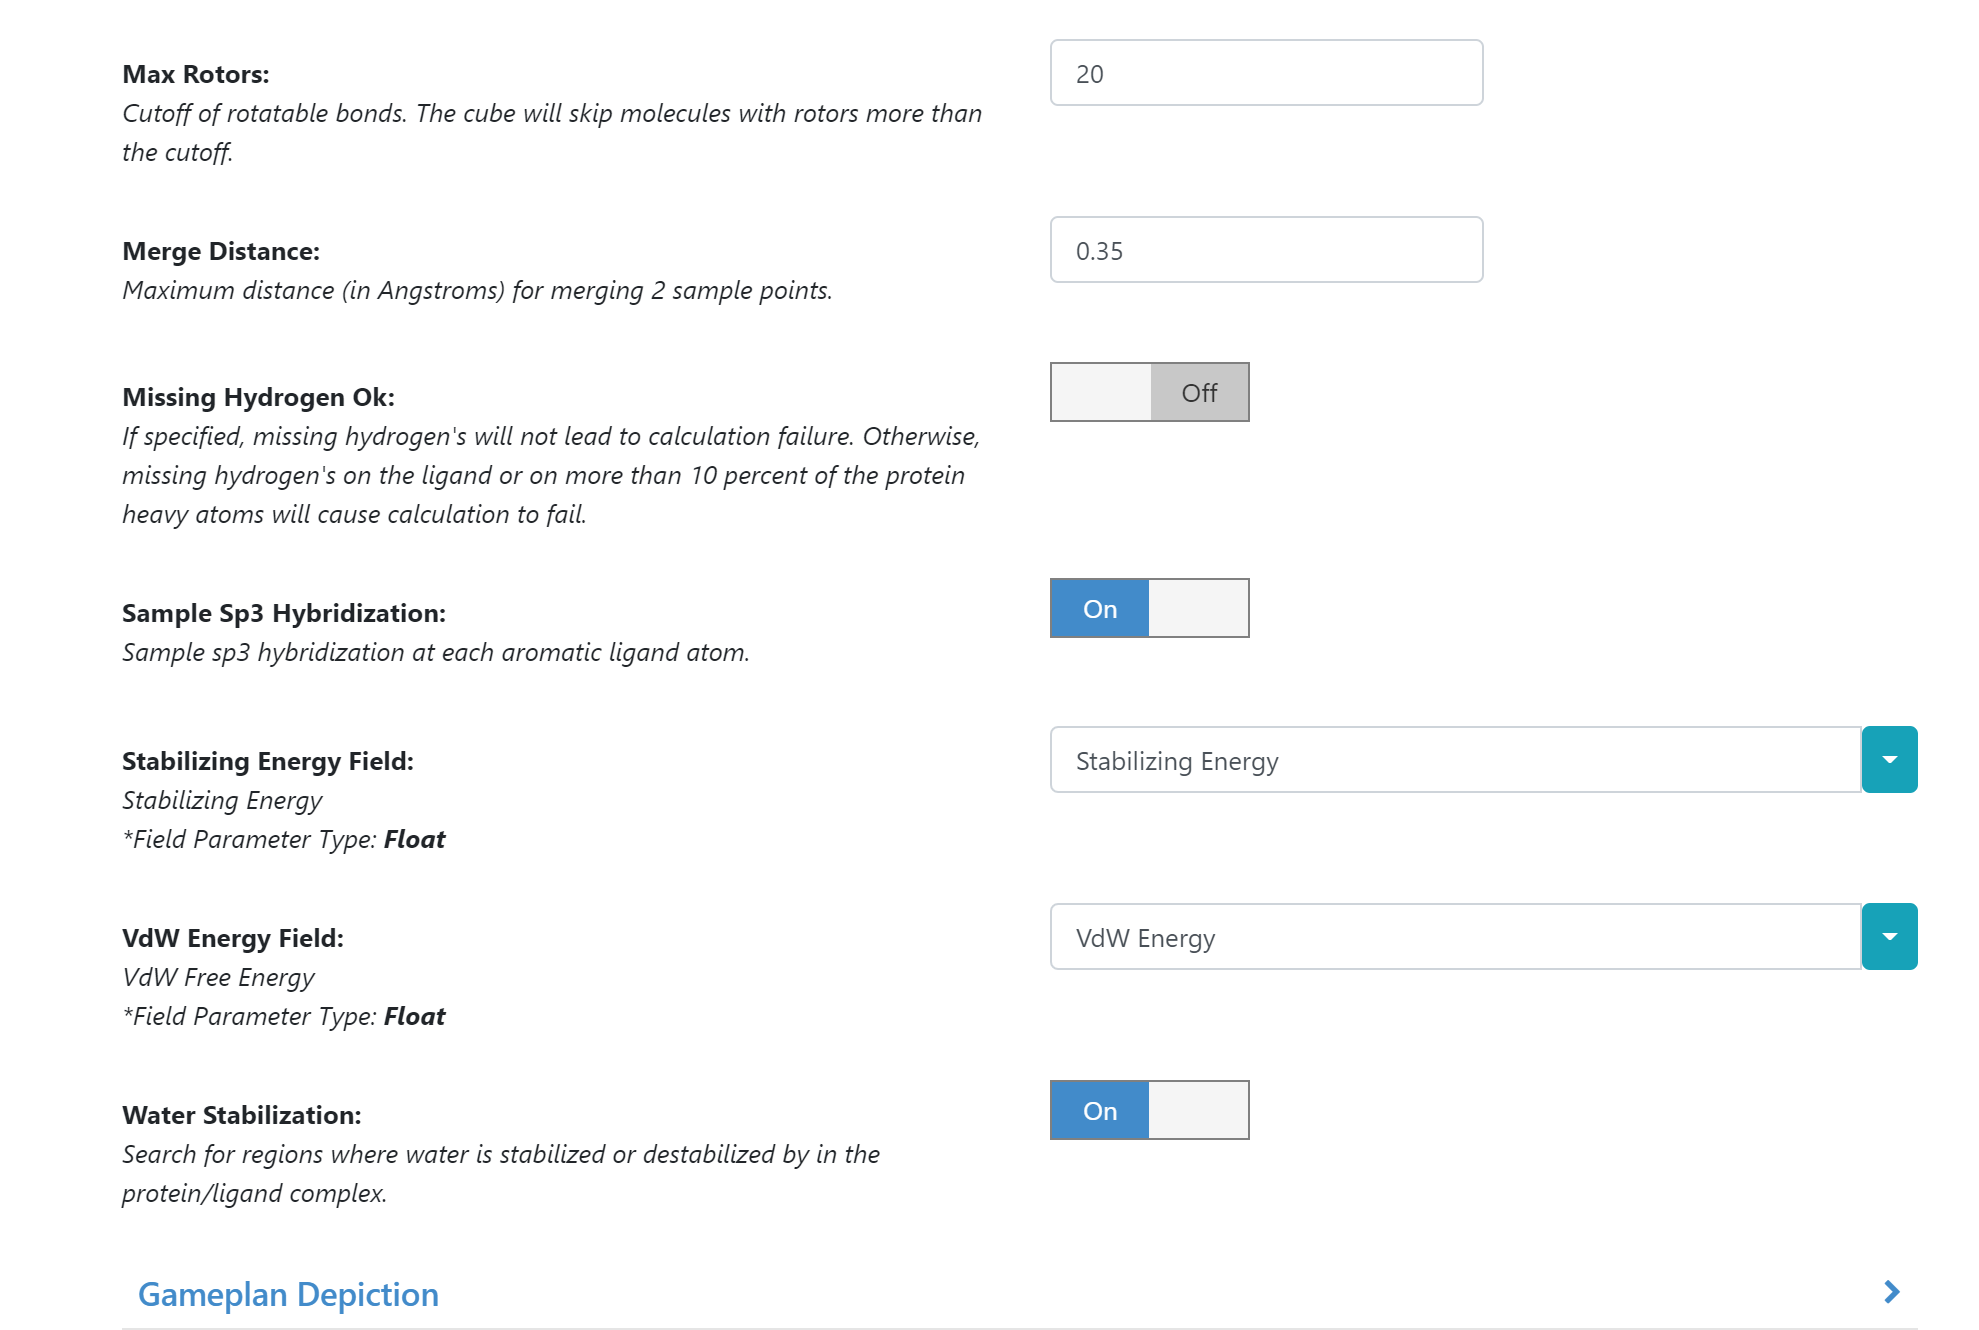
Turn “Sample Sp3 Hybridization” On
Gameplan Results
Once the Gameplan Floe job finishes, click the “Show in Project Data” in the job status page.
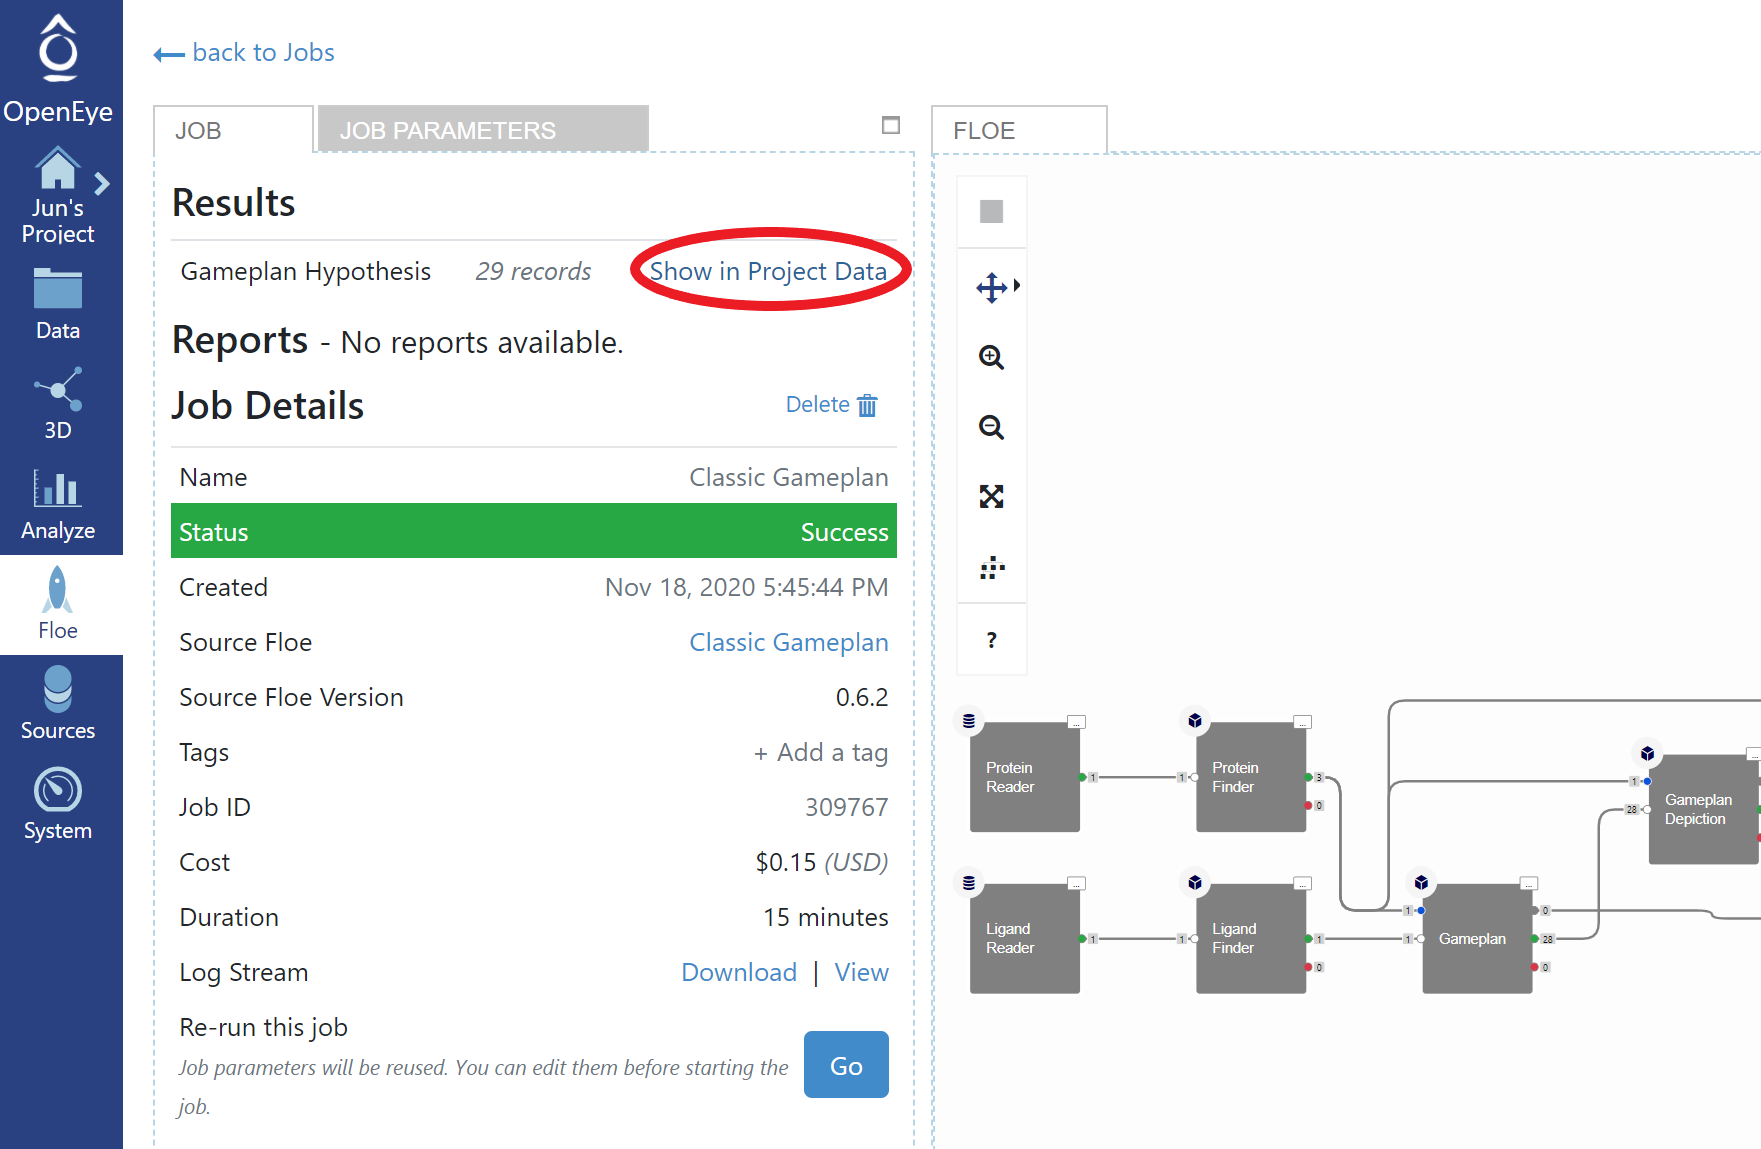
Open Project Data
And then click “Add to active data” to add the Gameplan hypothesis dataset.

Add Gameplan Hypothesis to Active Data
Click the “3D Modeling” button. This will open the 3D Viewer pre-populated with the Gameplan hypothesis results.
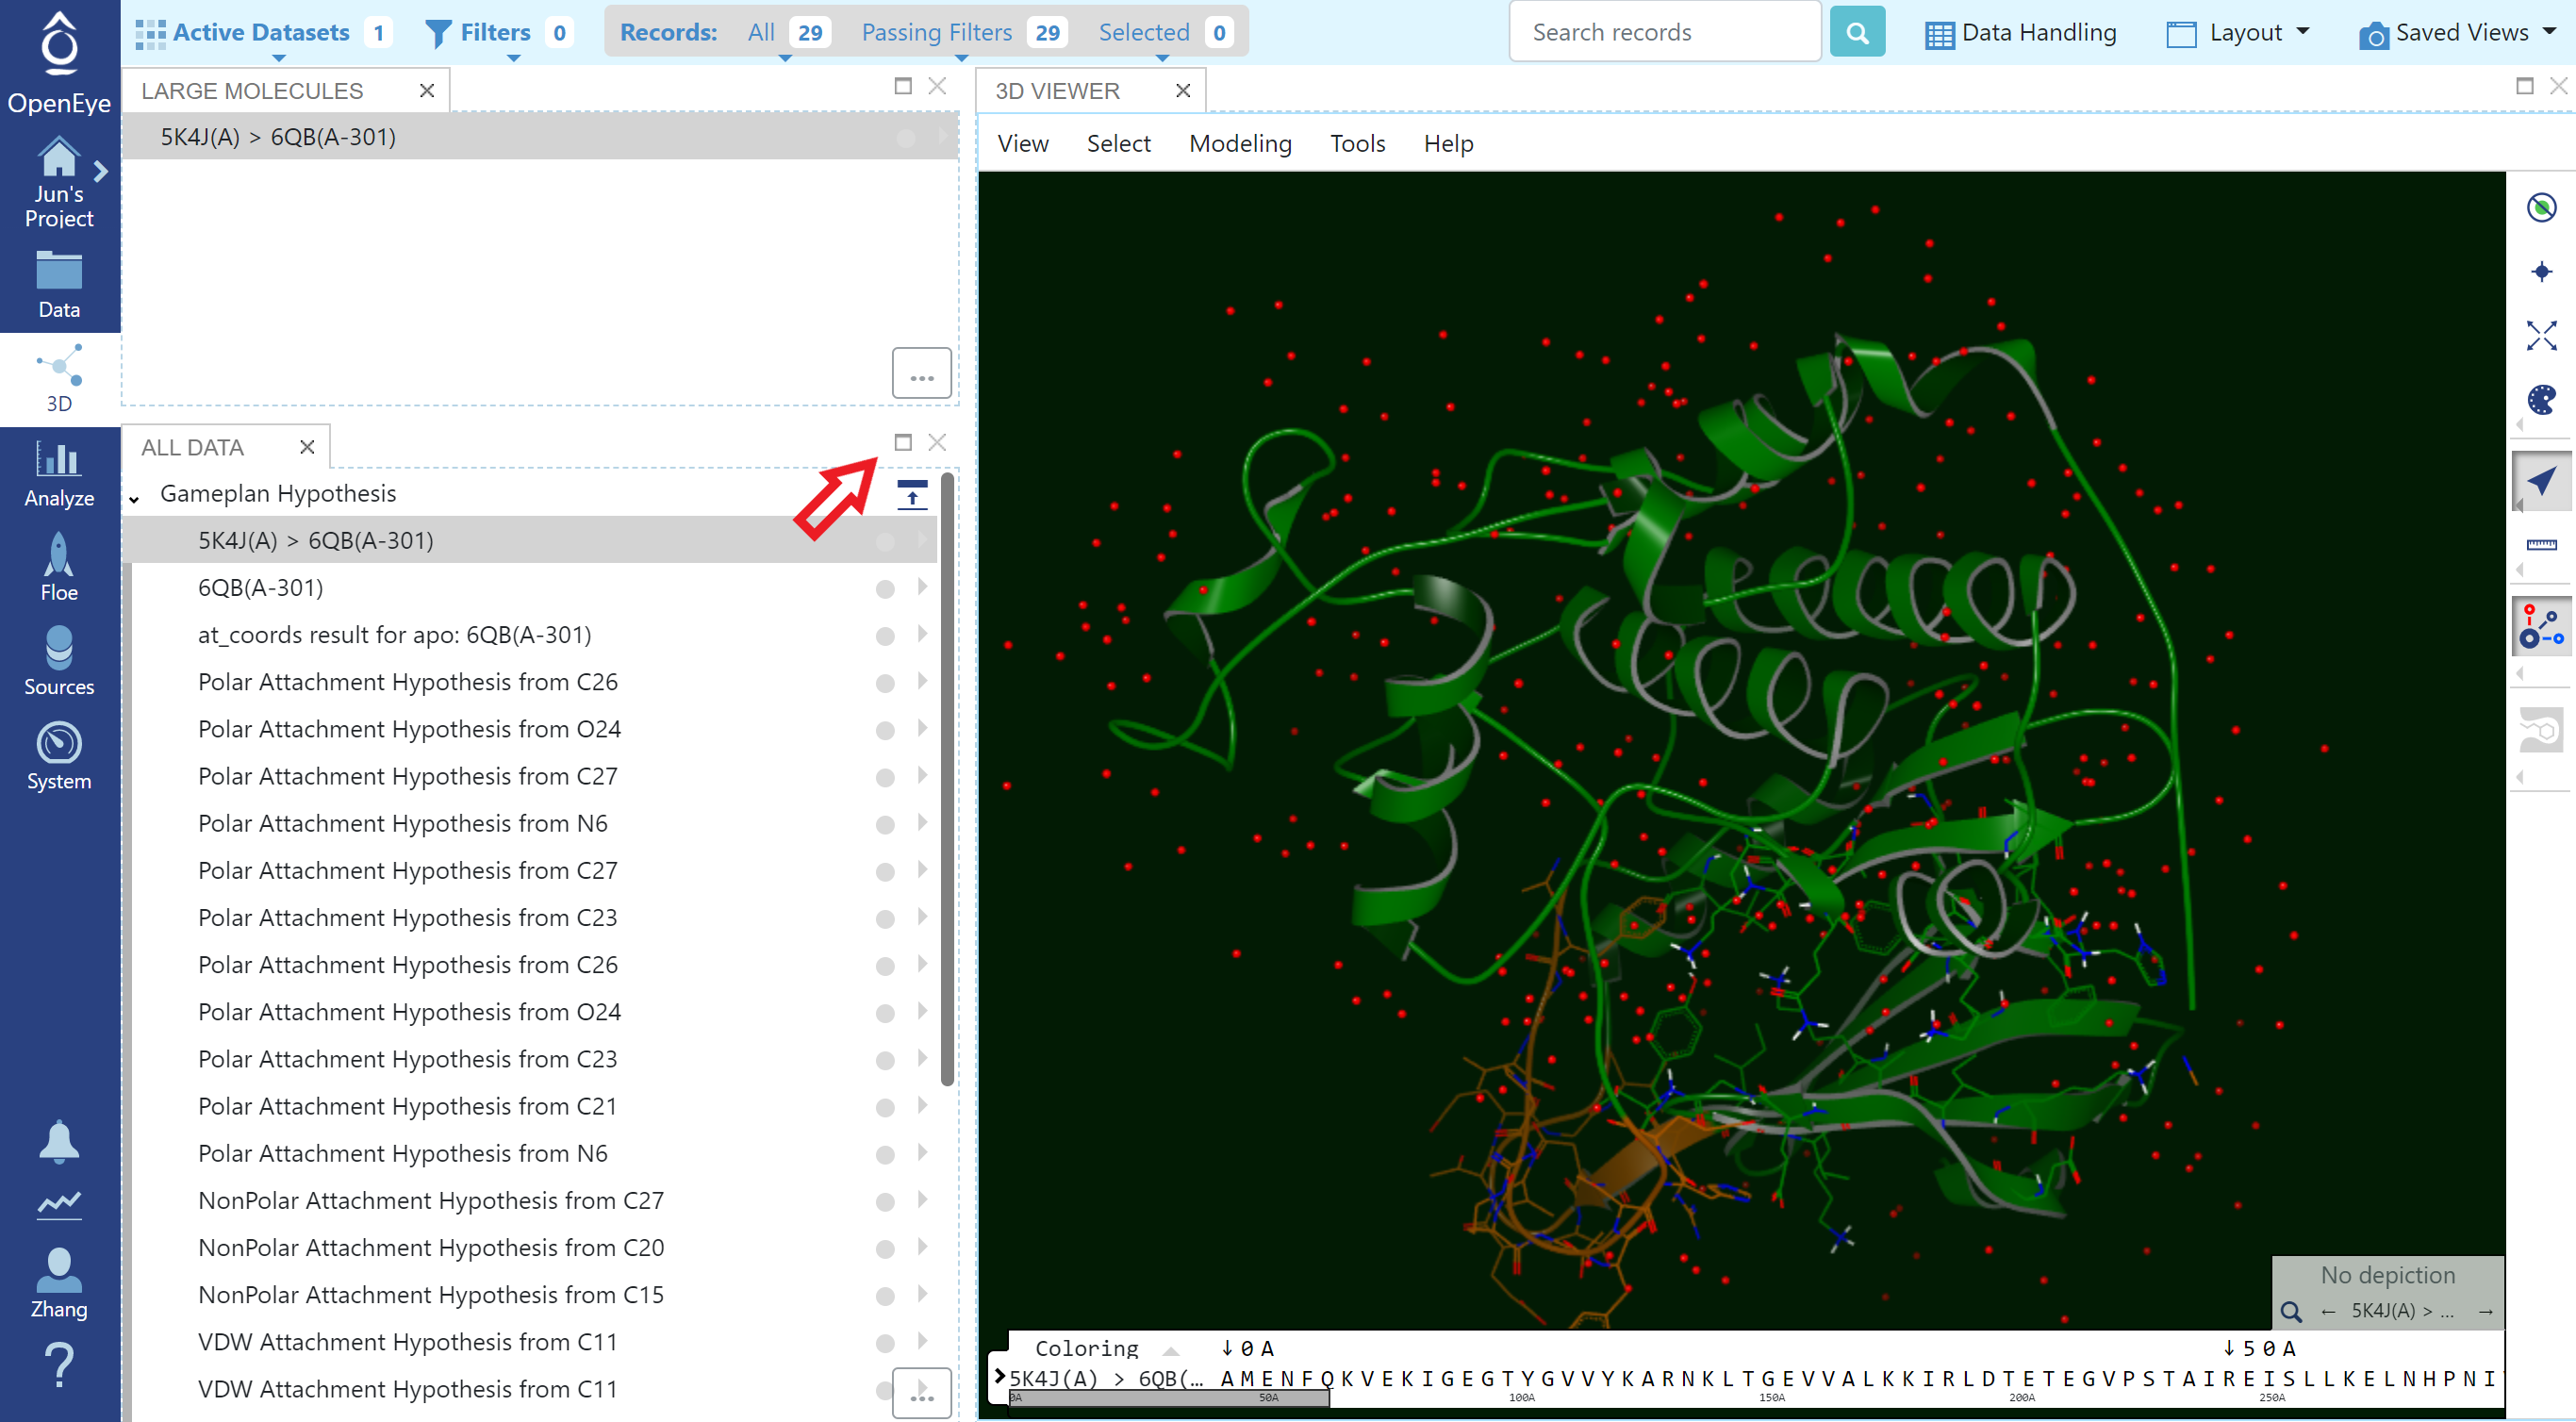
Gameplan Results in 3D Modeling Page
Gameplan results are organized into three main sections (click “maximize” to show full list):
An analysis of how well the ligand compares to the solvent in the binding site with colored annotation around atoms that indicates the type of site (Figure Ligand Compared to apo Binding Site). The protein is also included here for context.
A series of hypotheses for substituents that could be added to the ligand. Each attachment is modeled using dummy atoms with annotation that indicates the type of site: polar, nonpolar and van der Waals (see Figures Hypothesis for a Polar Substituent and Hypothesis for a Nonpolar/VDW Substituent).
A (possibly empty) section showing stabilizing and destabilizing water sites (Figure Stabilizing Site and Figure Destablizing Site).
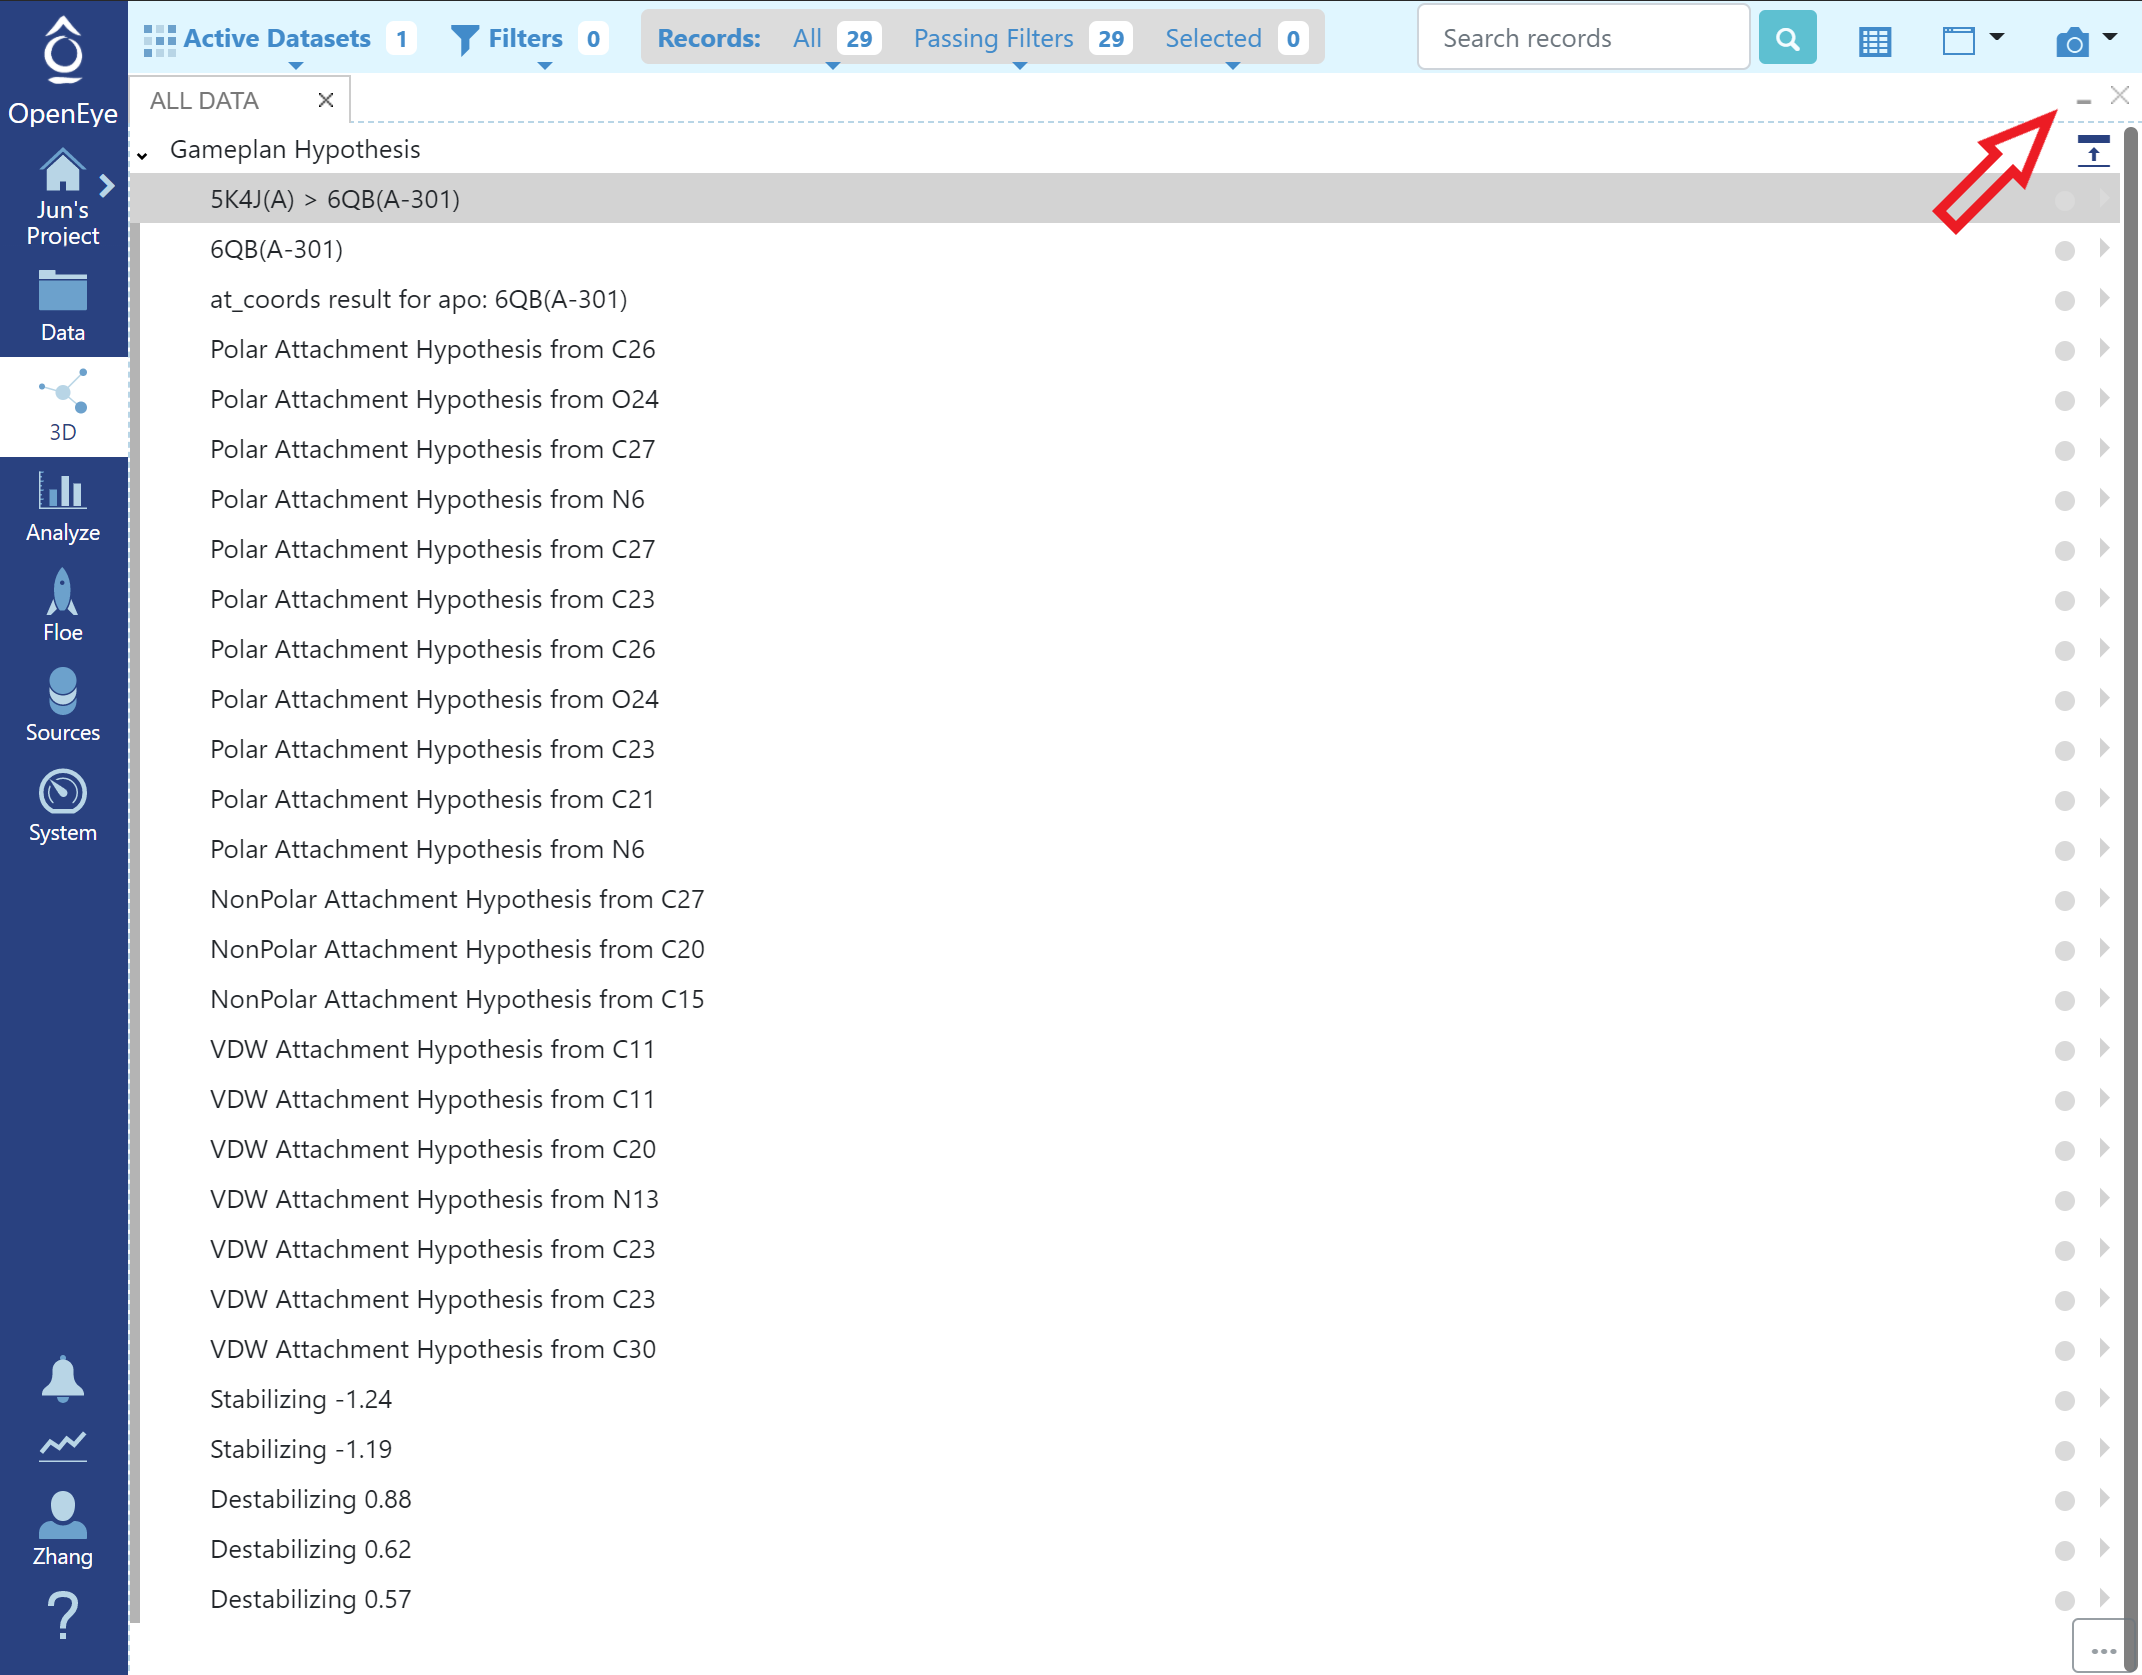
Full List of Gameplean Hypothesis
Click “restore” to show other tabs in the 3D Viewer Page and click the grey circle in the list to turn on/off a specific hypothesis in the 3D viewer.
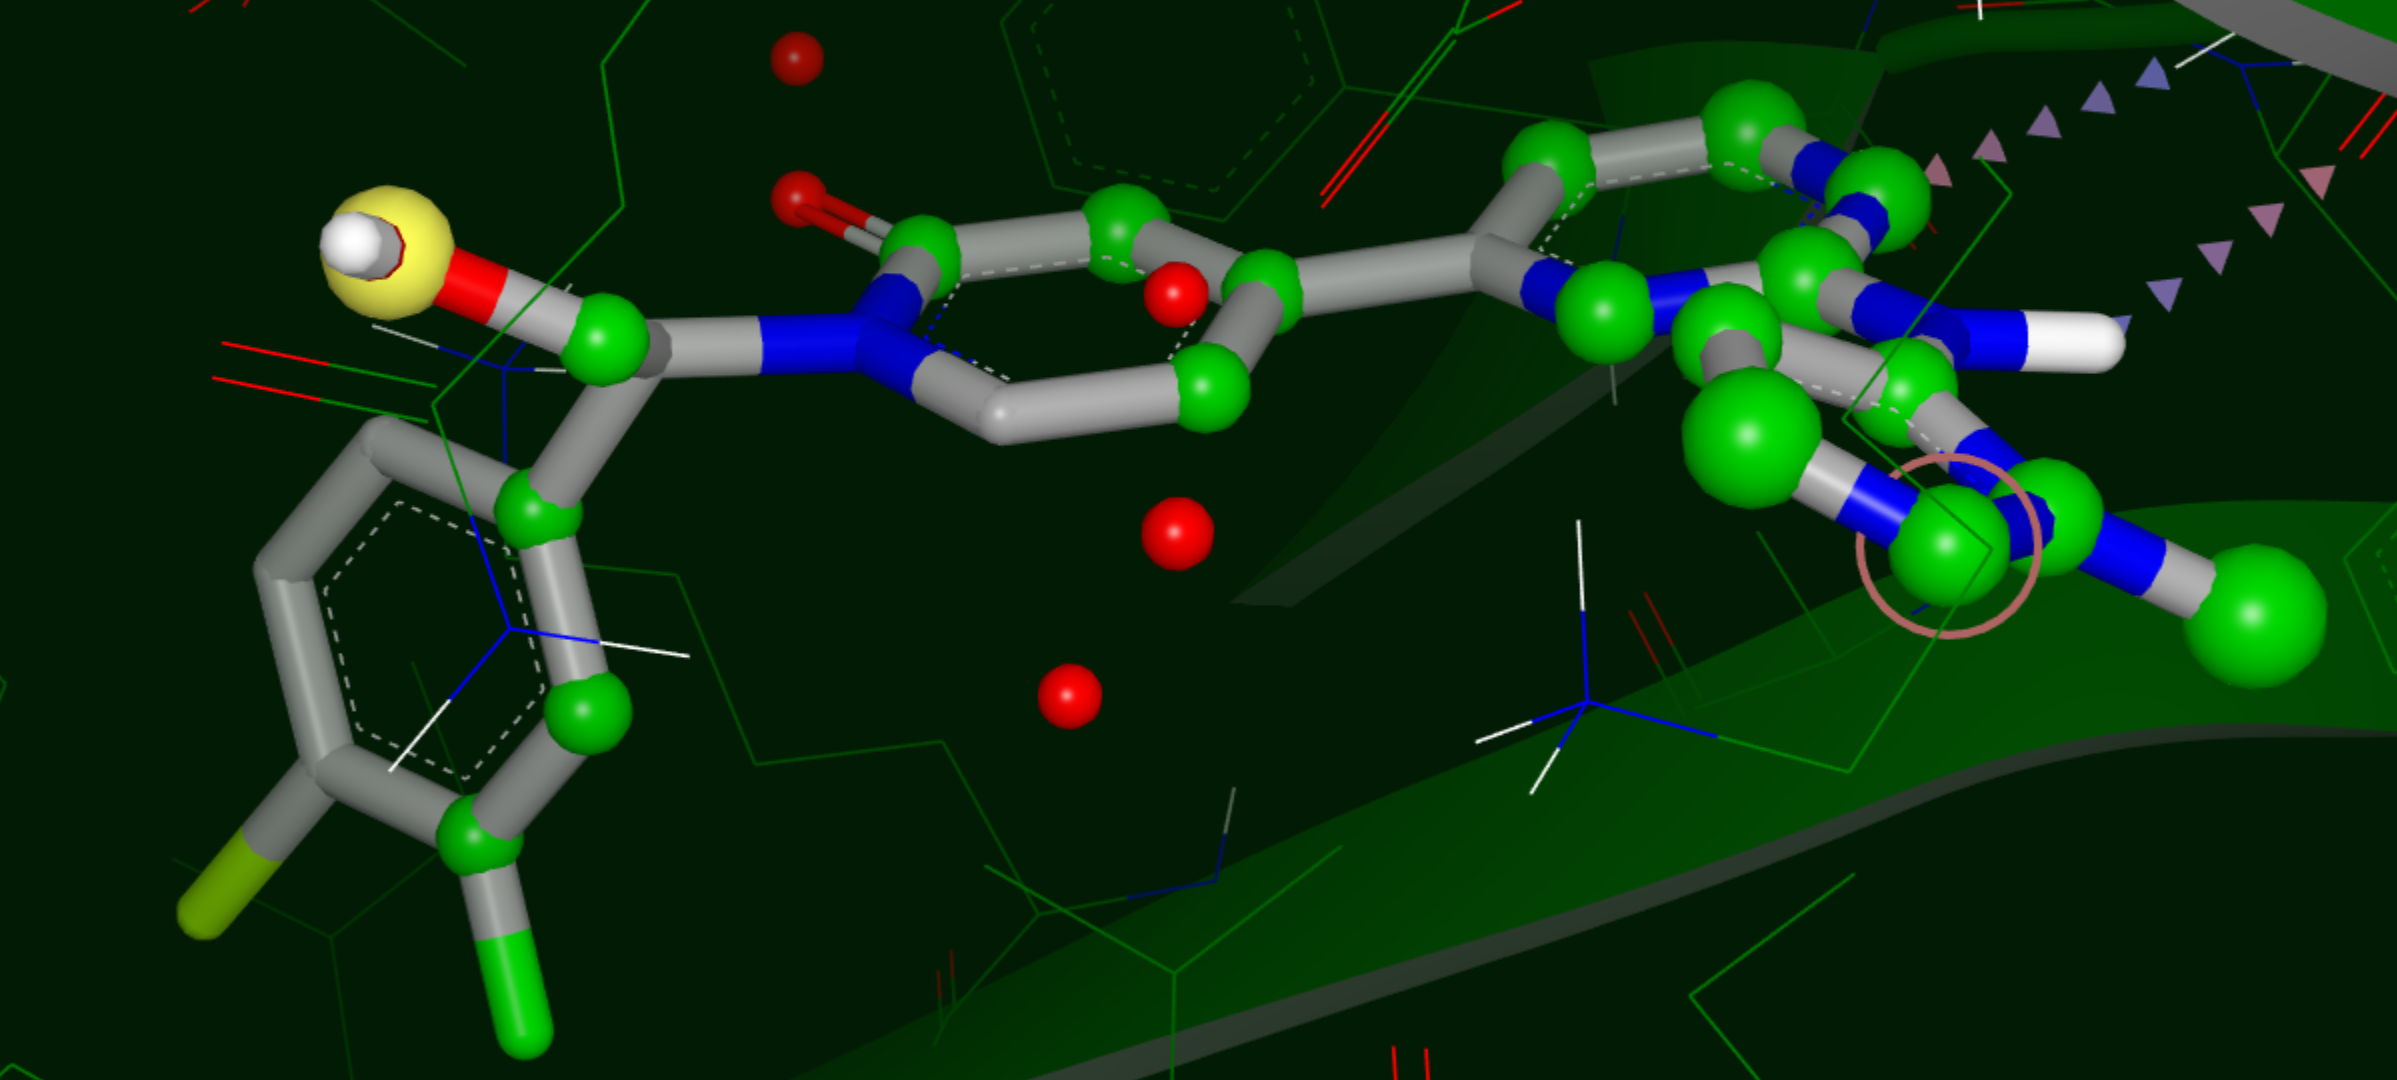
Ligand Compared to apo Binding Site
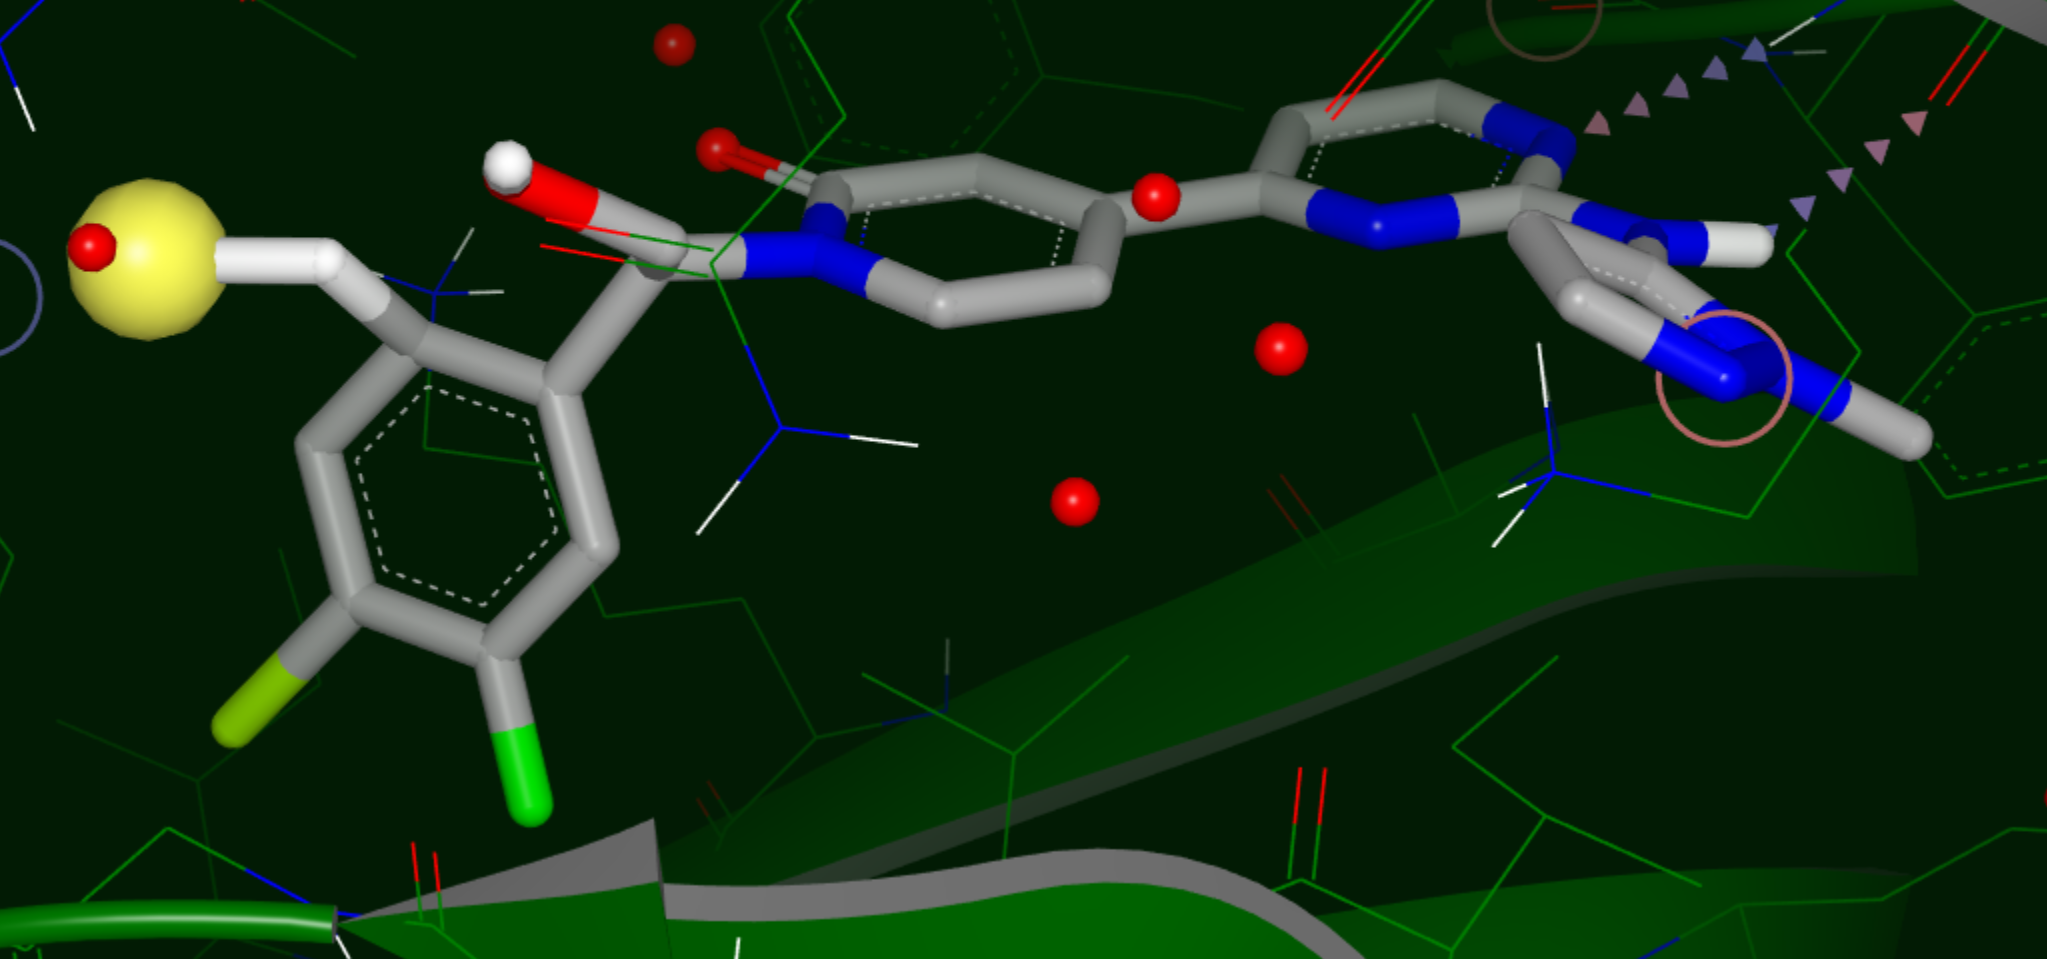
Hypothesis for a Polar Substituent
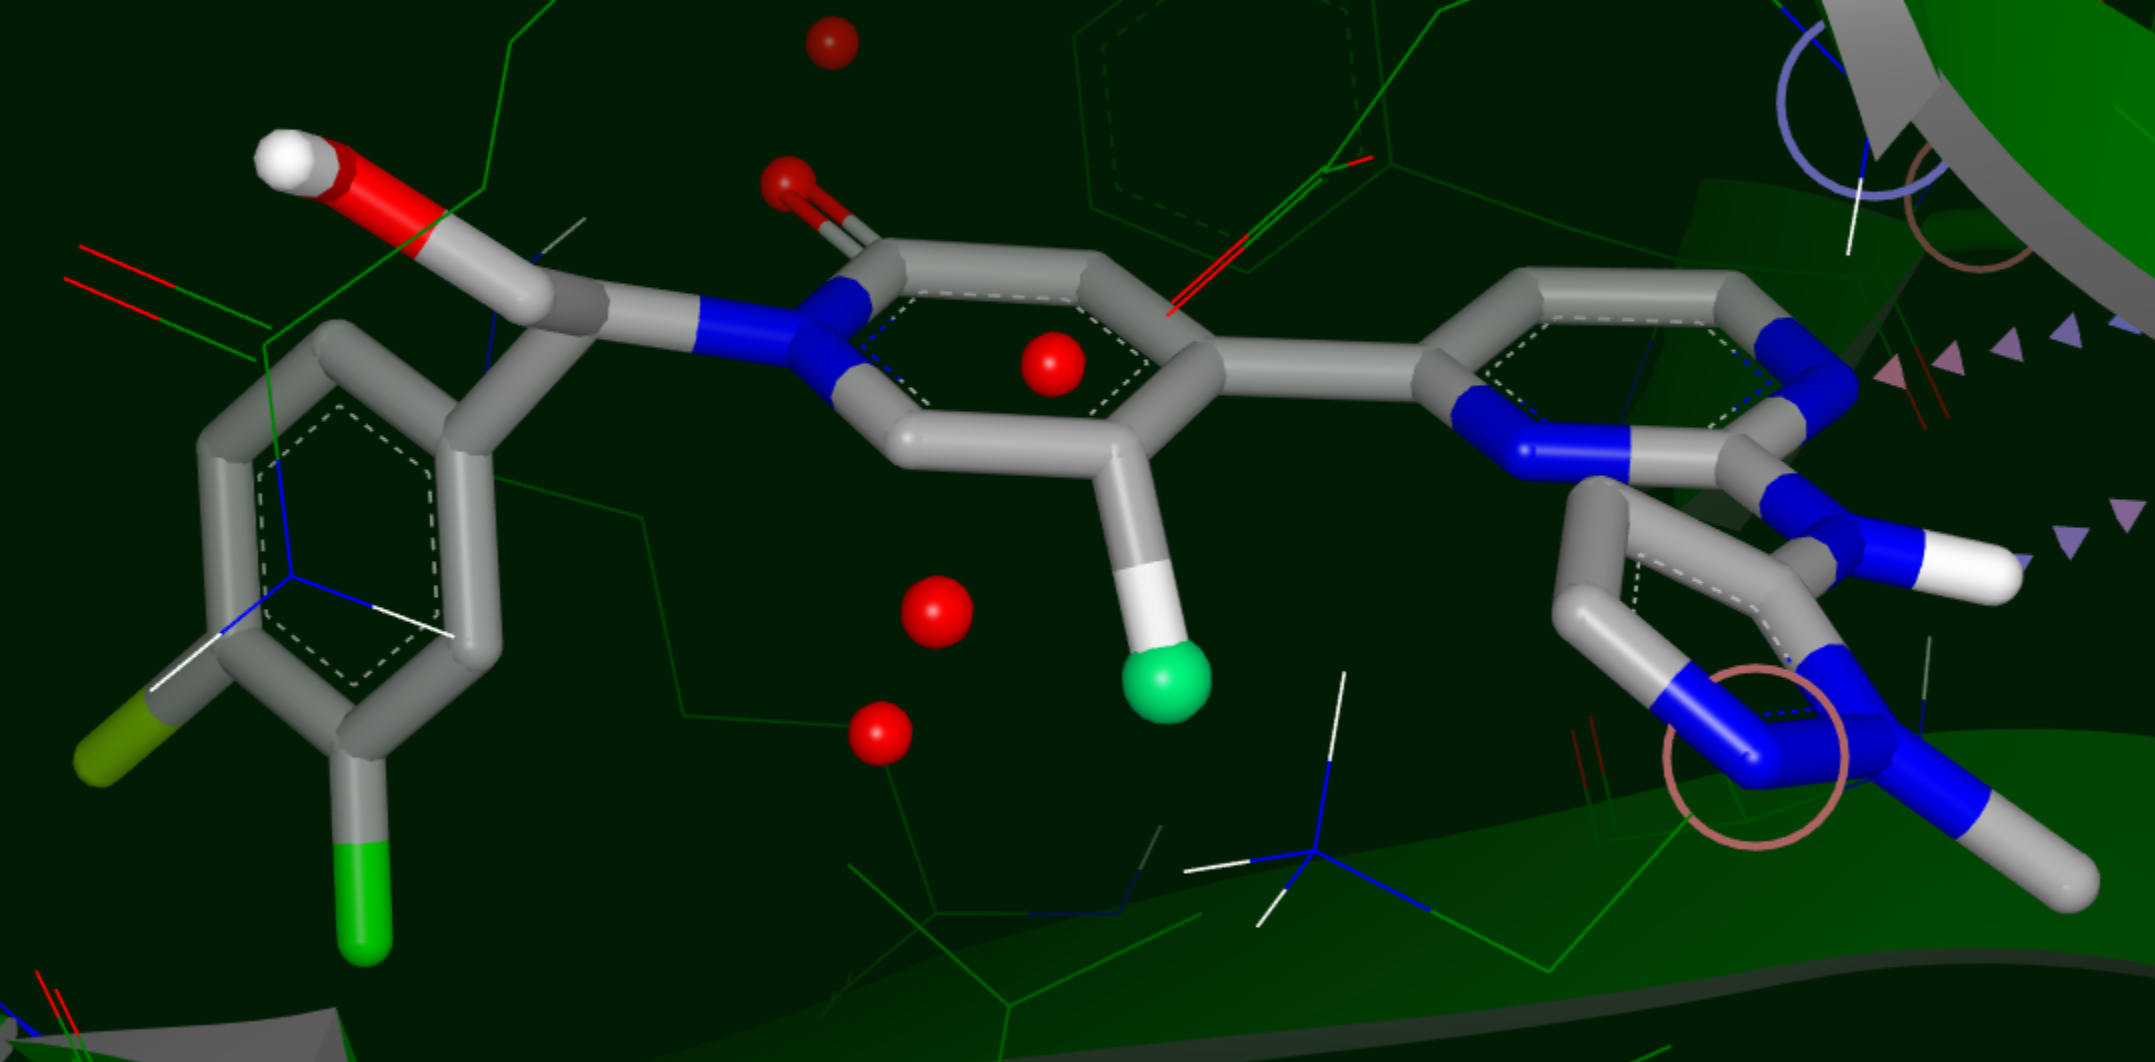
Hypothesis for a Nonpolar Substituent
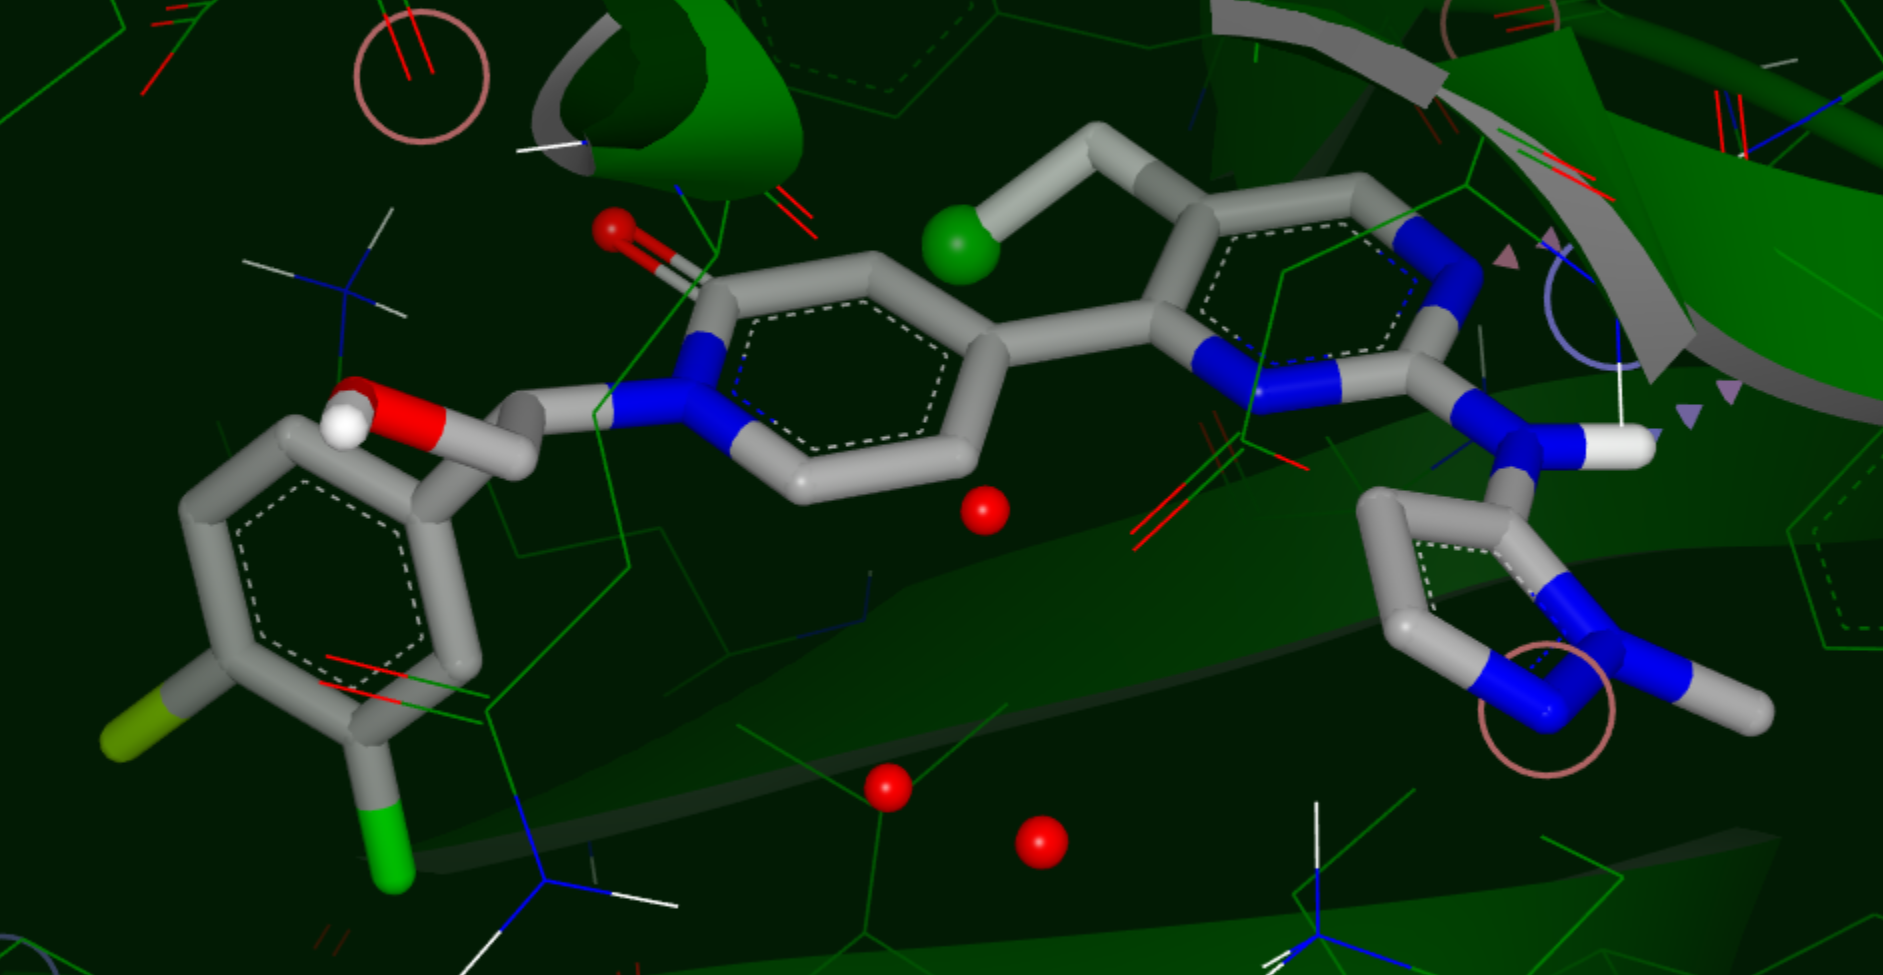
Hypothesis for a VDW Substituent
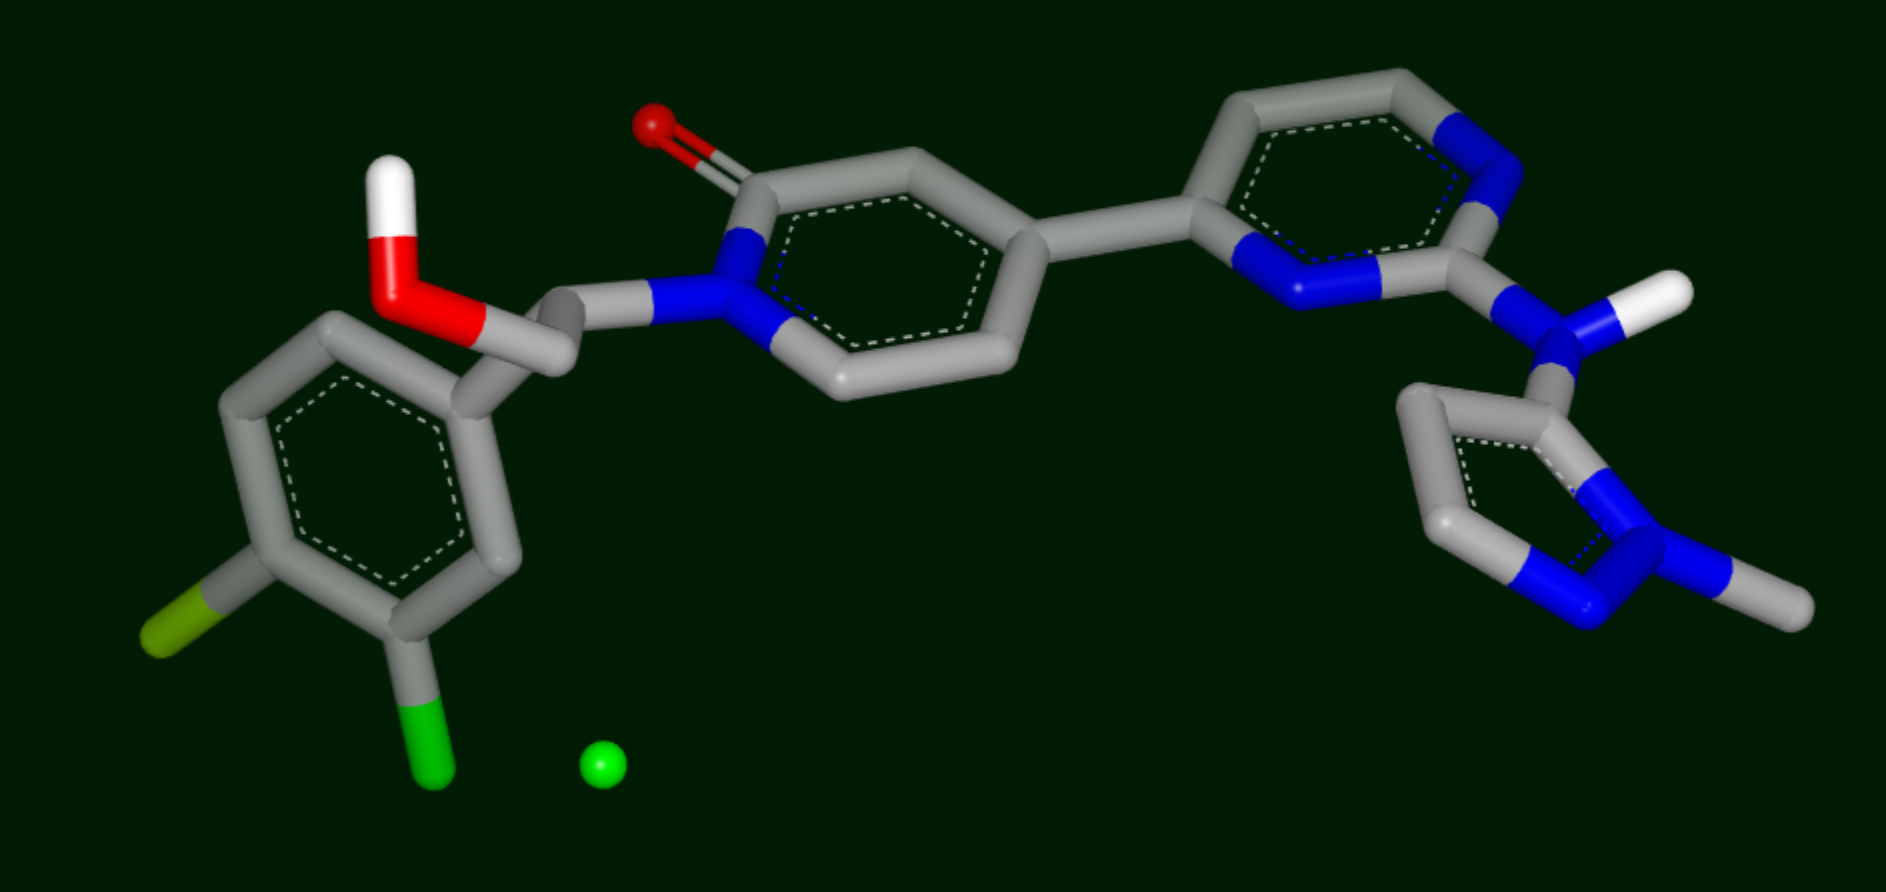
Stabilizing Site
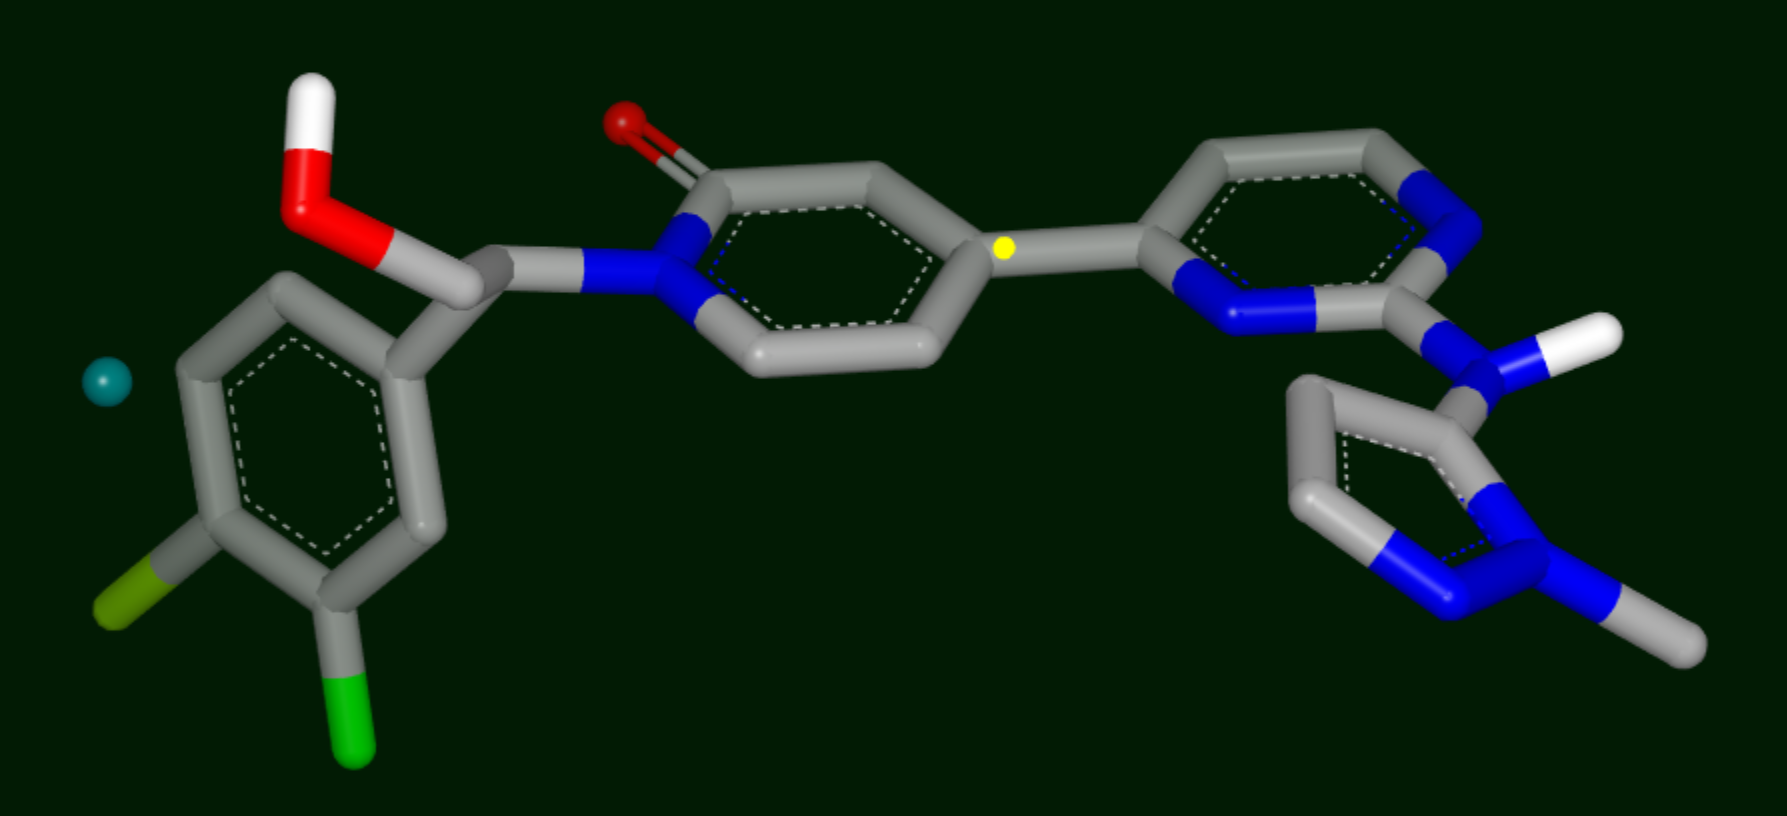
Destabilizing Site
Annotations are:
Yellow sphere: polar site; the size of the sphere indicates the magnitude of the polar interaction.
Green sphere: van der Waals site; the size of the sphere indicates the magnitude of the VDW interaction.
Bluish Green sphere: non-polar site.
Purple top: mismatch site, where the ligand polarity does not match that of the solvent.
Small green and blue spheres: stabilizing and destabilizing points, respectively.
Click the Analyze button, energies of the Gameplan Hypotheses are shown in the spreadsheet.
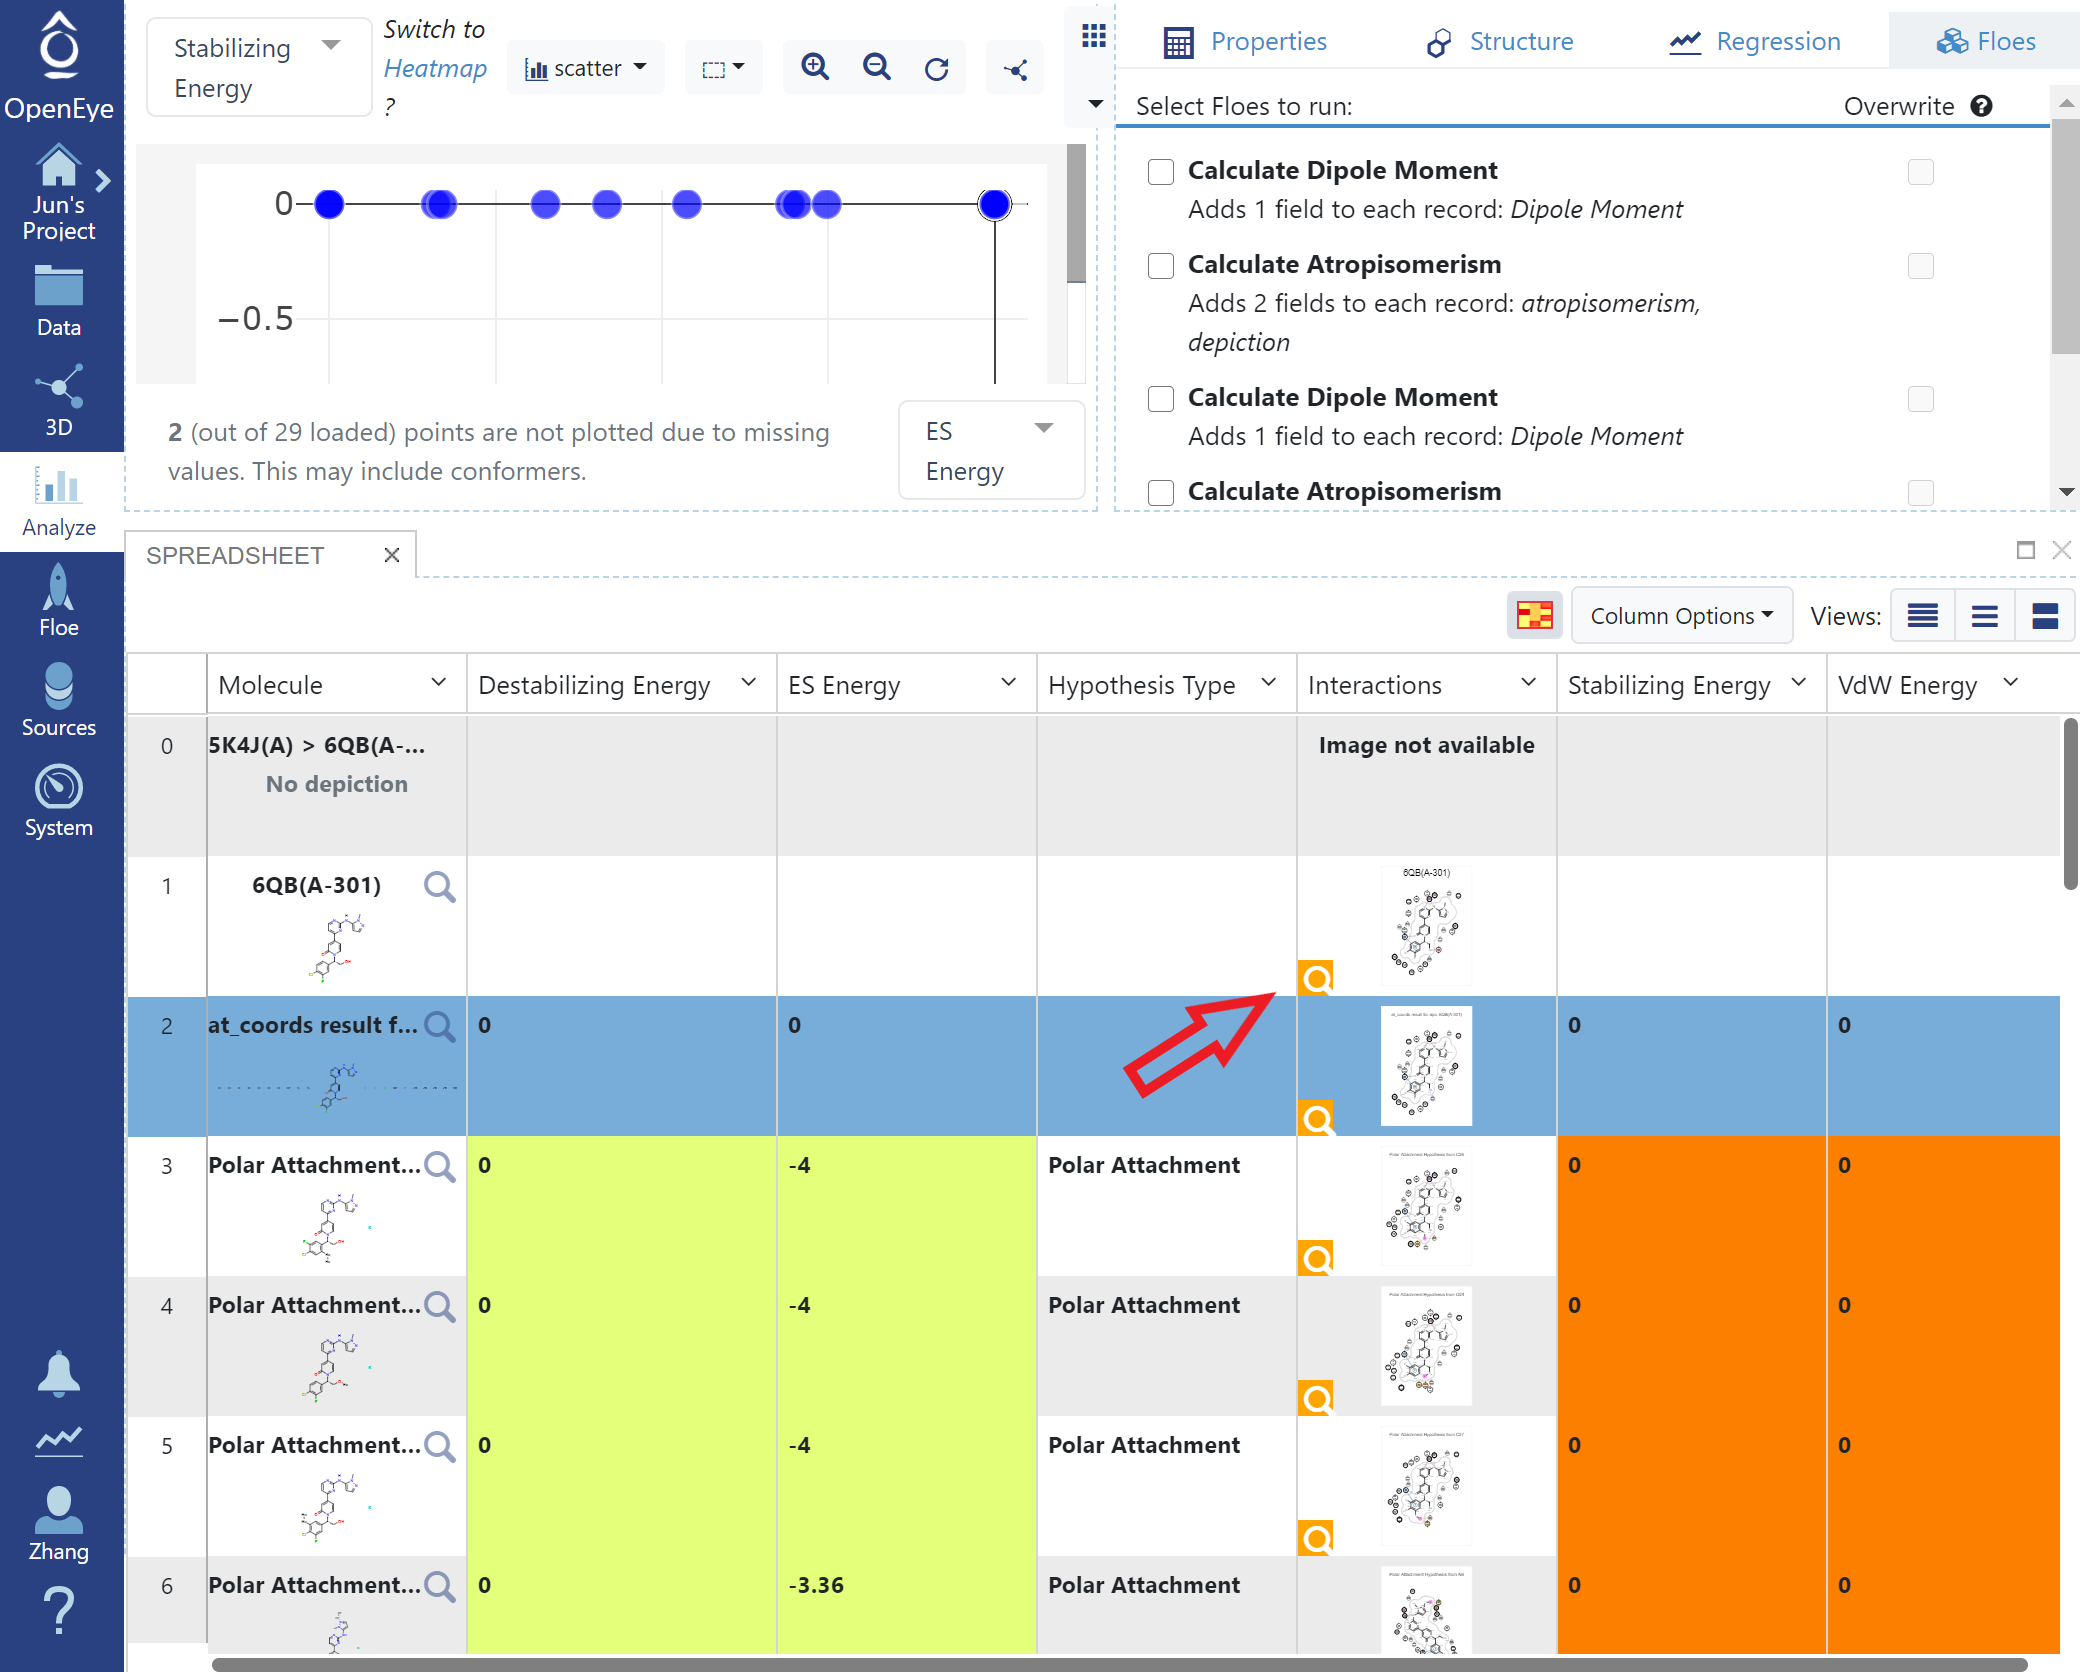
Gameplan Results in Analyze Page
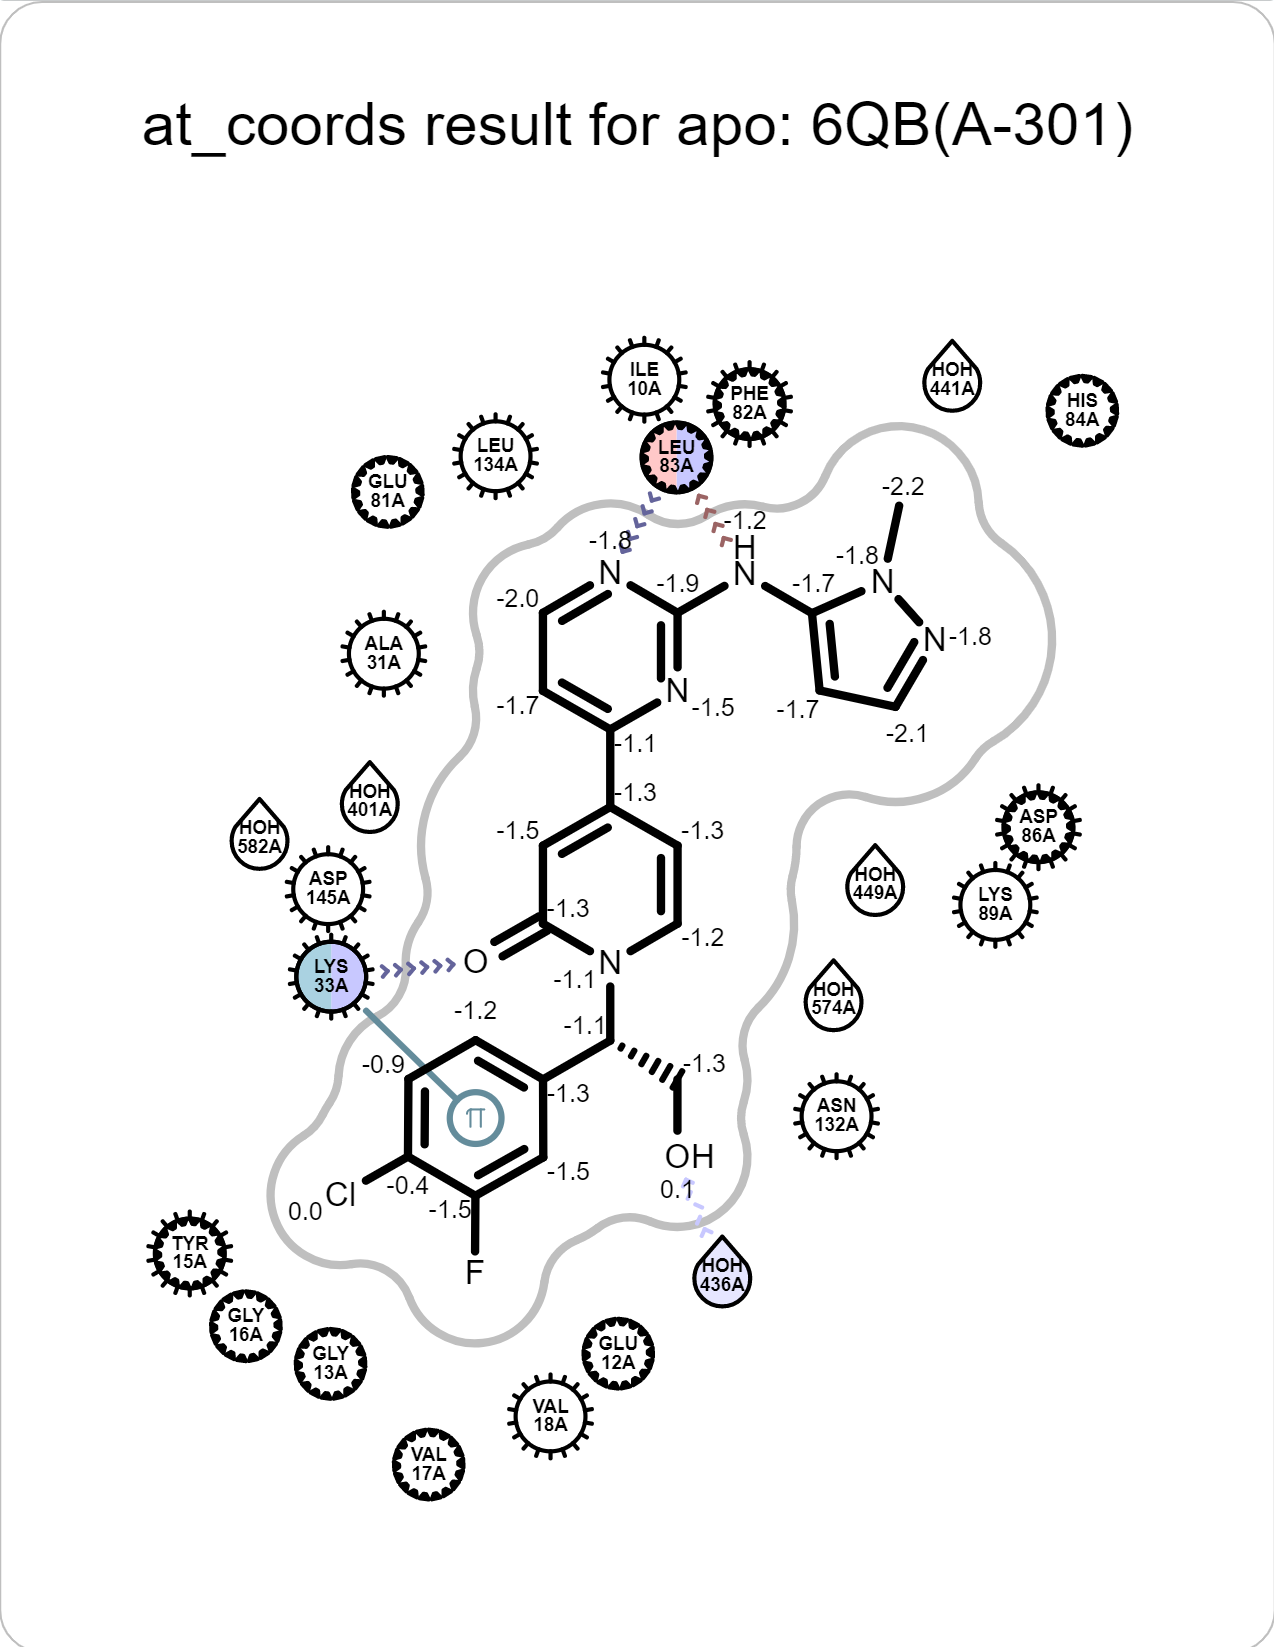
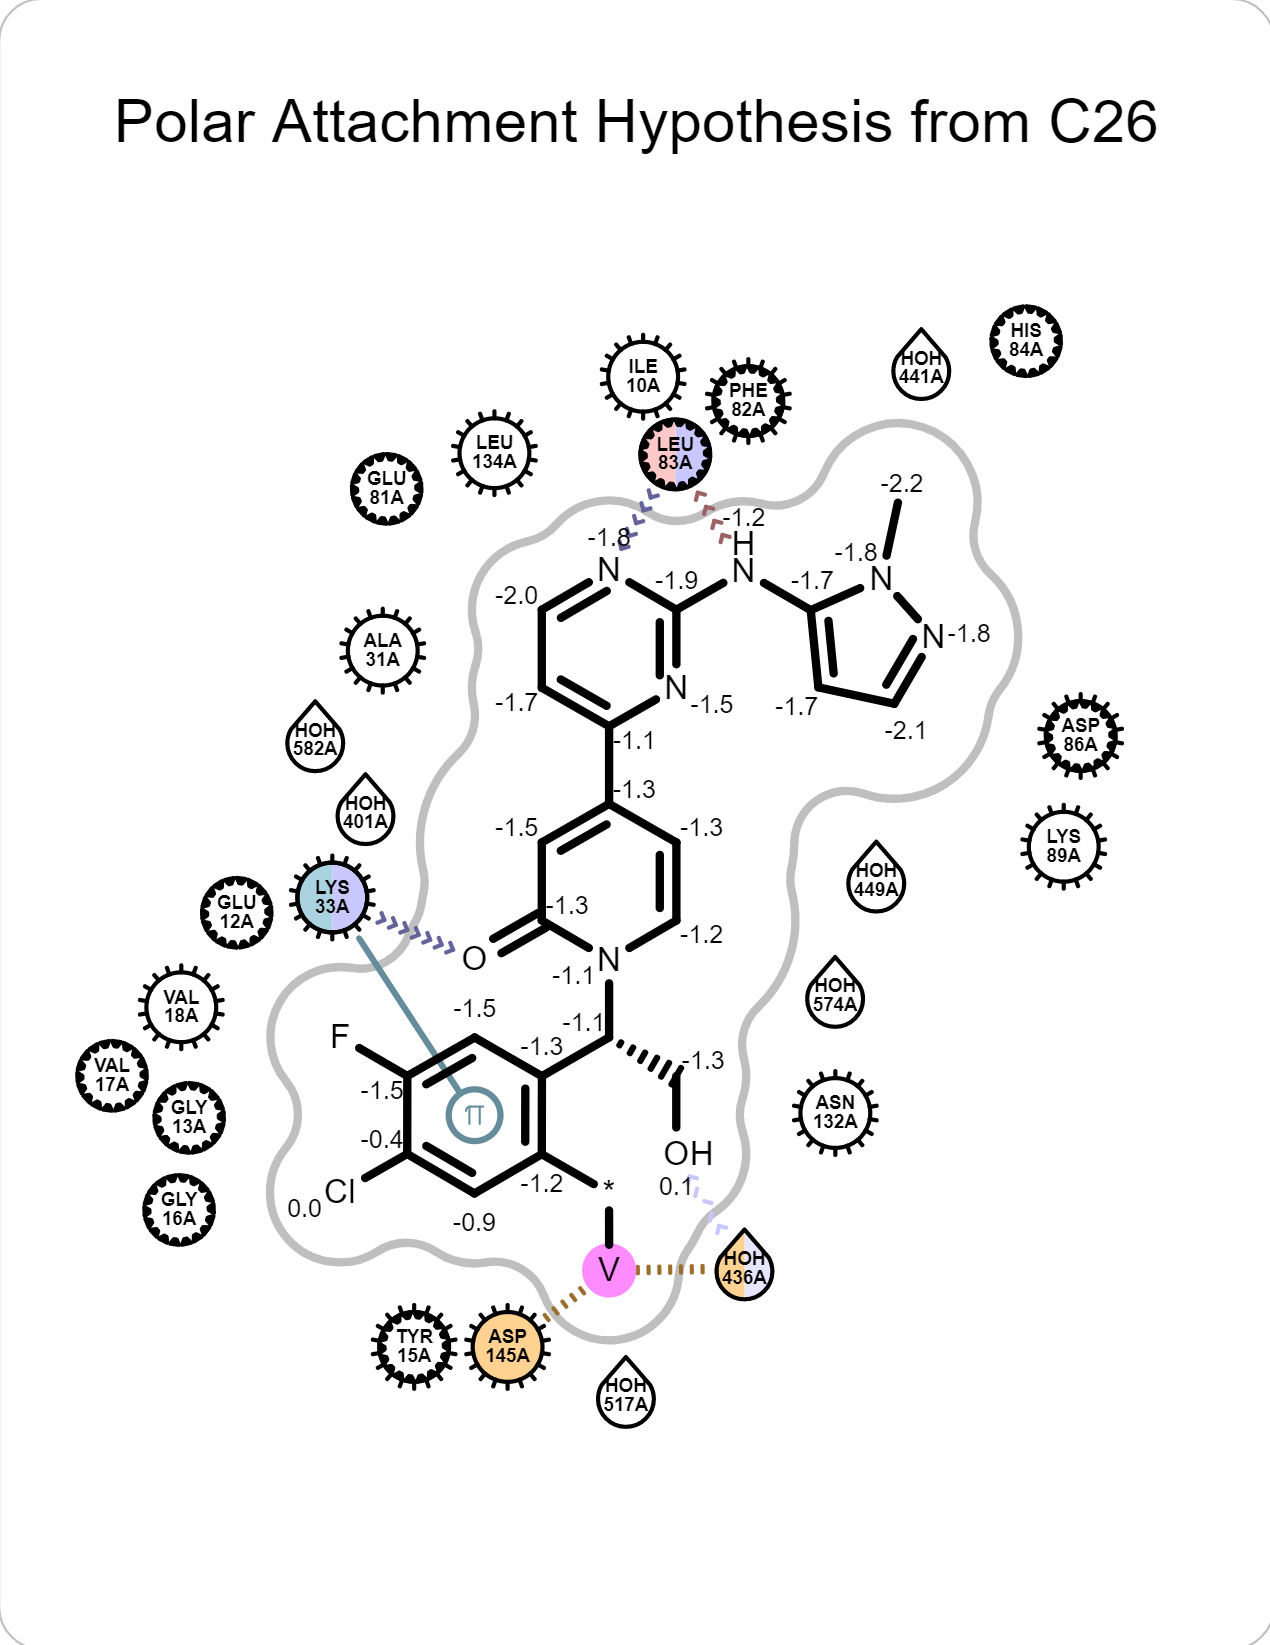
There are also 2D depiction of interactions. Click “Magnify” icon to show a large version of the depiction.
|
|
Suggested further experiments, you may want to modify your ligand to make it more compatible with the apo pocket solvent electrostatics, add a substituent based on the suggested hypotheses, displace a destabilizing water or carefully replace a stabilizing water, mimicking the interactions of the water.