3D Modeling Page
The 3D Modeling page allows users to manipulate structures in 3D. It includes the perception of protein and ligand interactions, as well as editing facilities for ligands in the context of the active site. Small molecules can also be manipulated in the 3D Viewer.
All panels can be moved, removed, resized, or duplicated. There are two preset views: a 3D modeling view and a 3D viewer with spreadsheet view. Additional options can be selected from the Layout drop-down.
The Data Handling tool on the top left of the Active Data Bar can be used to manage dataset column settings and visibility. The Snapshot option allows users to create a link to the current state of the 3D Modeling page, either to share with other project members or to return to the same state after switching to a different project or task.
Specific residues of a selected protein can be located and selected from a sequence viewer at the bottom of the 3D Viewer. When a residue is clicked, it is highlighted in the 3D window. Conversely, when residues are selected from the 3D Viewer menu, the residues in the sequence viewer will also be highlighted. To collapse the sequence viewer, click the arrow on the left side of the strip. To return it to view, click the arrow on the right side of the window.
Badges such as  identify molecules, proteins, and other components.
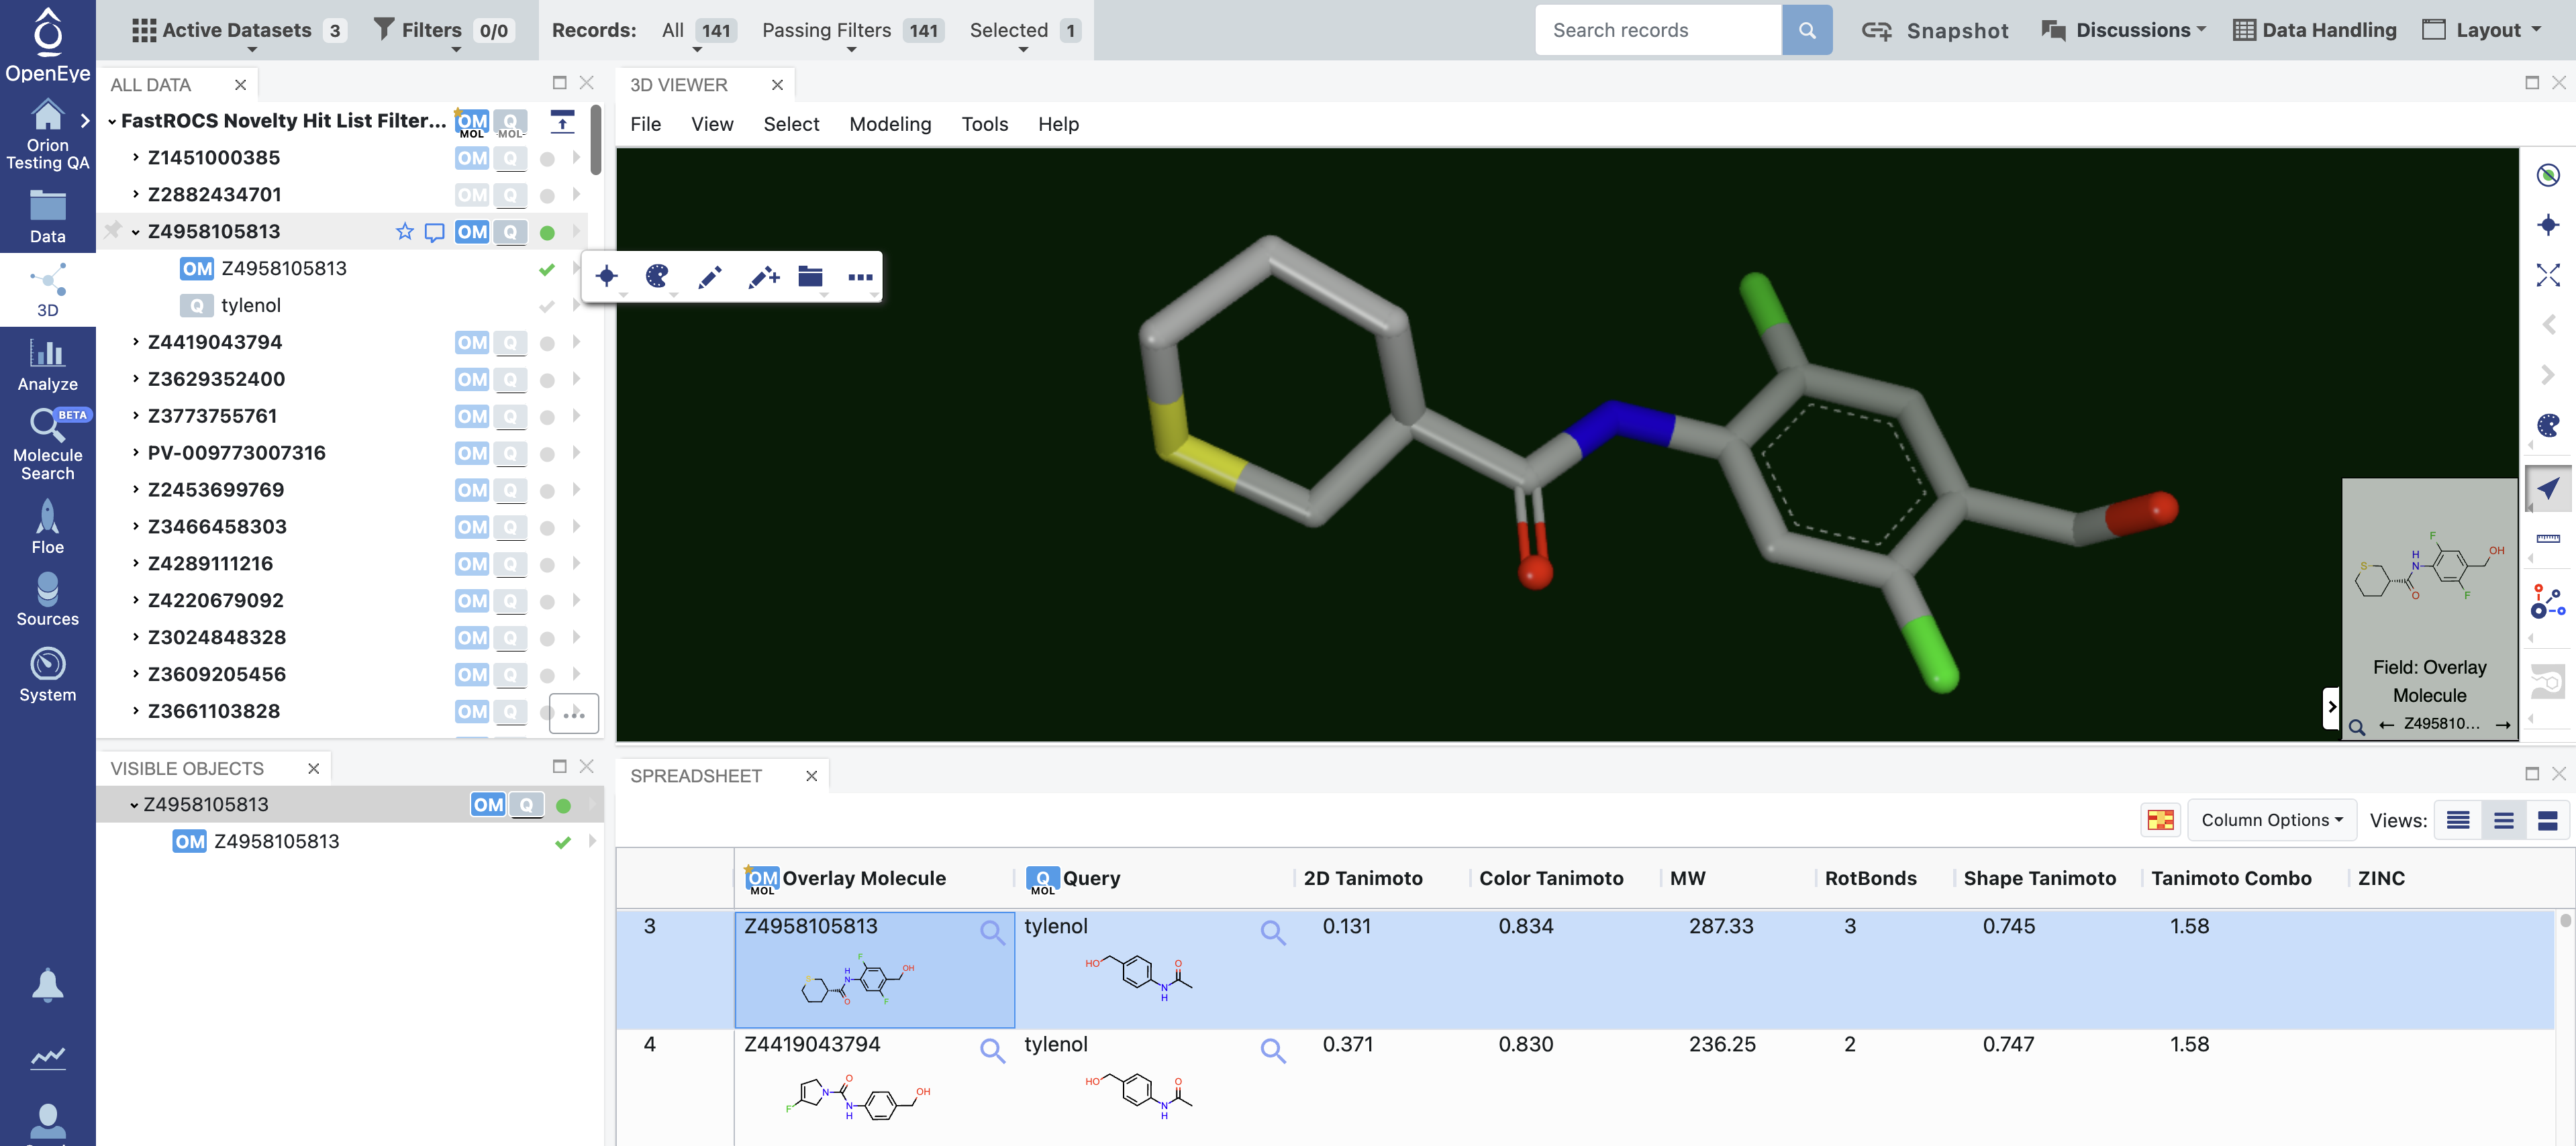
Figure 1. 3D Modeling page with 3D Viewer and Spreadsheet layout. Database molecules are shown in the All Data panel, with the displayed molecule shown in the Visible Objects panel.
Name |
Description |
|---|---|
3D Viewer |
Displays 3D structures of small molecules and receptors. |
Toolbar |
Allows users to change mouse modes, switch to distance measurement mode, change the residue selection
model, and access additional tools.
|
All Data |
Lists all structures in the active dataset. |
Visible Objects List |
Displays structures that are currently marked as active. |
Styling |
Allows users to edit structures using different color schemes and styles. |
Structure Rating |
Allows users to rate a structure on a 1 to 5 scale by hovering over the Ratings icon next to each structure. |
Annotations |
Allows users to add an annotation to a structure by hovering over the Notes icon next to each structure. |
Structure Editing |
Allows users to edit a structure by clicking the caret next to a chosen structure, then selecting
the Pencil icon.
|
Spreadsheet |
Displays imported data, molecular structures, and images. This spreadsheet is the same as the one shown
in the Analyze page.
|
Binding Site Options |
Allows users to generate and manipulate a binding site view of a selected receptor using a cocrystallized
ligand as the site marker.
|
Hint
Selected structures are listed in the Visible Objects panel. Selecting any objects from the All Data list automatically places them in the Visible Objects list.
To add a panel, choose it from the Layout drop-down. Data panels can be added by choosing the Secondary Lists option and dragging it to the desired location. Specific panels are chosen from the three dot menu in the bottom left corner of the data panel. Available data panels are: All Data, Visible Objects, Large Molecules, and Pinned Records.
Convert a 2D Molecule to a 3D Conformer
Molecules in a dataset sometimes appear in 2D rather than 3D. In order to engage these molecules in three dimensions, it is necessary to convert them to their 3D form. While the molecule can be sent from the spreadsheet to the OMEGA - 3D Conformer Ensemble Generation Floe, it is far easier to generate the 3D coordinates directly in the 3D Modeling page. You can determine which molecules are depicted in 2D by expanding the molecule file on the left. Molecules in 2D have a red 2D next to the molecule badges, as shown by the yellow arrow in Figure 2. Simply expand the caret, click the three dot menu, and select Generate Coordinates. A 3D depiction of the molecule will now be available, as shown in the inset. The 3D depiction can either be saved or reverted back to the 2D form.
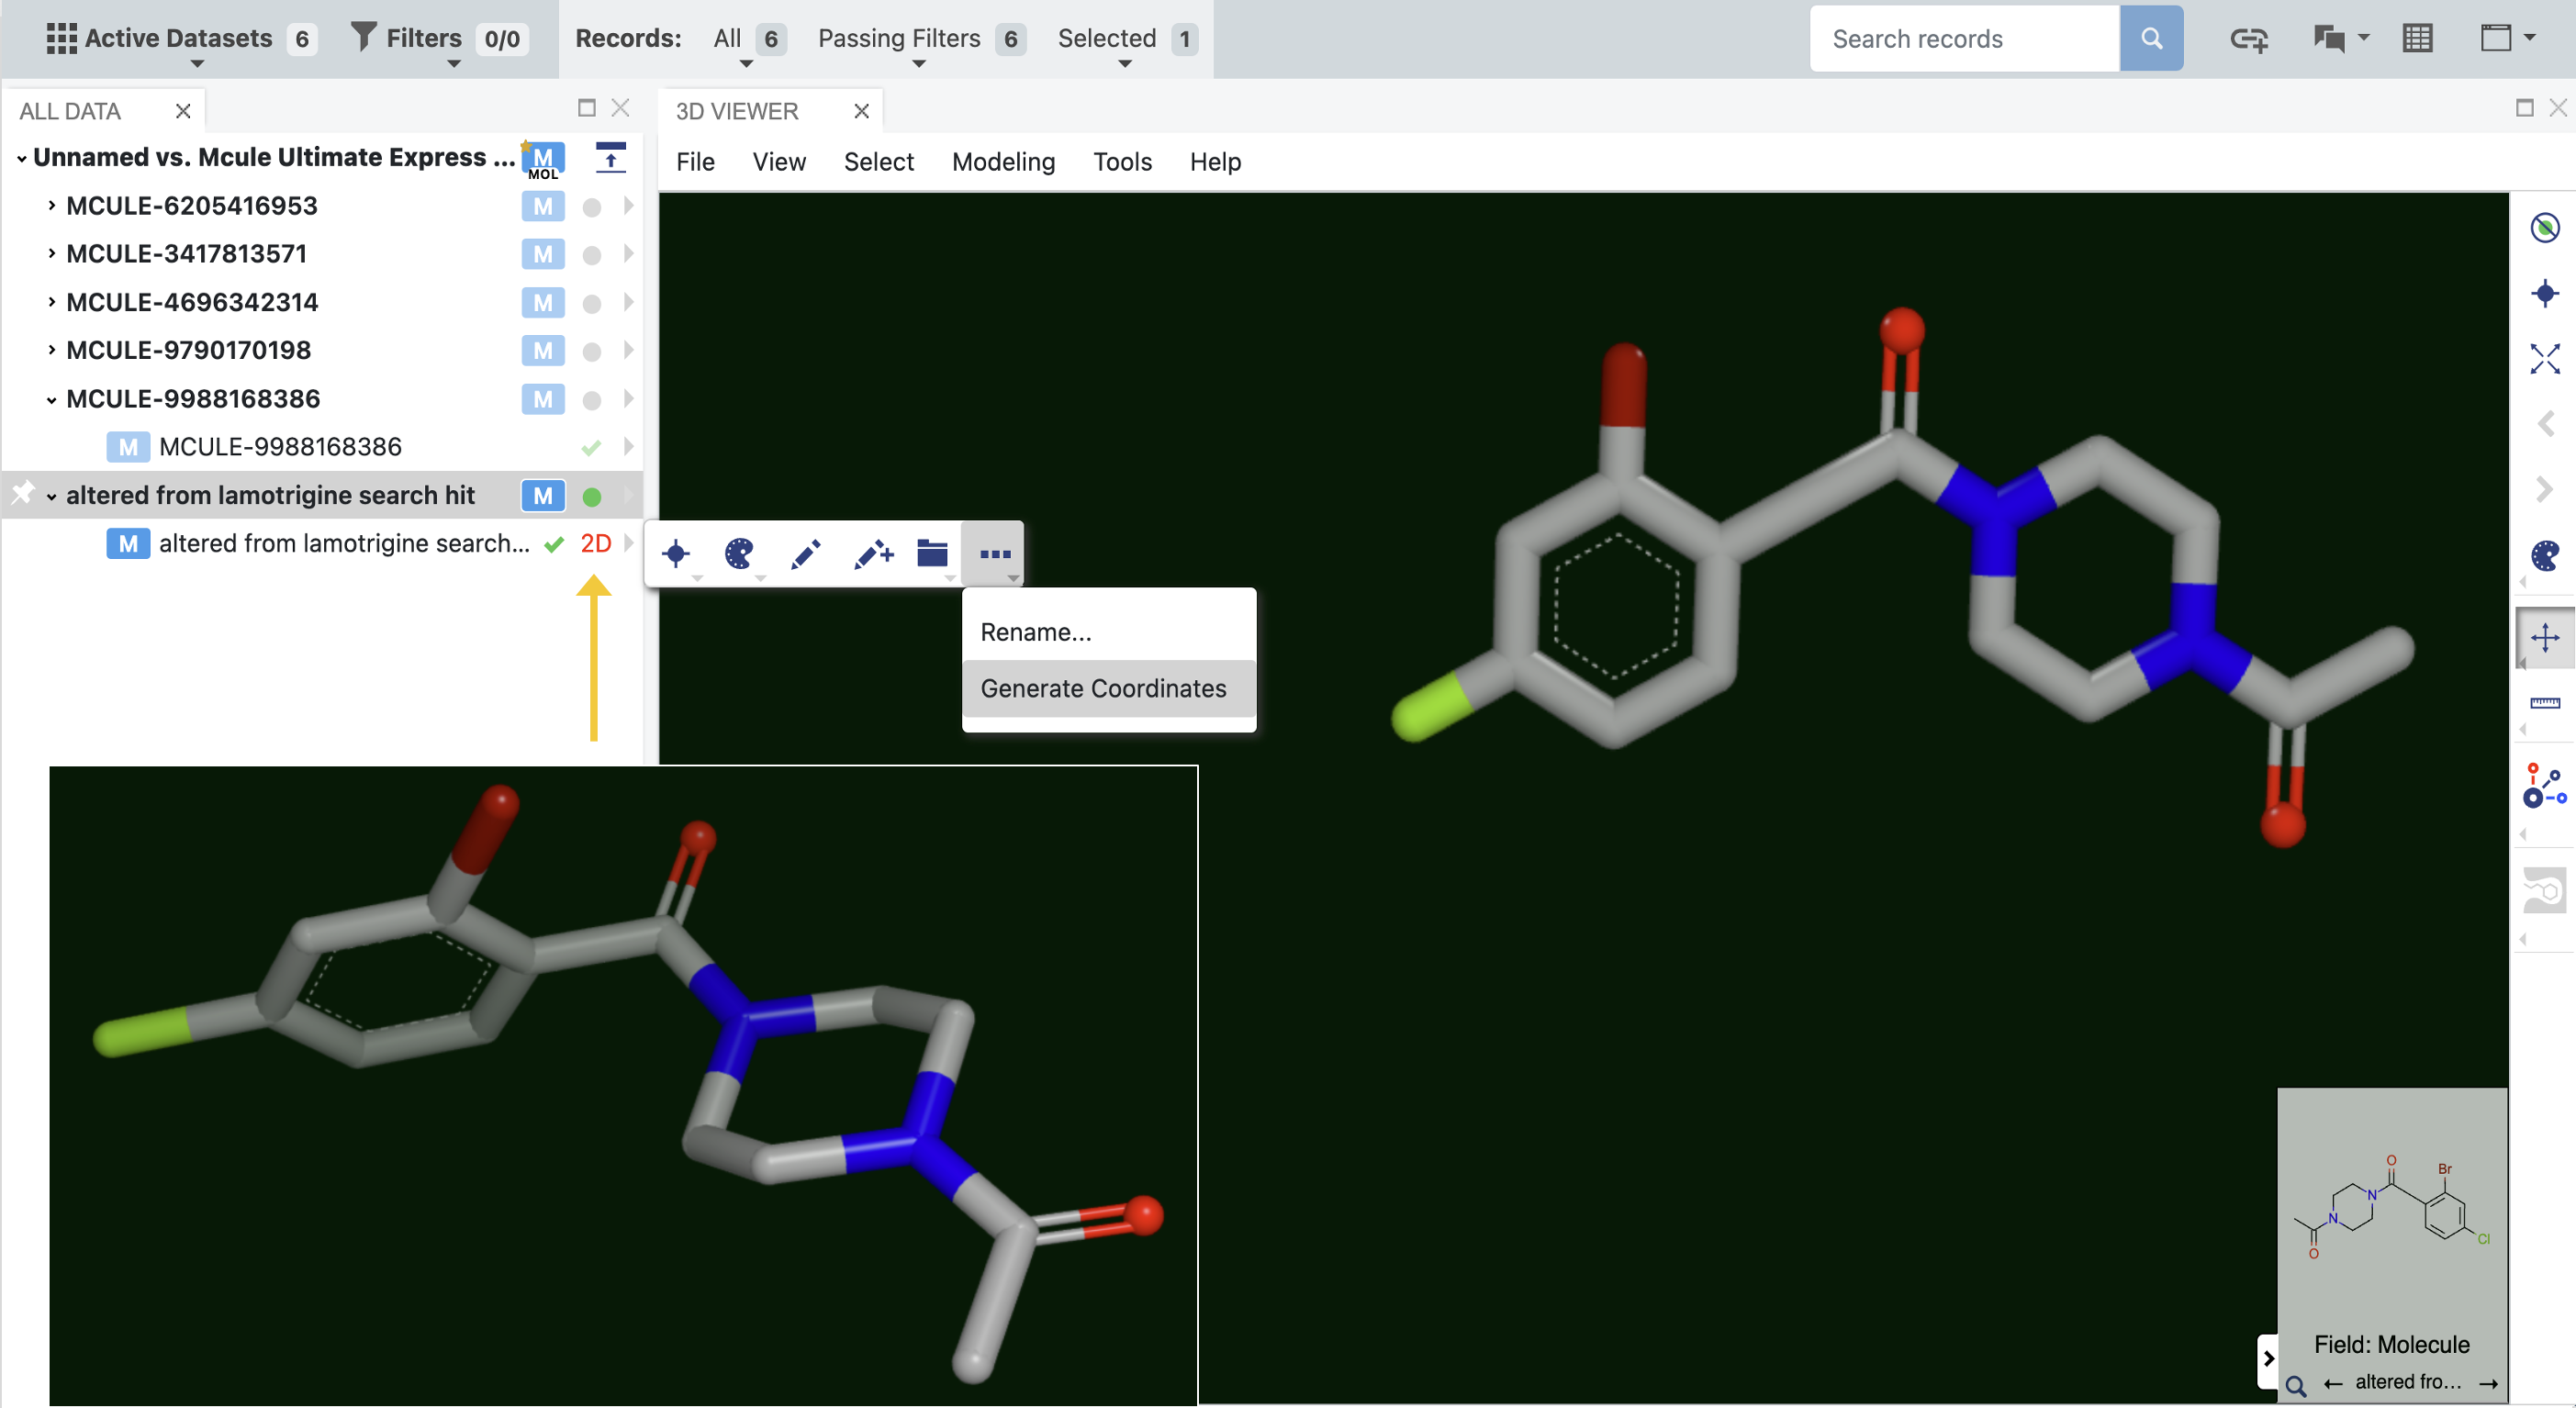
Figure 2. Molecules that are displayed in two dimensions in the 3D Viewer can be converted into 3D structures. The inset shows the generated 3D structure.
Edit DU Receptor
The Edit DU Receptor feature allows you to modify your receptor grid directly from the 3D Modeling page. Choose a design unit (DU), then select Edit DU Receptor on the Modeling drop-down menu.
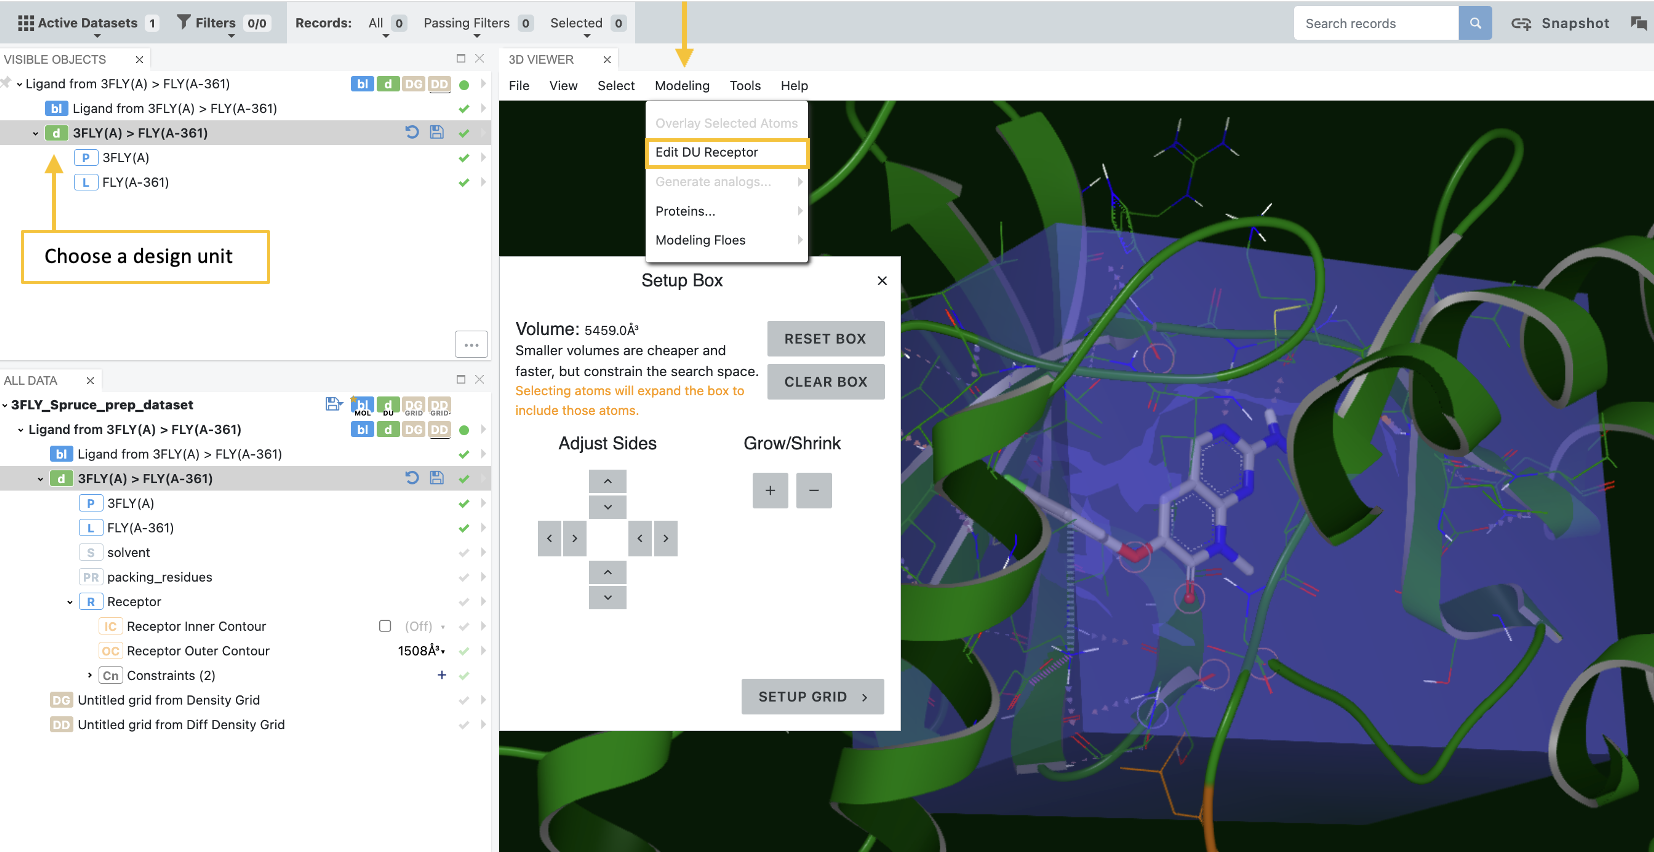
Figure 3. Defining the grid enclosing a receptor.
Once you open the Receptor Editor, you can adjust the size and position of an autogenerated box that defines the confines of the receptor grid. Simply make adjustments with the controls in the Setup Box. Click the “Setup Grid” button for additional options, then click “Build Grid” to build your receptor grid and see details about the contours and constraints. See the release highlights video for a demonstration.
From the list of molecules and design units, you can fine-tune constraints and inner and outer contours as shown in the figure below. These options are enabled by using the corresponding checkboxes. Contours can be adjusted with a slide bar. When adding a new constraint, you can adjust the interaction options using the toolbar on the right-hand side of the 3D Viewer. Click the plus sign to bring up the “Add a Constraint” box. As you hover over the binding site, circles will appear that correspond to atoms in your protein. To add a new constraint, either select one of these atoms or choose the “Custom” option to add a SMARTS pattern. Click the disk icon to save the DU.
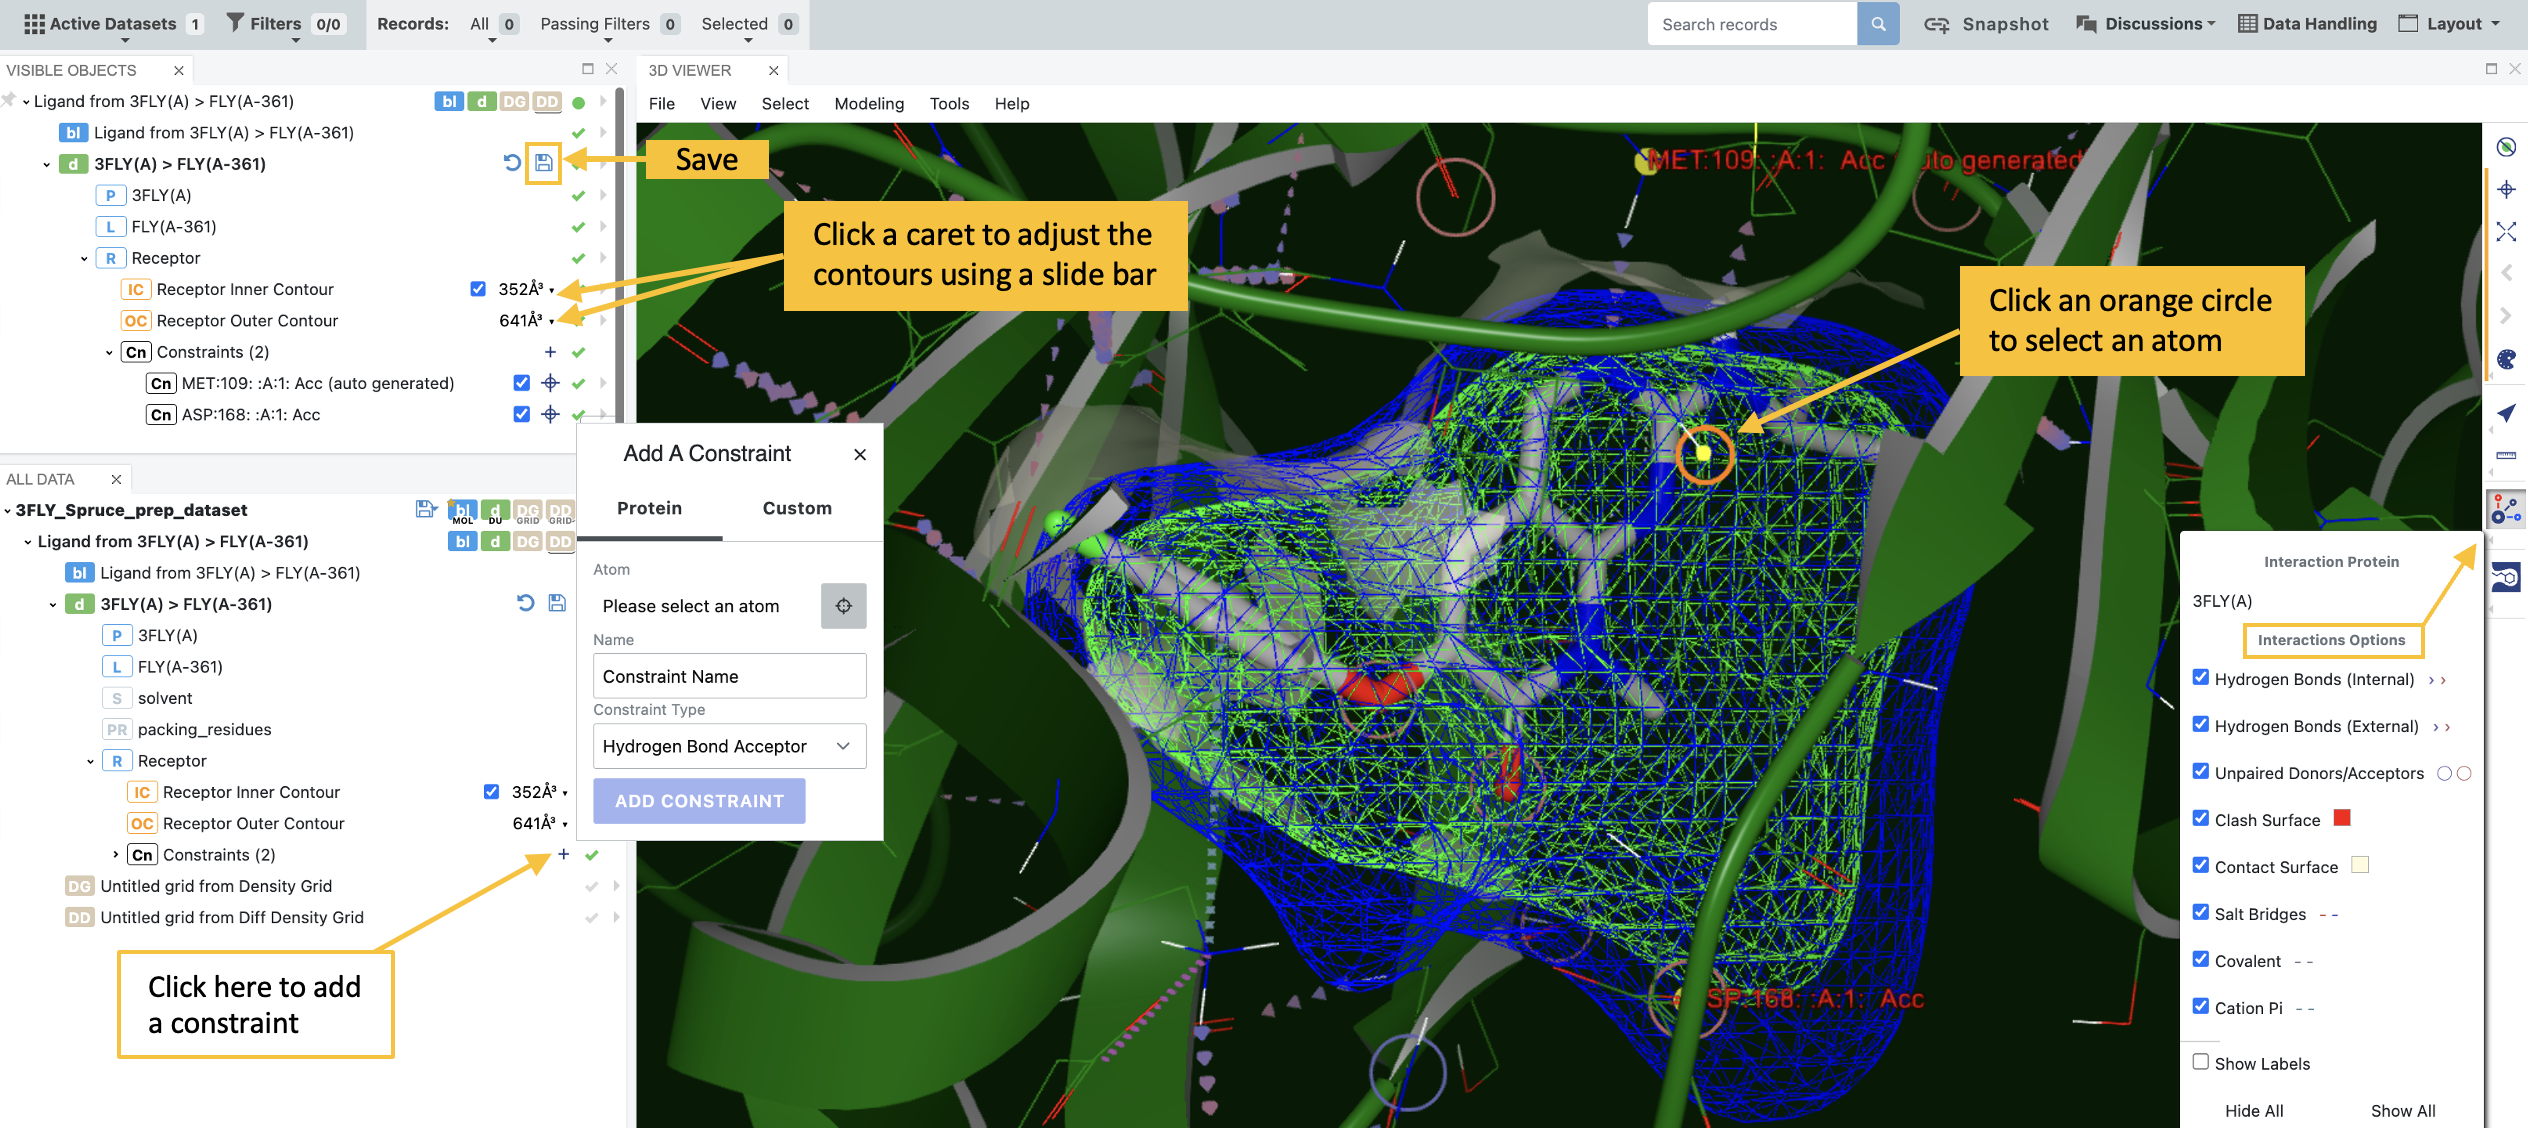
Figure 4. Adding a new constraint.
You can also add a new receptor to a DU if the DU does not have a receptor. The option to add a receptor will only appear if there is no receptor present. Most of the time, this step is not necessary.
Protein editing video
For a tutorial on protein editing, see Protein Editing: 3D Modeling.
Receptor constraints video
Features for enabling and modifying constraints are covered in the 2023.1 video.
Styling small molecules video
For a tutorial about how to visualize small molecules, see Styling Small Molecules.
More tutorial videos
For more training videos on 3D features, see the 3D Features Video Tutorials.