Tutorial 2: NGS Pipeline with Automated Top Lead Selection (PacBio), In-Vitro Library
Background
See Background from Tutorial 1
The goal of this tutorial is to utilize the automated selection pipeline for lead selection straight straight from the FASTQ input.
STEP 1 - Login to Orion, Set-Up Directory, Locate Tutorial Files
Create a general tutorial directory and tutorial 2 subdirectory under PROJECT DIRECTORY / TUTORIALS / TUTORIAL_2 (This is your BASE DIRECTORY and should be used for all outputs for this Tutorial 2 below).
STEP 2 - Select the ‘NGS Pipeline with Automated Lead Selection’ Floe
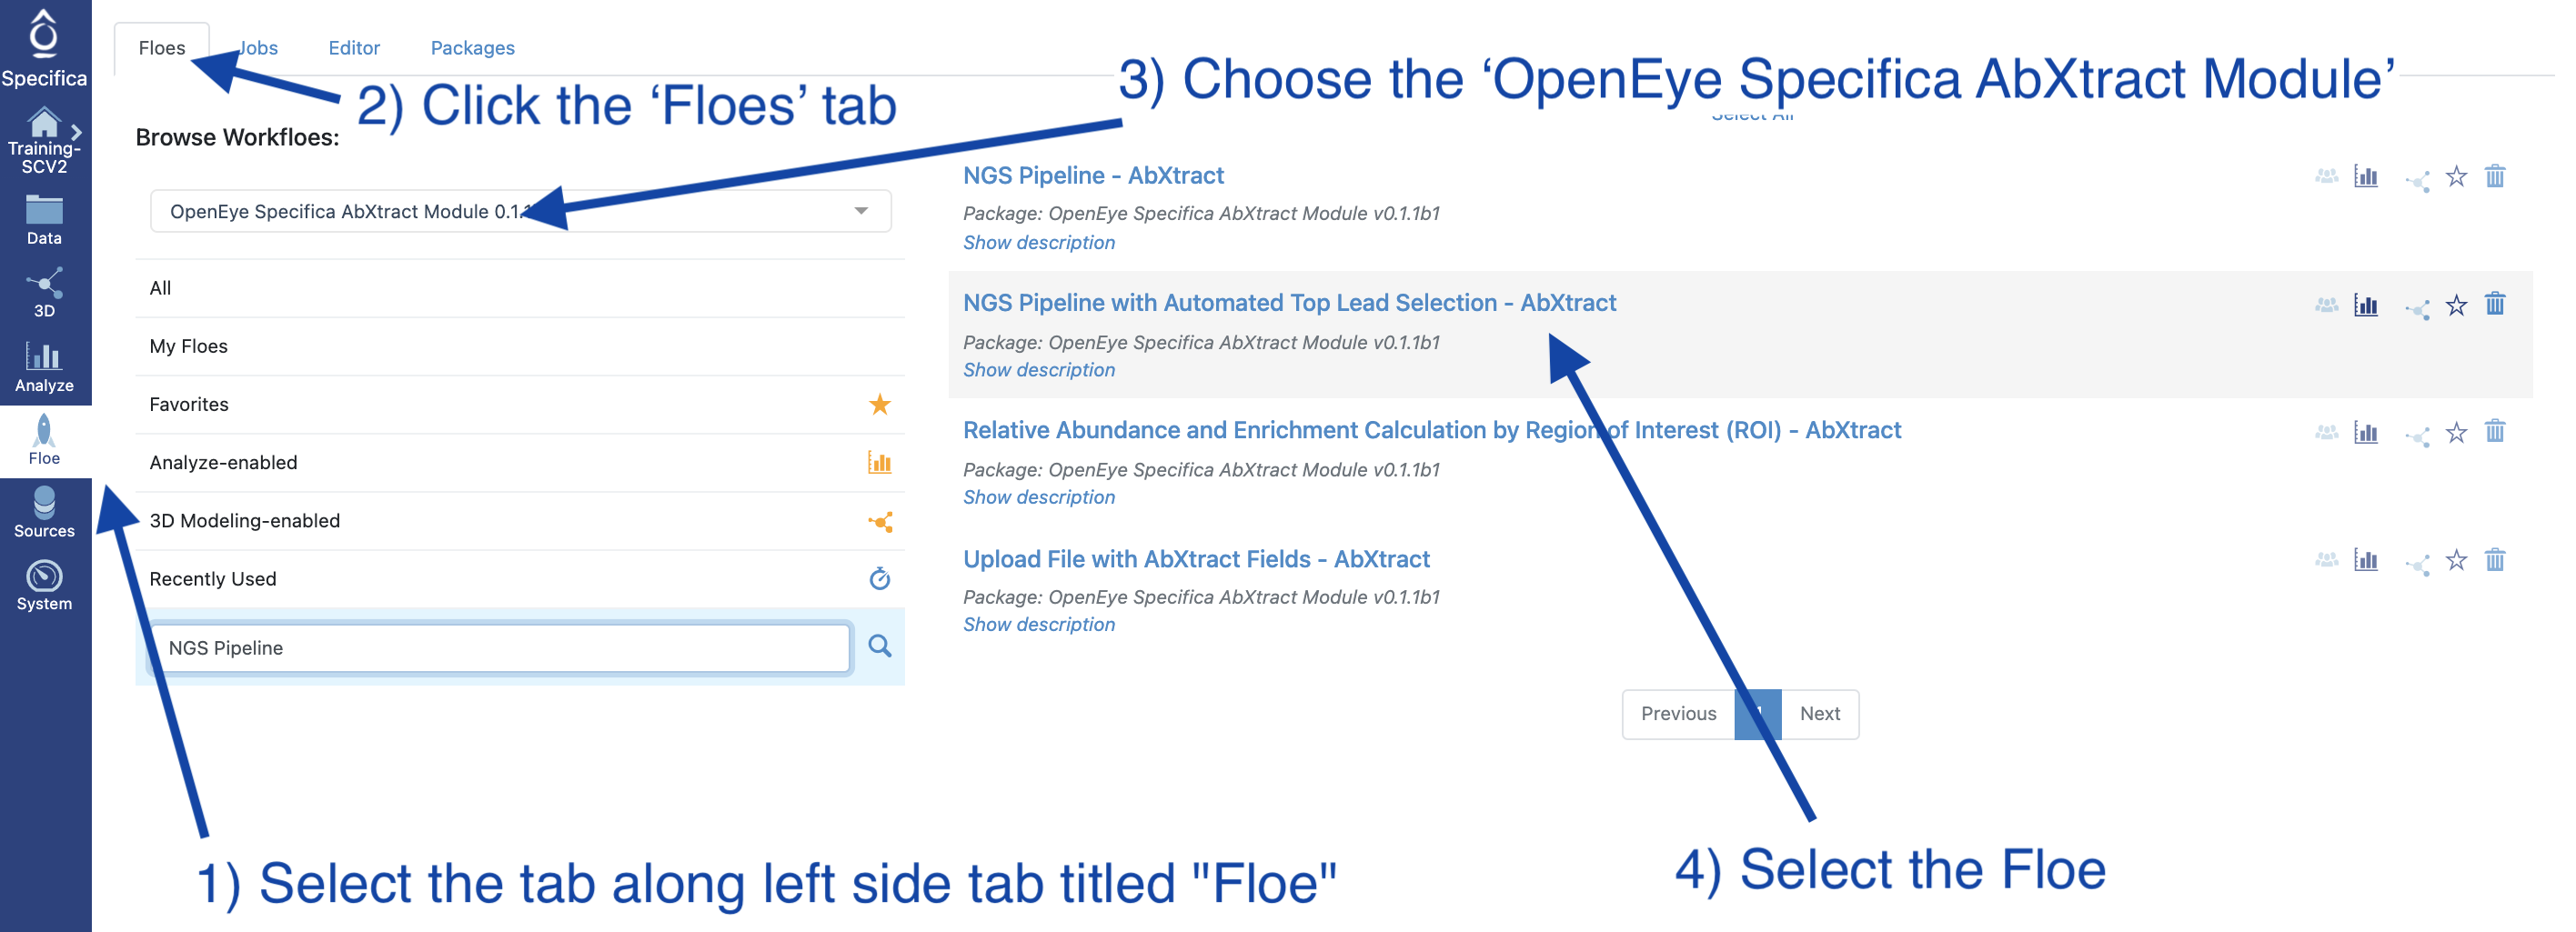
Select the tab along the left side tab titled ‘Floe’
Click the ‘Floes’ tab
Choose the ‘OpenEye Specifica AbXtract Module’
Select the Floe ‘NGS Pipeline with Automated Top Lead Selection’
STEP 3 - Prepare PacBio Run and Start Job
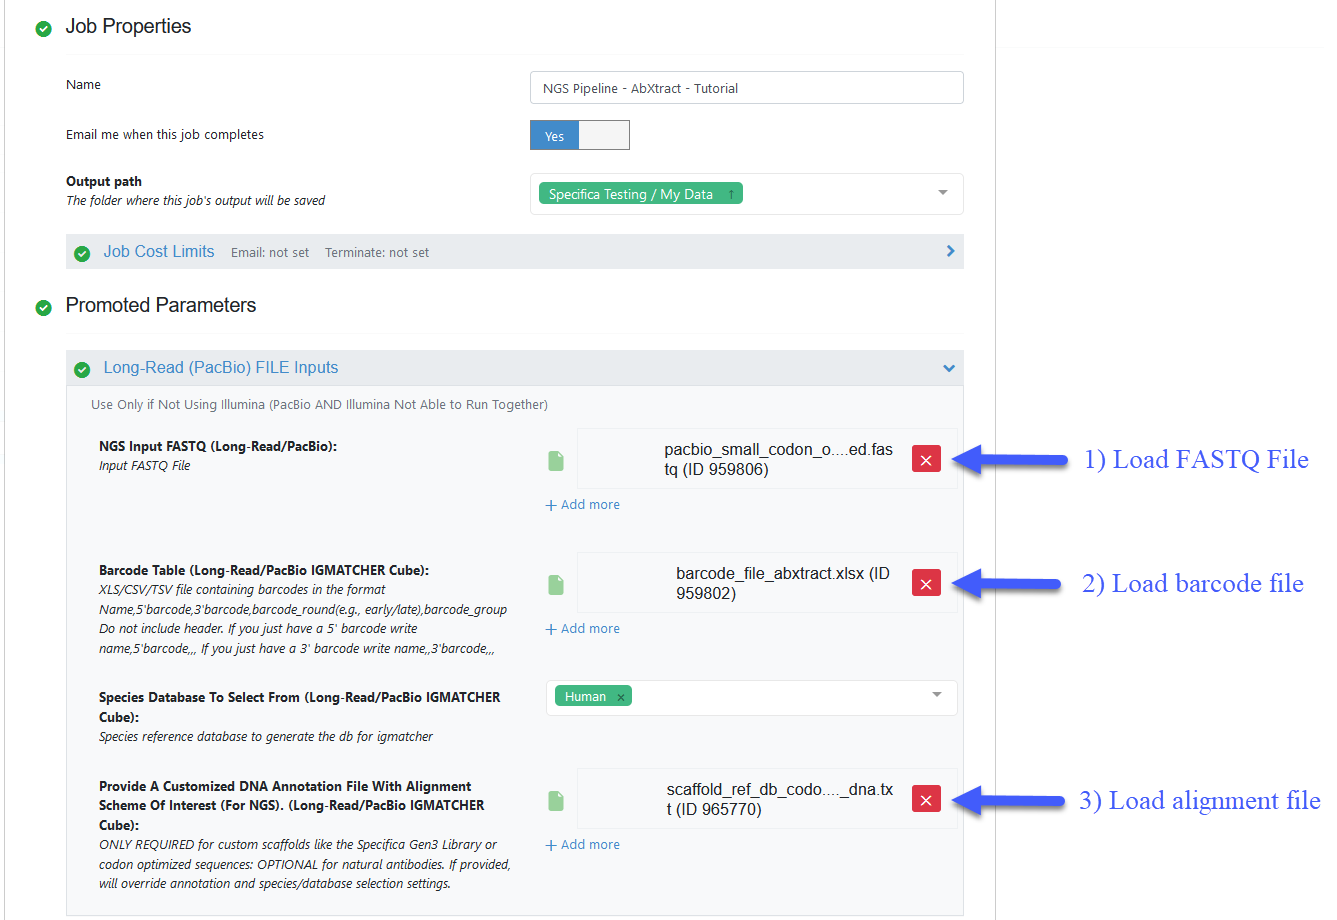
Load FASTQ file - ‘pacbio_small_codon_optimized.fastq’
Load barcode XLSX file - ‘barcode_file_abxtract.xlsx’
Load alignment TXT file - ‘scaffold_ref_db_codon_optimized_dna.txt’
Important Note
All the remaining parameters can be kept as the default values. Scroll through remaining “Promoted” parameters to understand these in greater detail.
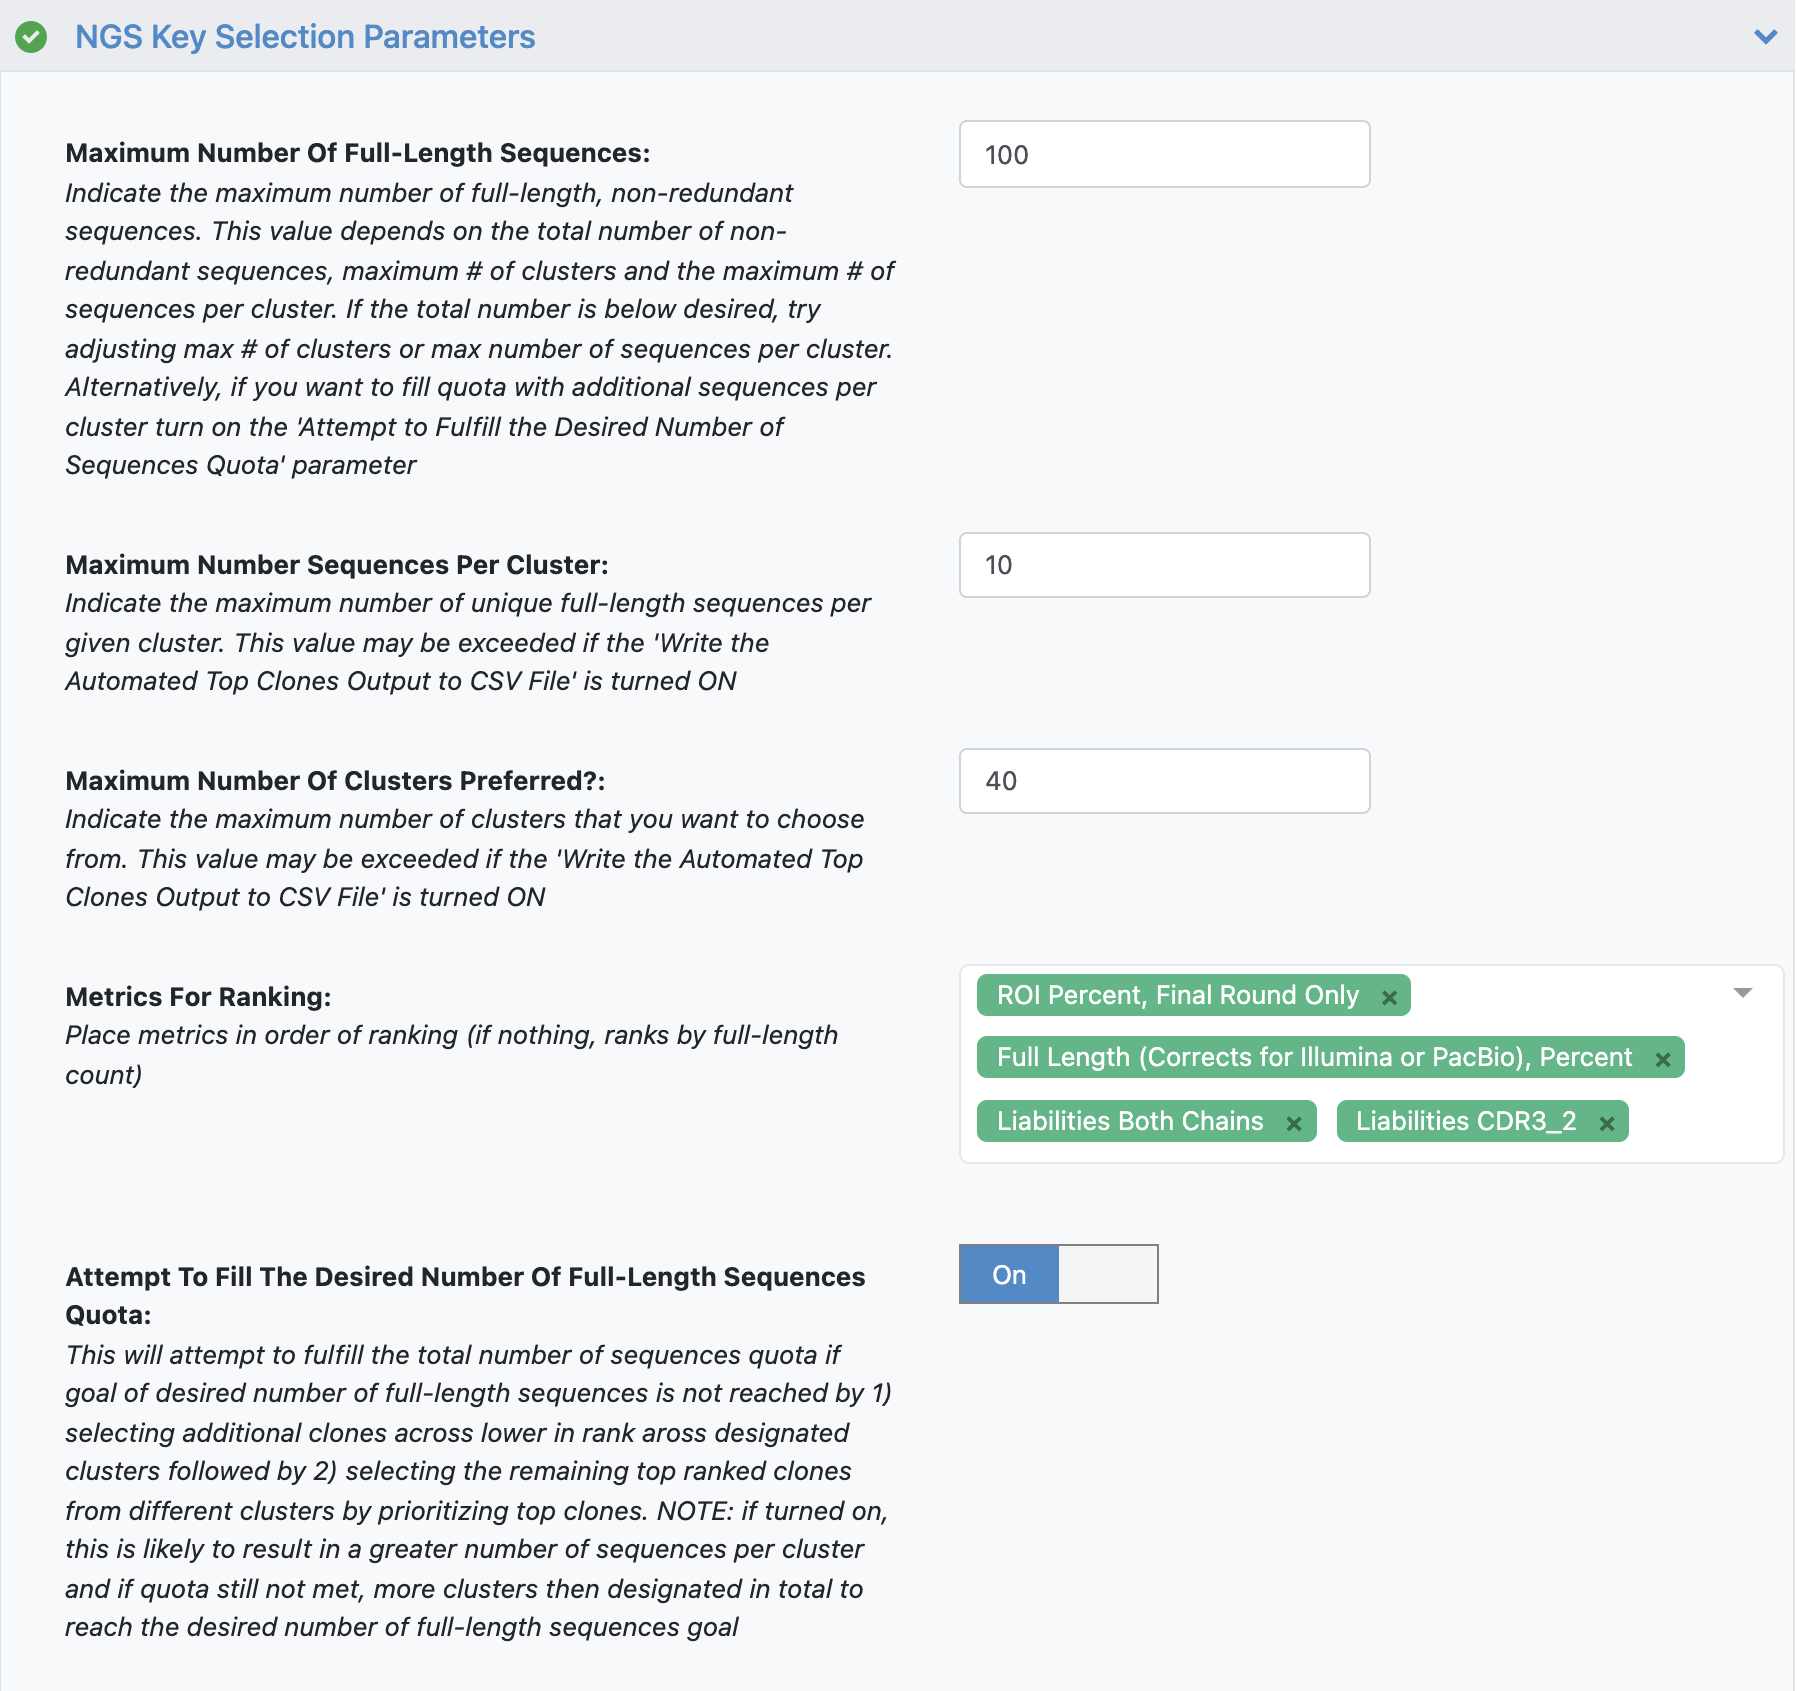
DESCRIPTION OF KEY SELECTION PARAMETERS
Maximum Number Of Full-Length Sequences - The maximum number of full-length, non-redundant sequences to output.Maximum Number Sequences per Cluster - The maximum number of unique full-length sequences per given cluster.Maximum Number Of Clusters Preferred - The maximum number of clusters that we want to select from.Metrics For Ranking - Metrics that determine how the sequences will be sorted in output.Attempt To Fill The Desired Number Of Full-Length Sequences Quota - Attempts to fulfill the total number of sequences Maximum Number Of Full-Length Sequences by selecting additional full-length sequences from same clusters followed by selecting the remaining top ranked clones from different clusters.
Click ‘Start Job’
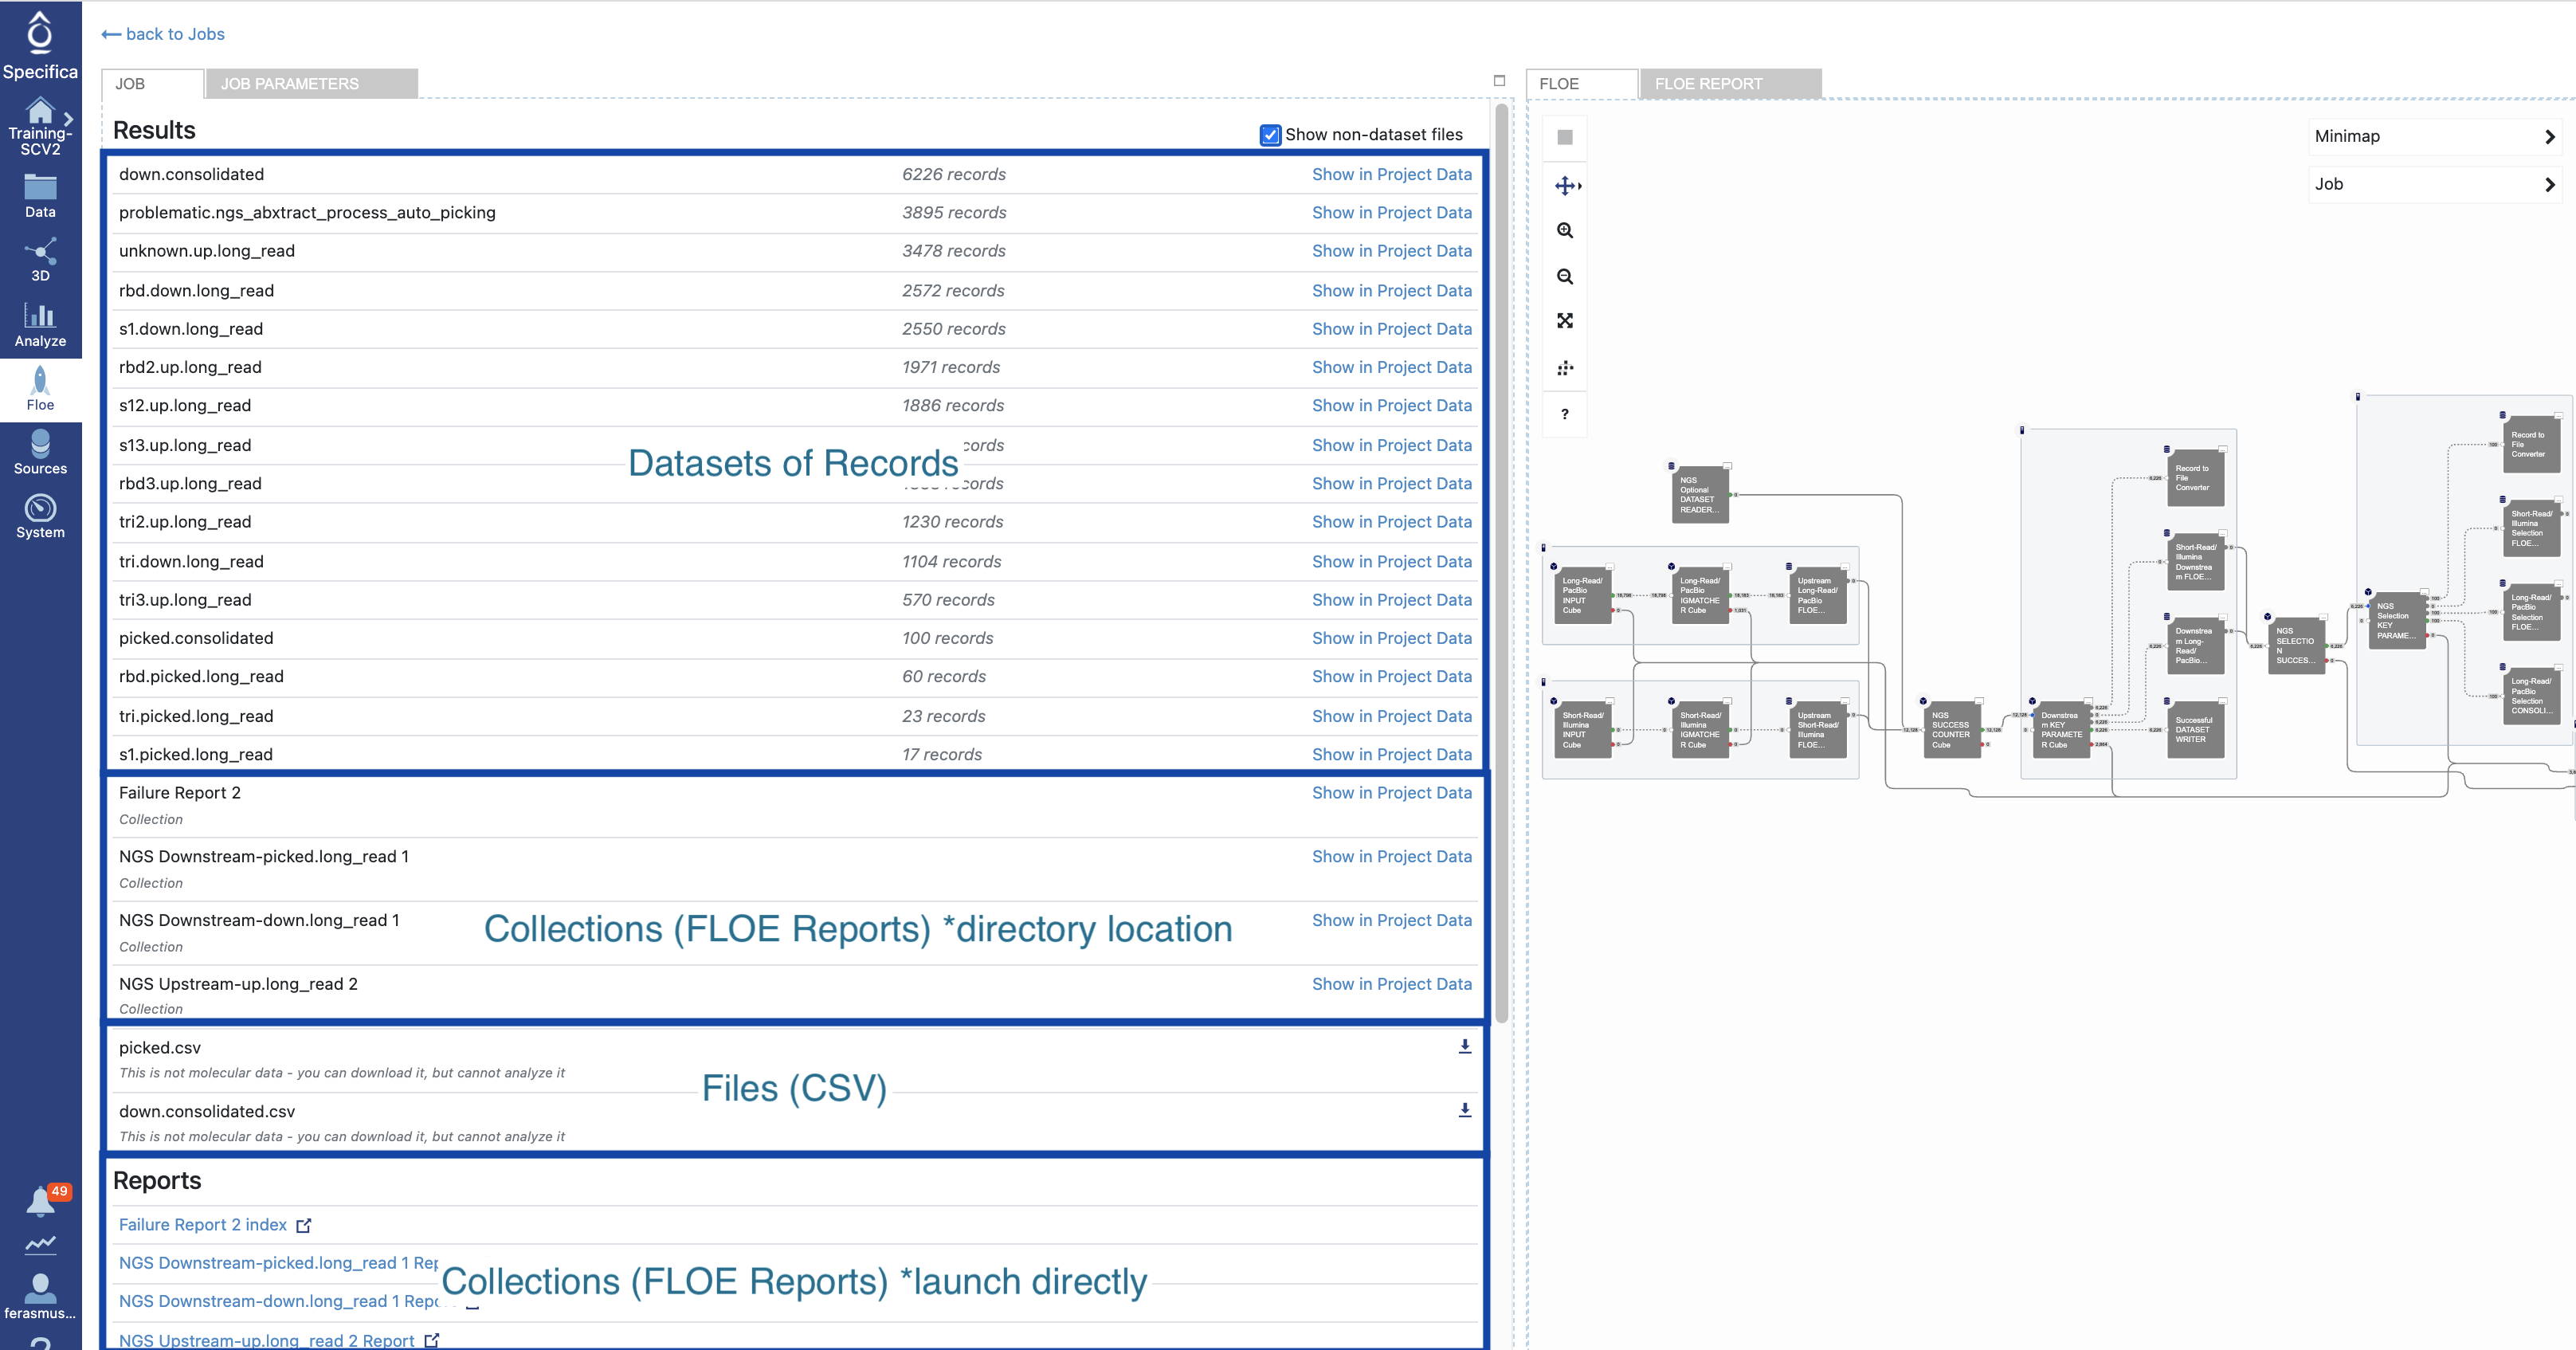
STEP 4 - Open the Floe Report to Get a Detailed Understanding of the Selected or ‘Picked’ Population
Under the ‘Jobs’ tab find the ‘NGS Pipeline with Automated Top Lead Select’.
Click the ‘Show non-dataset files’ checkbox. The breakdown of datasets, collections (Floe reports) and files (CSV) are depicted here:
Click on the ‘NGS Downstream-picked.long_read Report’ under the ‘Reports’ section to launch in browser. Give it some time to load in browser.
See the ‘General stats’, which provides a snapshot of the number of non-redundant full-length, LCDR3, HCDR3, LCDR3 and HCDR3 sequences. Chain_1 represents the variable light chain (VL) and chain_2 represents the variable heavy chain (VH). The overlap shows the overlap of the region of interest (HCDR3) across the different populations.
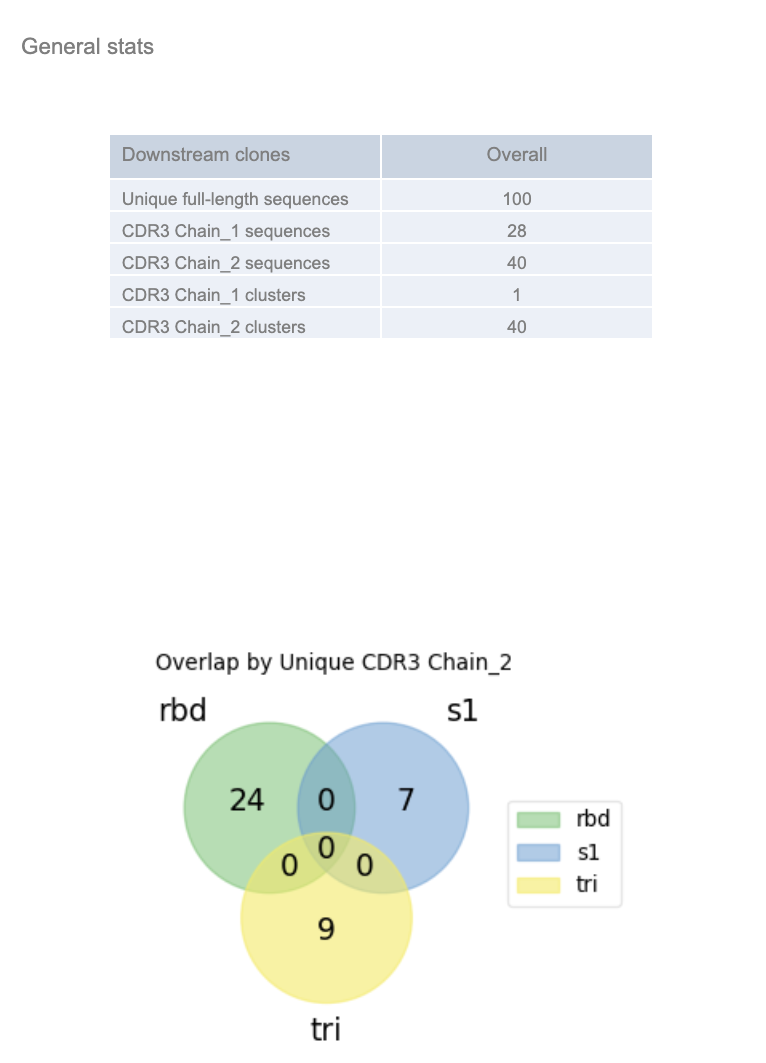
Each subpanel separates out the ‘barcode_group’ and shows the population specific (e.g., trimer, S1, RBD) statistics.
Return to Job overview of all the datasets, floe reports and files - see above
Find the file called ‘picked.consolidated’ and click ‘Show in Project Data’.
Make the dataset active and open dataset in Analyze tool, see making dataset active.
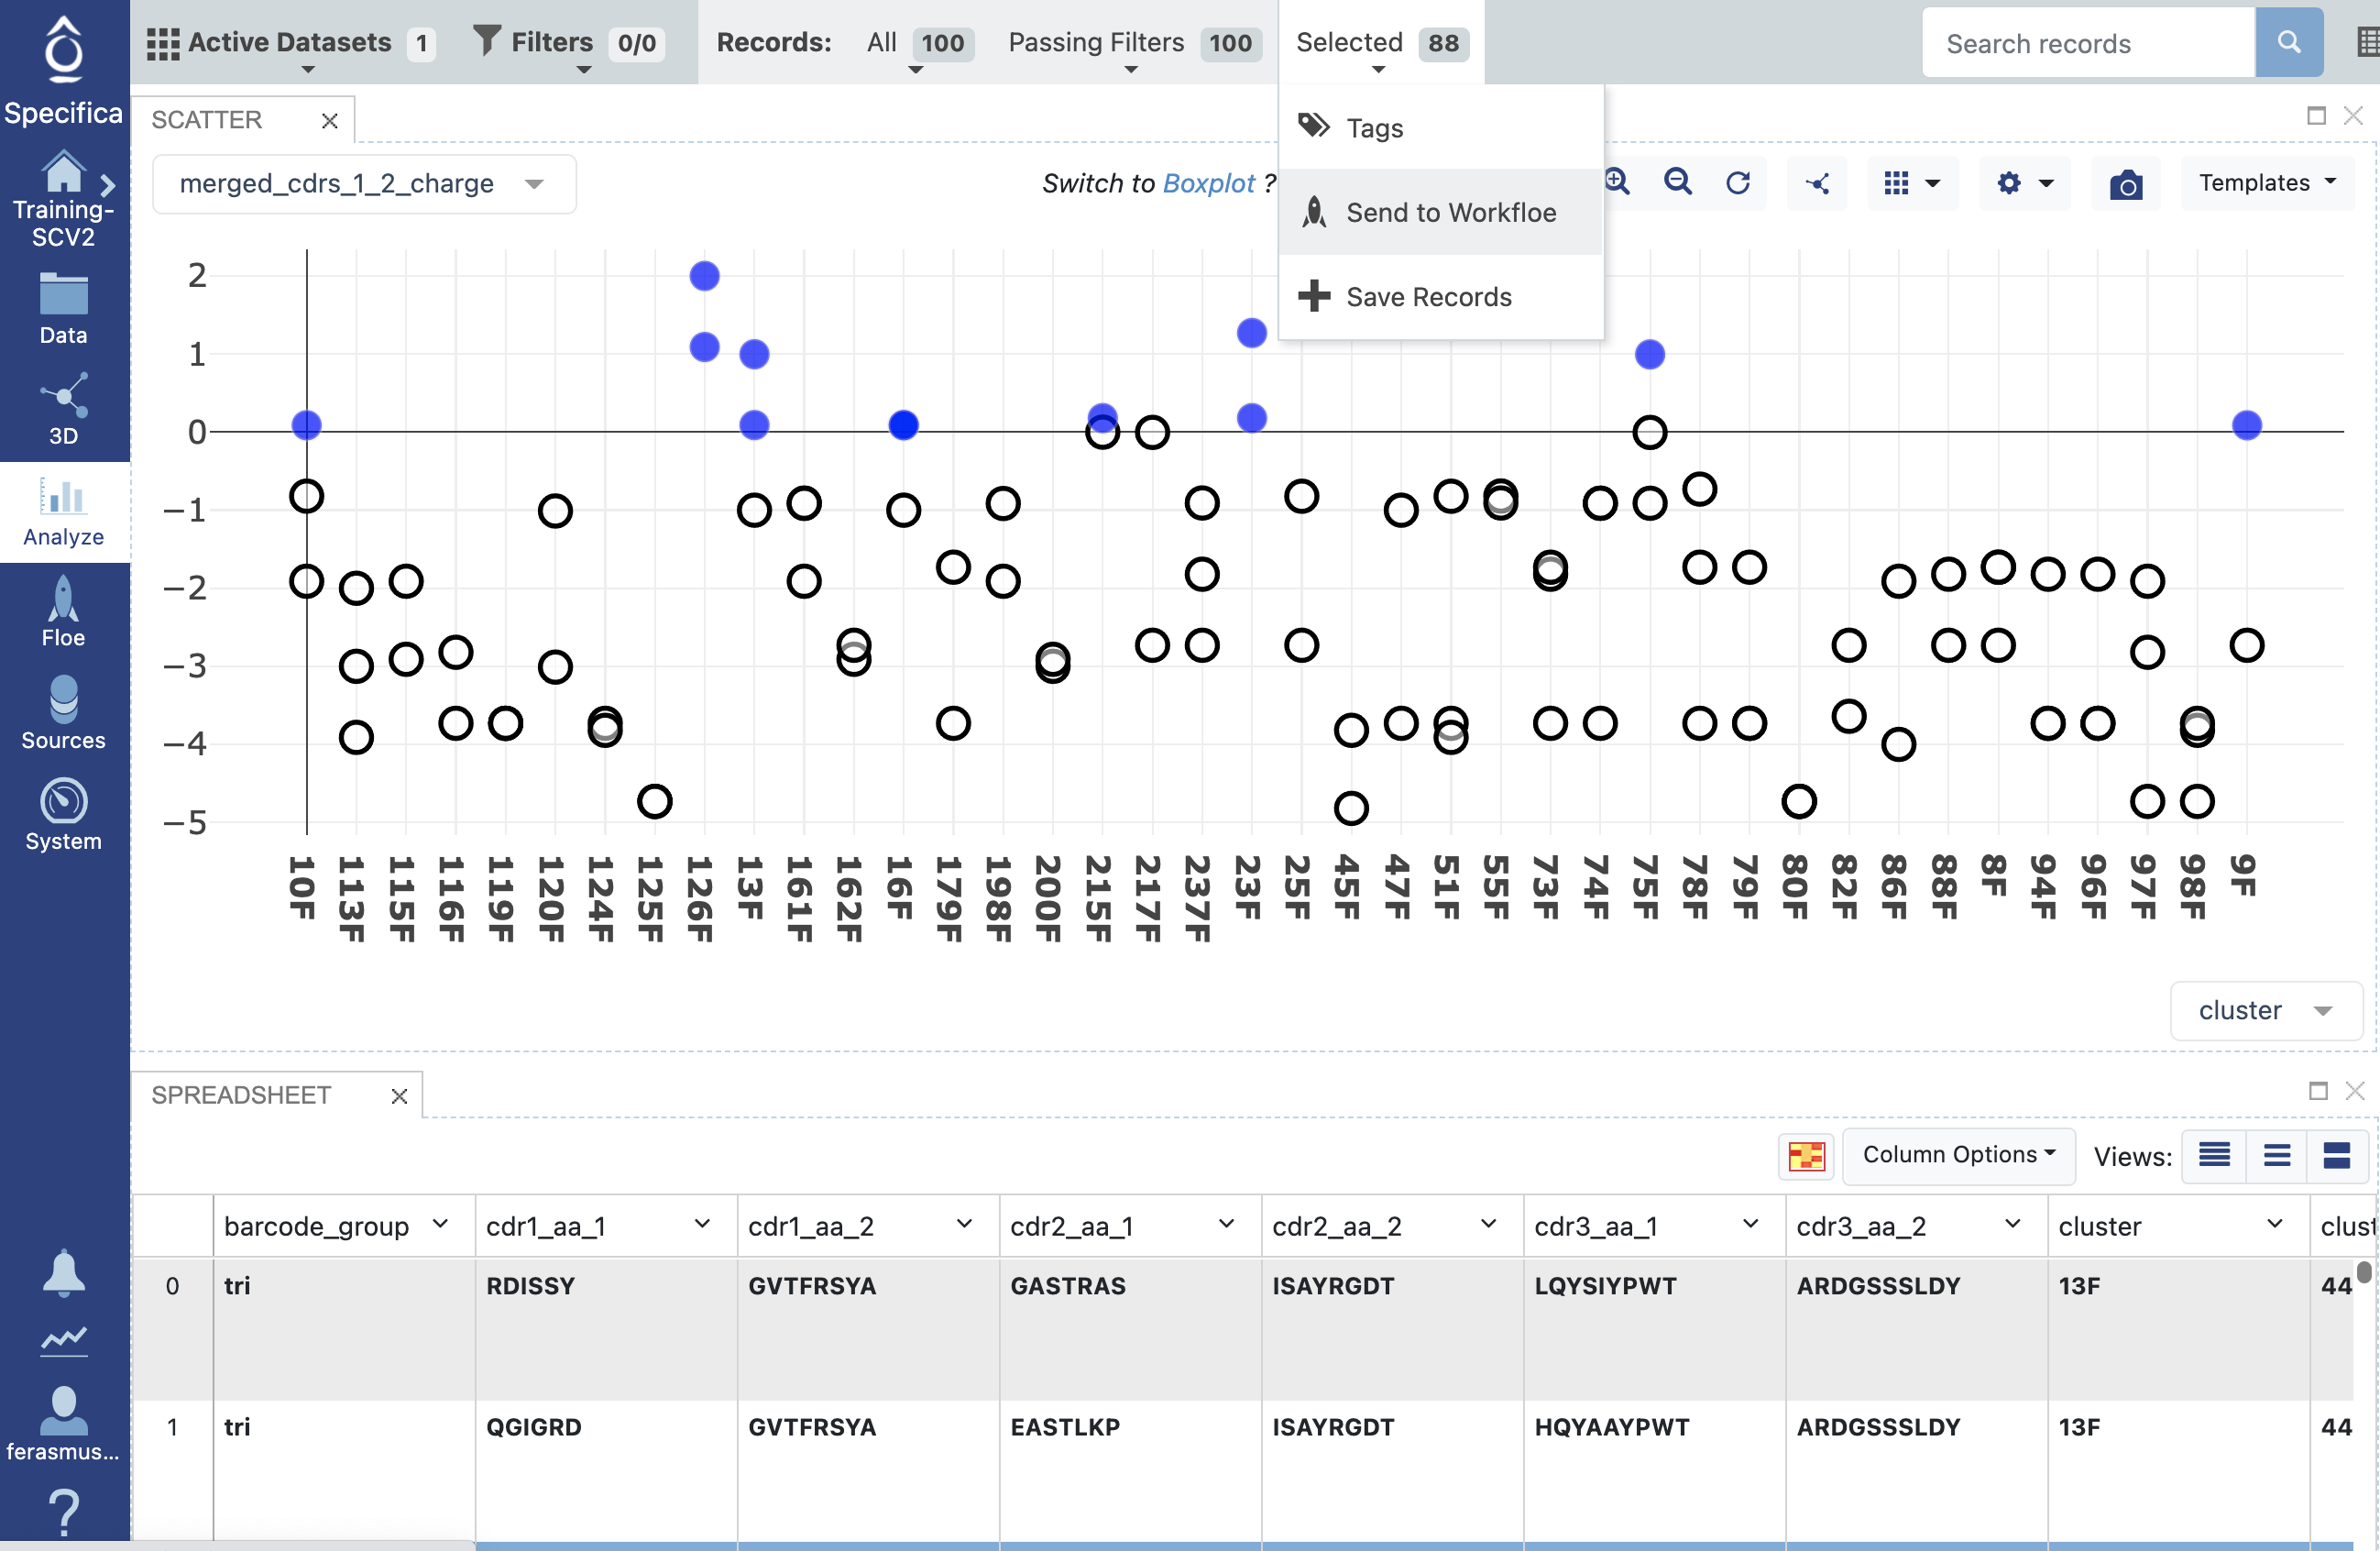
STEP 5 - Select Populations with Net Negative Charge of the CDRs
Plot the ‘cluster’ on x-axis (there should be 40 clusters since we selected this option from the ‘Maximum Number Of Clusters Preferred’ Option.
On the y-axis select the ‘merged_cdrs_1_2_charge’ option, which looks at the net charge (pH 7.0) of all the CDRs.
Select only records below 0 net charge across all cluster groups then select the ‘Selected Tab’ near the top to choose ‘Send to Workfloe’ option, like this:
Important Note
It is often easier to rank numeric parameters in the table by clicking the down arrow and click ‘Rank Descending’.
STEP 6 - Subset the Output Fields
Under Search Bar, search for ‘Subset the Number of Fields for Export’ and click ‘View all Workfloe options’
Keep following fields (for more details, see key fields reference):
A) seq_idB) match_name_1C) match_name_2D) cdr3_aa_2E) sequence_aa_1F) sequence_aa_2G) clusterClick ‘Start Job’
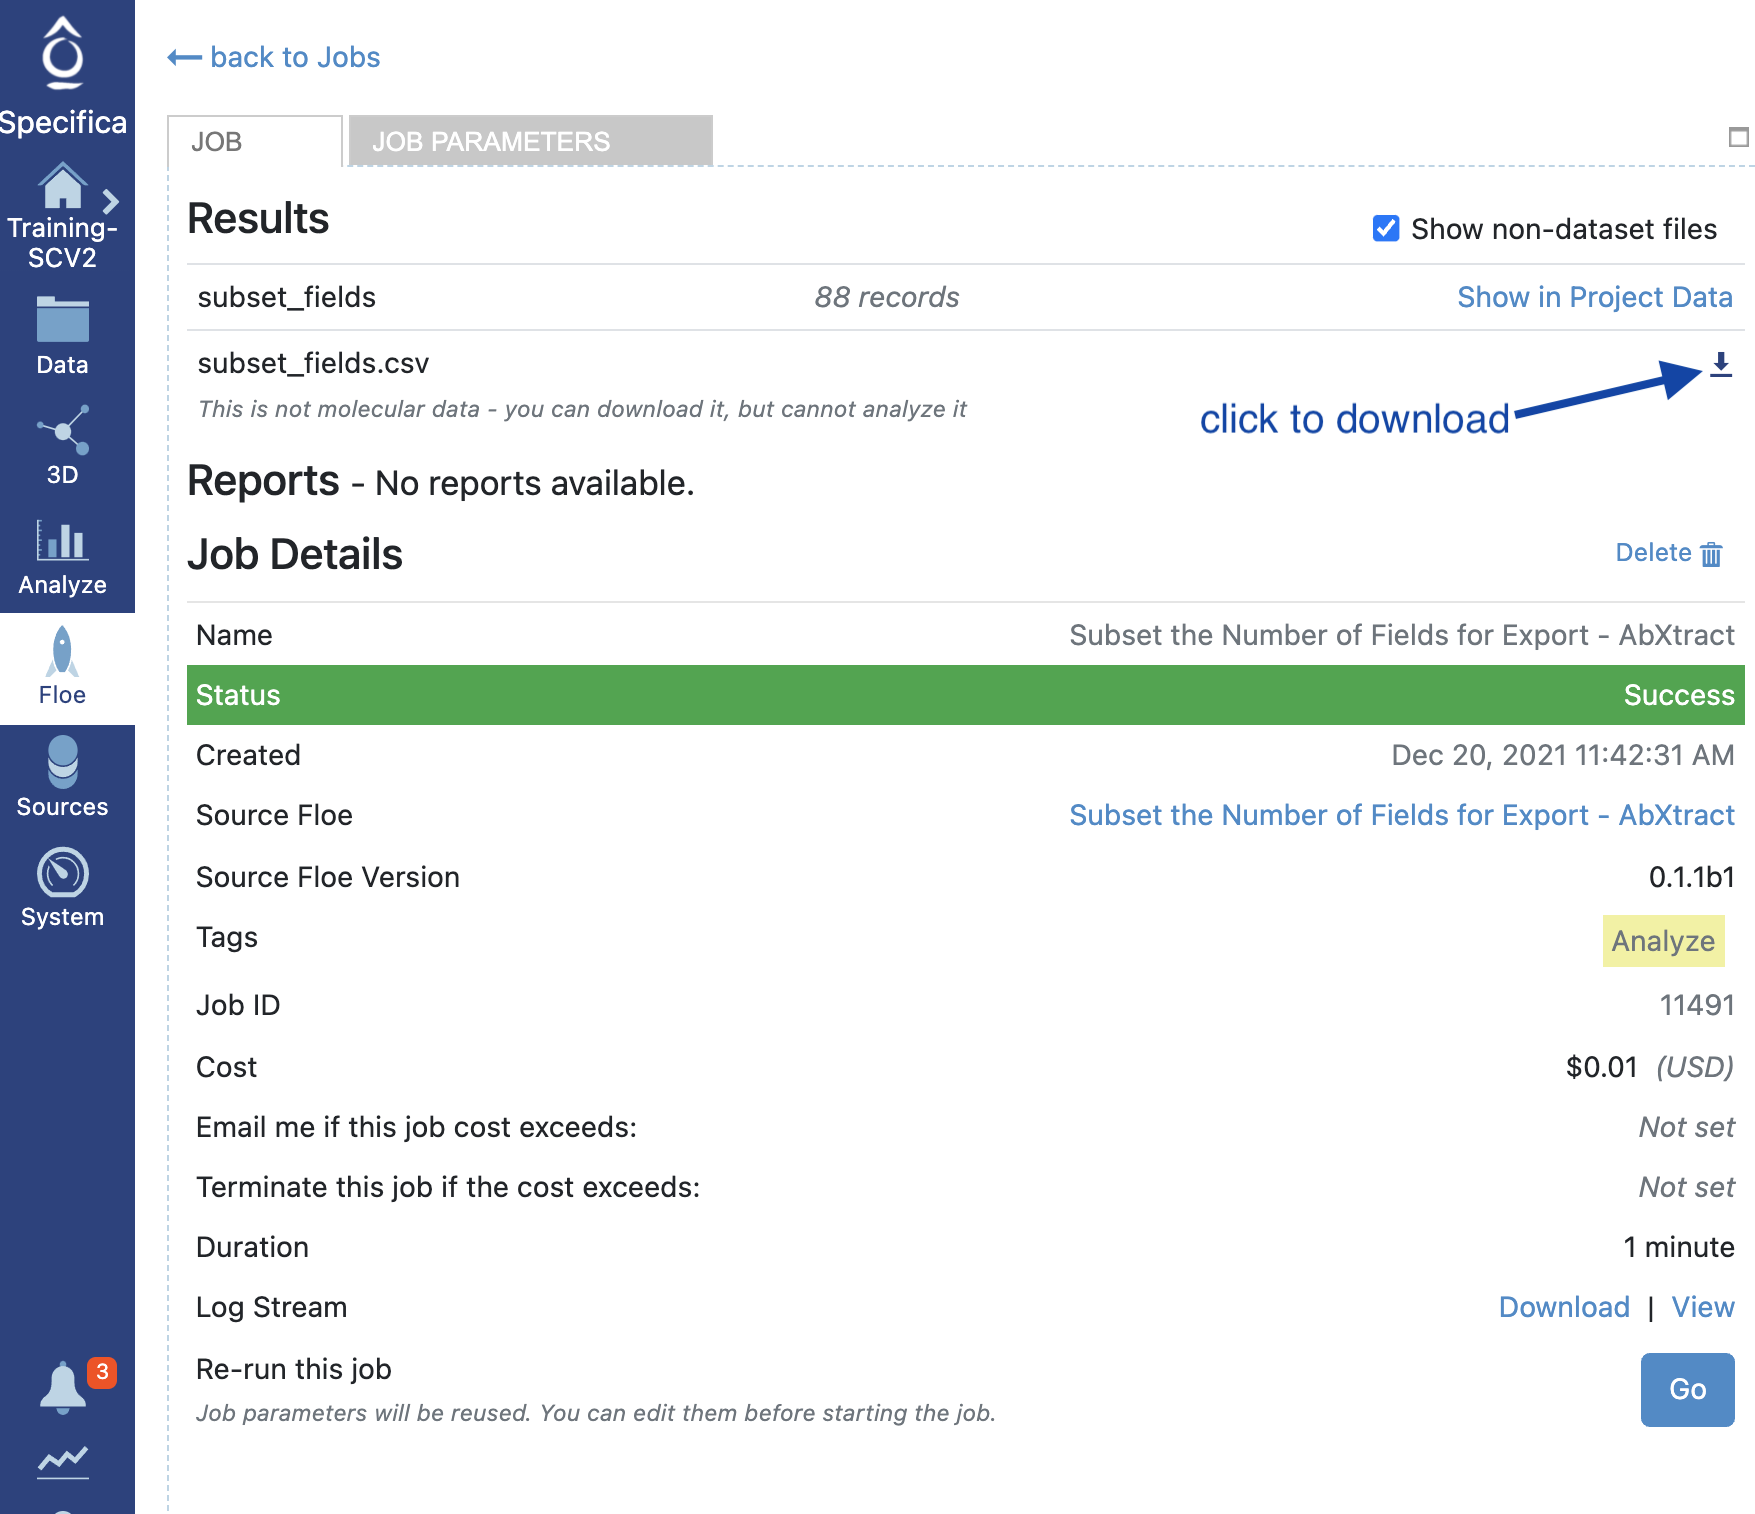
STEP 7 - Download the CSV
Click ‘Floe’ > ‘Jobs’ and identify the Job Name e.g., ‘Subset the Number of Fields for Export’.
Select the checkbox titled ‘Show non-dataset files’ and download the file.