Tutorial 4: NGS and Sanger Pipeline with Automated Top Lead Selection (Illumina), In-Vitro Library
Background
Find Background from Tutorial 1
This is one of the most comprehensive Floes available. The goal of this tutorial is to utilize the automated selection pipeline for lead selection using both NGS and Sanger datasets simultaneously, while using this with Illumina, as opposed to PacBio datasets. We will use the analyze tool to identify the overlap population (see description under overlap_population :) which includes the Sanger populations.
STEP 1 - Login to Orion, Set-Up Directory, Upload Files
Follow Step 1 from Tutorial 1, #1.
Log into the Orion interface with email and password. Find the 3 required files under Organization Data as follows:
A) Organization Data / OpenEye Data / Tutorial Data / AbXtract / F_illumina_codon_optimized_abxtract.fastqB) Organization Data / OpenEye Data / Tutorial Data / AbXtract / R_illumina_codon_optimized_abxtract.fastqC) Organization Data / OpenEye Data / Tutorial Data / AbXtract / barcode_file_abxtract.xlsxD) Organization Data / OpenEye Data / Tutorial Data / AbXtract / scaffold_ref_db_codon_optimized_dna.txtFind these two additional SANGER input files:
E) Organization Data / OpenEye Data / Tutorial Data / AbXtract / SANGER_aa.xlsxF) Organization Data / OpenEye Data / Tutorial Data / AbXtract / scaffold_ref_db_aa.txtCreate a general tutorial directory and tutorial 4 subdirectory under PROJECT DIRECTORY / TUTORIALS / TUTORIAL_4 (This is your BASE DIRECTORY and should be used for all outputs for this Tutorial 4 below).
STEP 2 - Select the ‘NGS and Sanger Pipeline with Automated Top Lead Selection’ Floe
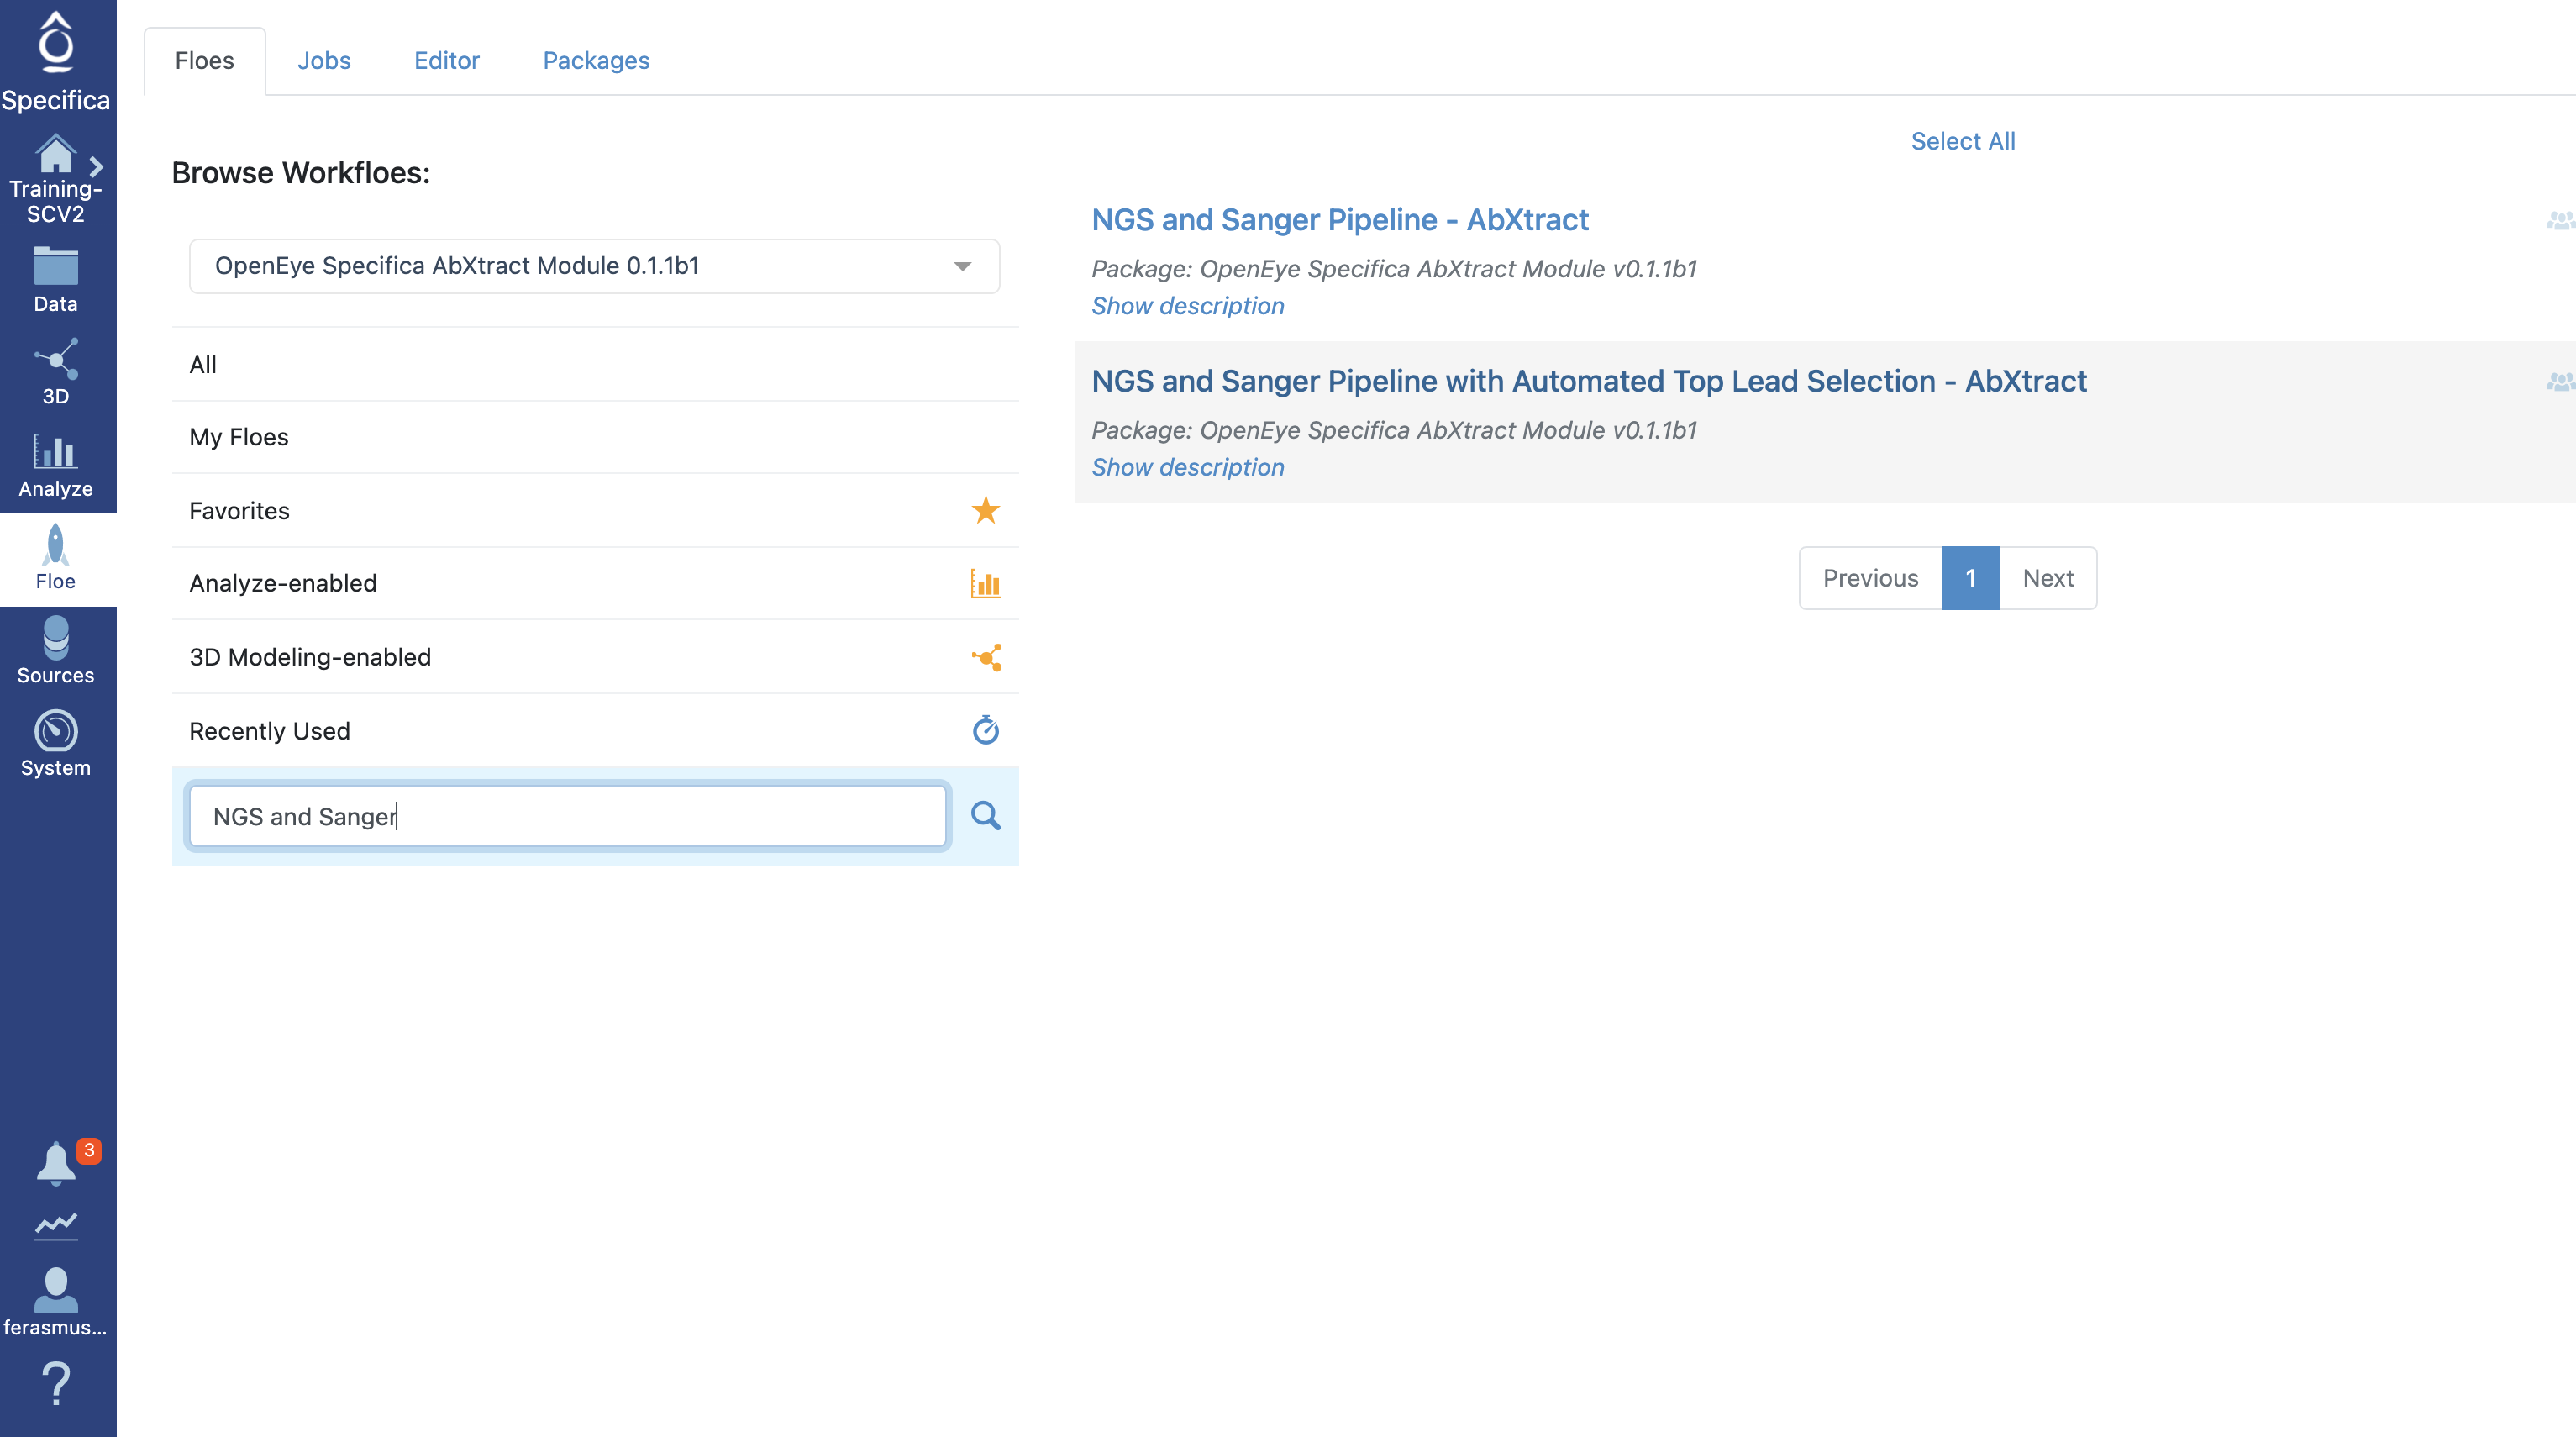
Select the tab along the left side tab titled ‘Floe’.
Click the ‘Floes’ tab.
Choose the ‘OpenEye Specifica AbXtract Module’.
Select the Floe ‘NGS and Sanger Pipeline with Automated Top Lead Selection’.
STEP 3 - Prepare Sanger Files
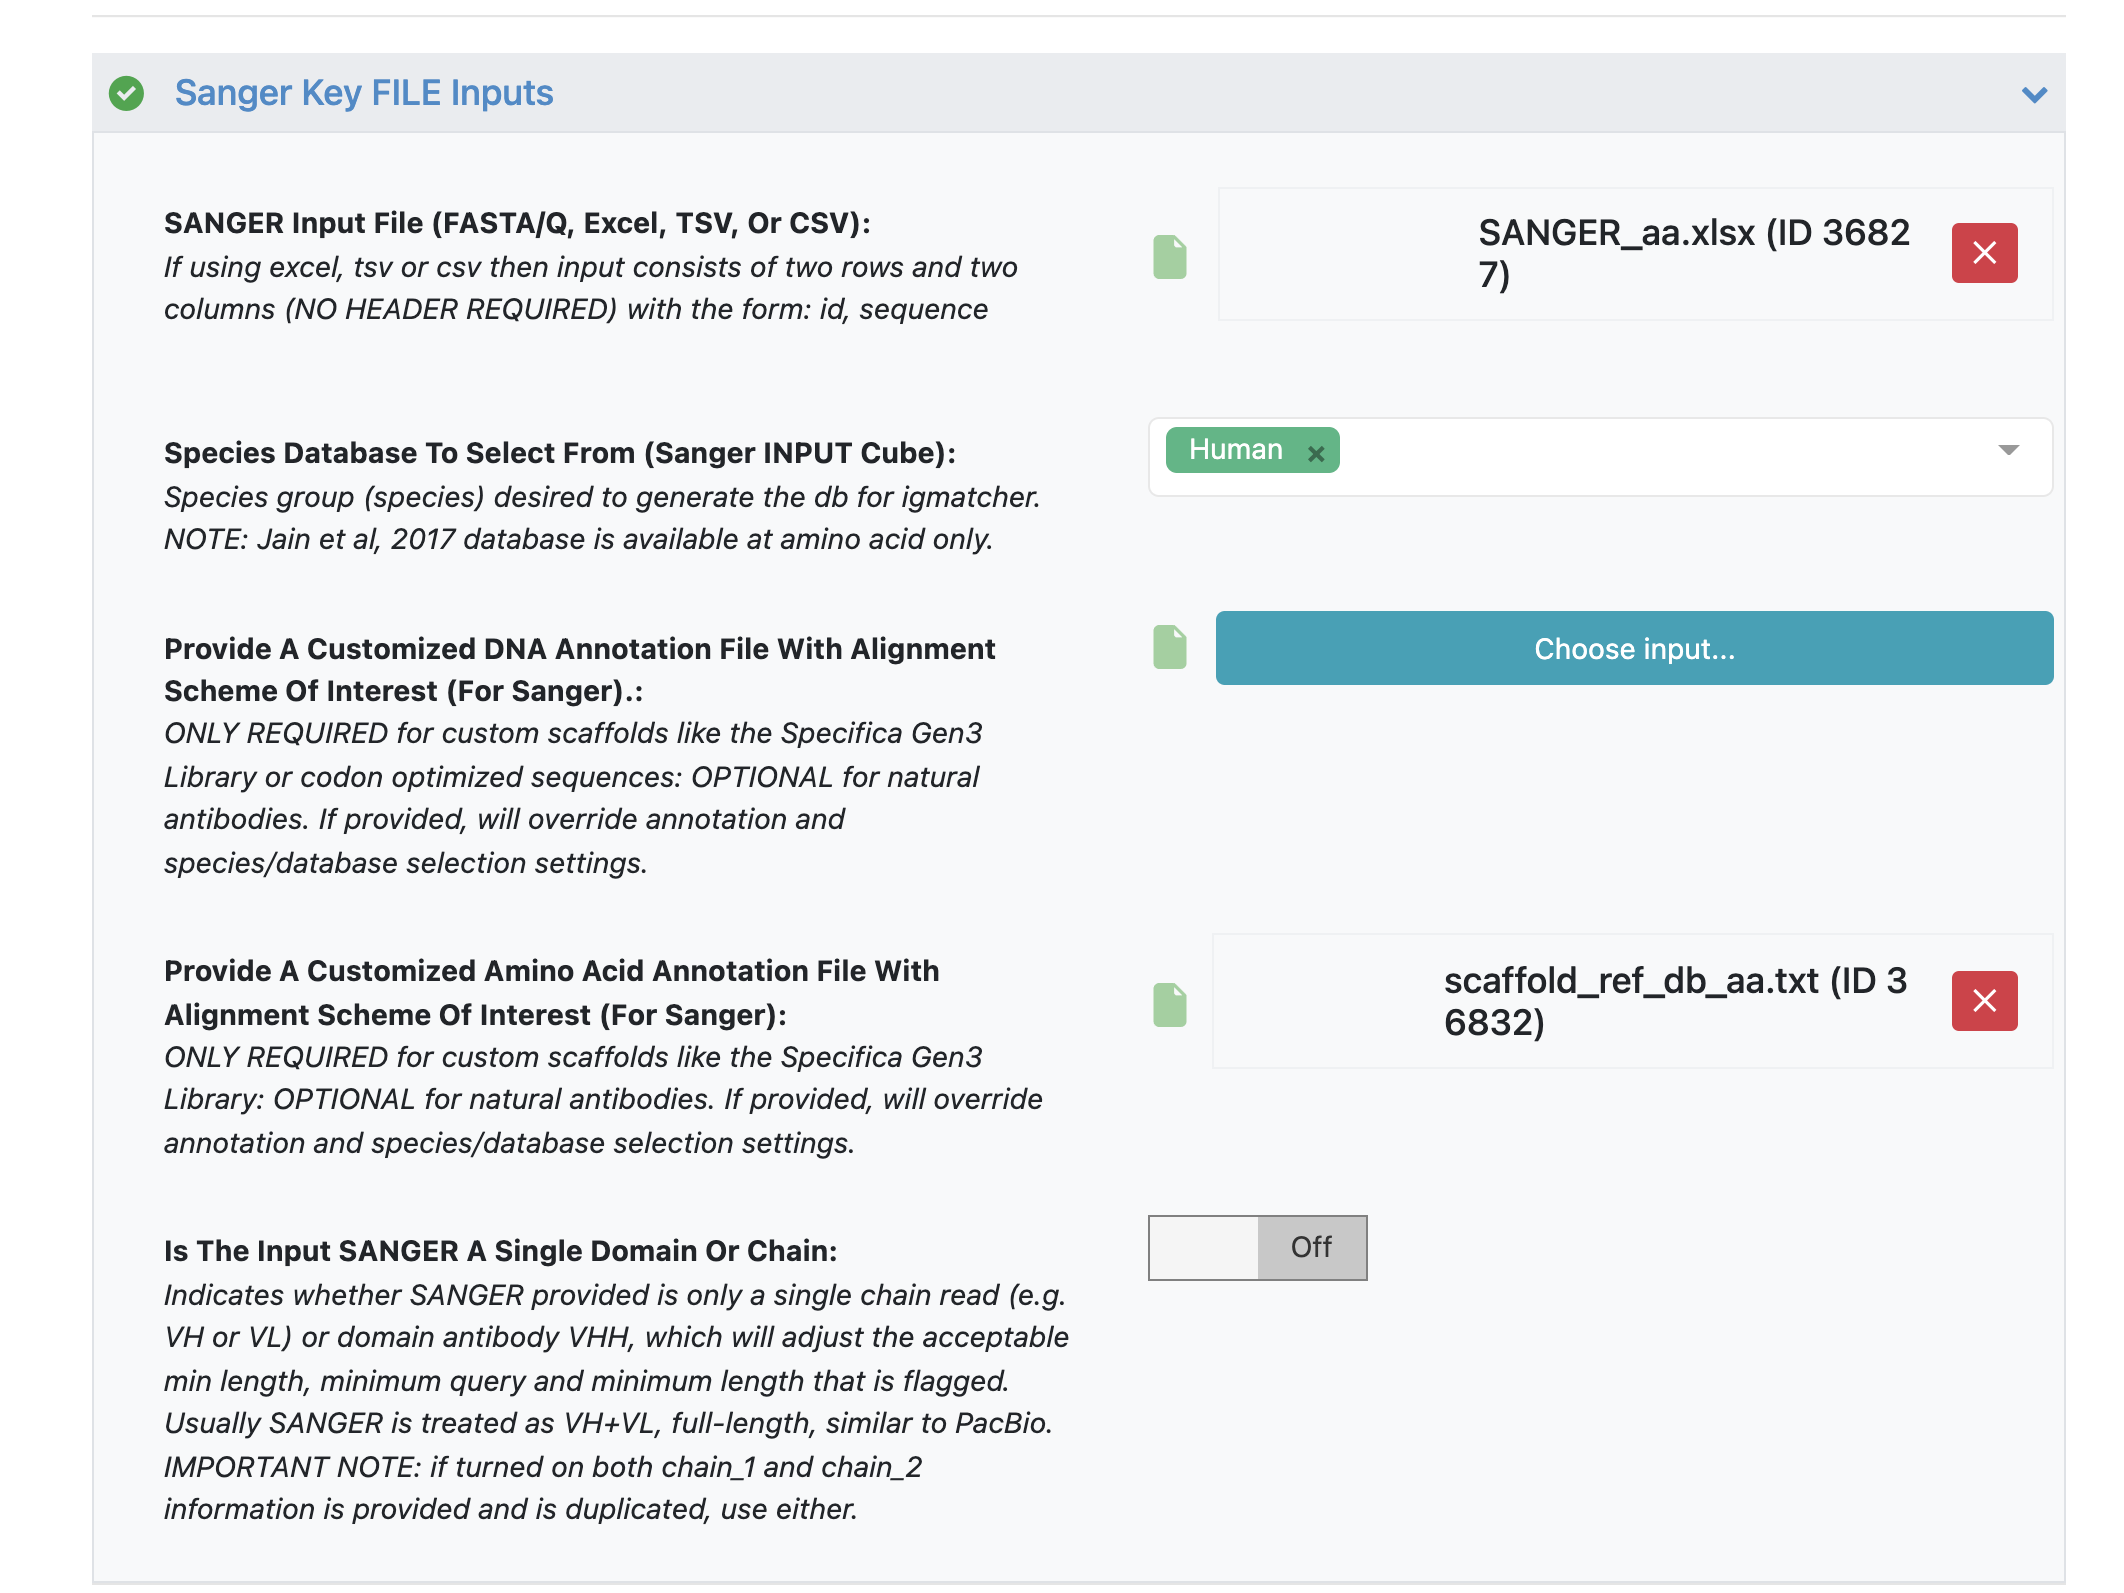
Under the ‘Sanger Key FILE Inputs’ load ‘SANGER Input File’ - ‘SANGER_aa.xlsx’.
Under parameter option ‘Provide A Customized Amino Acid Annotation File With Alignment Scheme Of Interest’ load the annotation file - ‘scaffold_ref_db_aa.txt’.
Important Note
While amino acid sequences work well with the reference database using ‘human’ input, we will still load a custom annotation file to get desired scaffold name for input that matches names used in the custom DNA annotation file ‘scaffold_ref_db_codon_optimized_dna.txt’.
STEP 4 - Prepare Illumina Files and Start Job
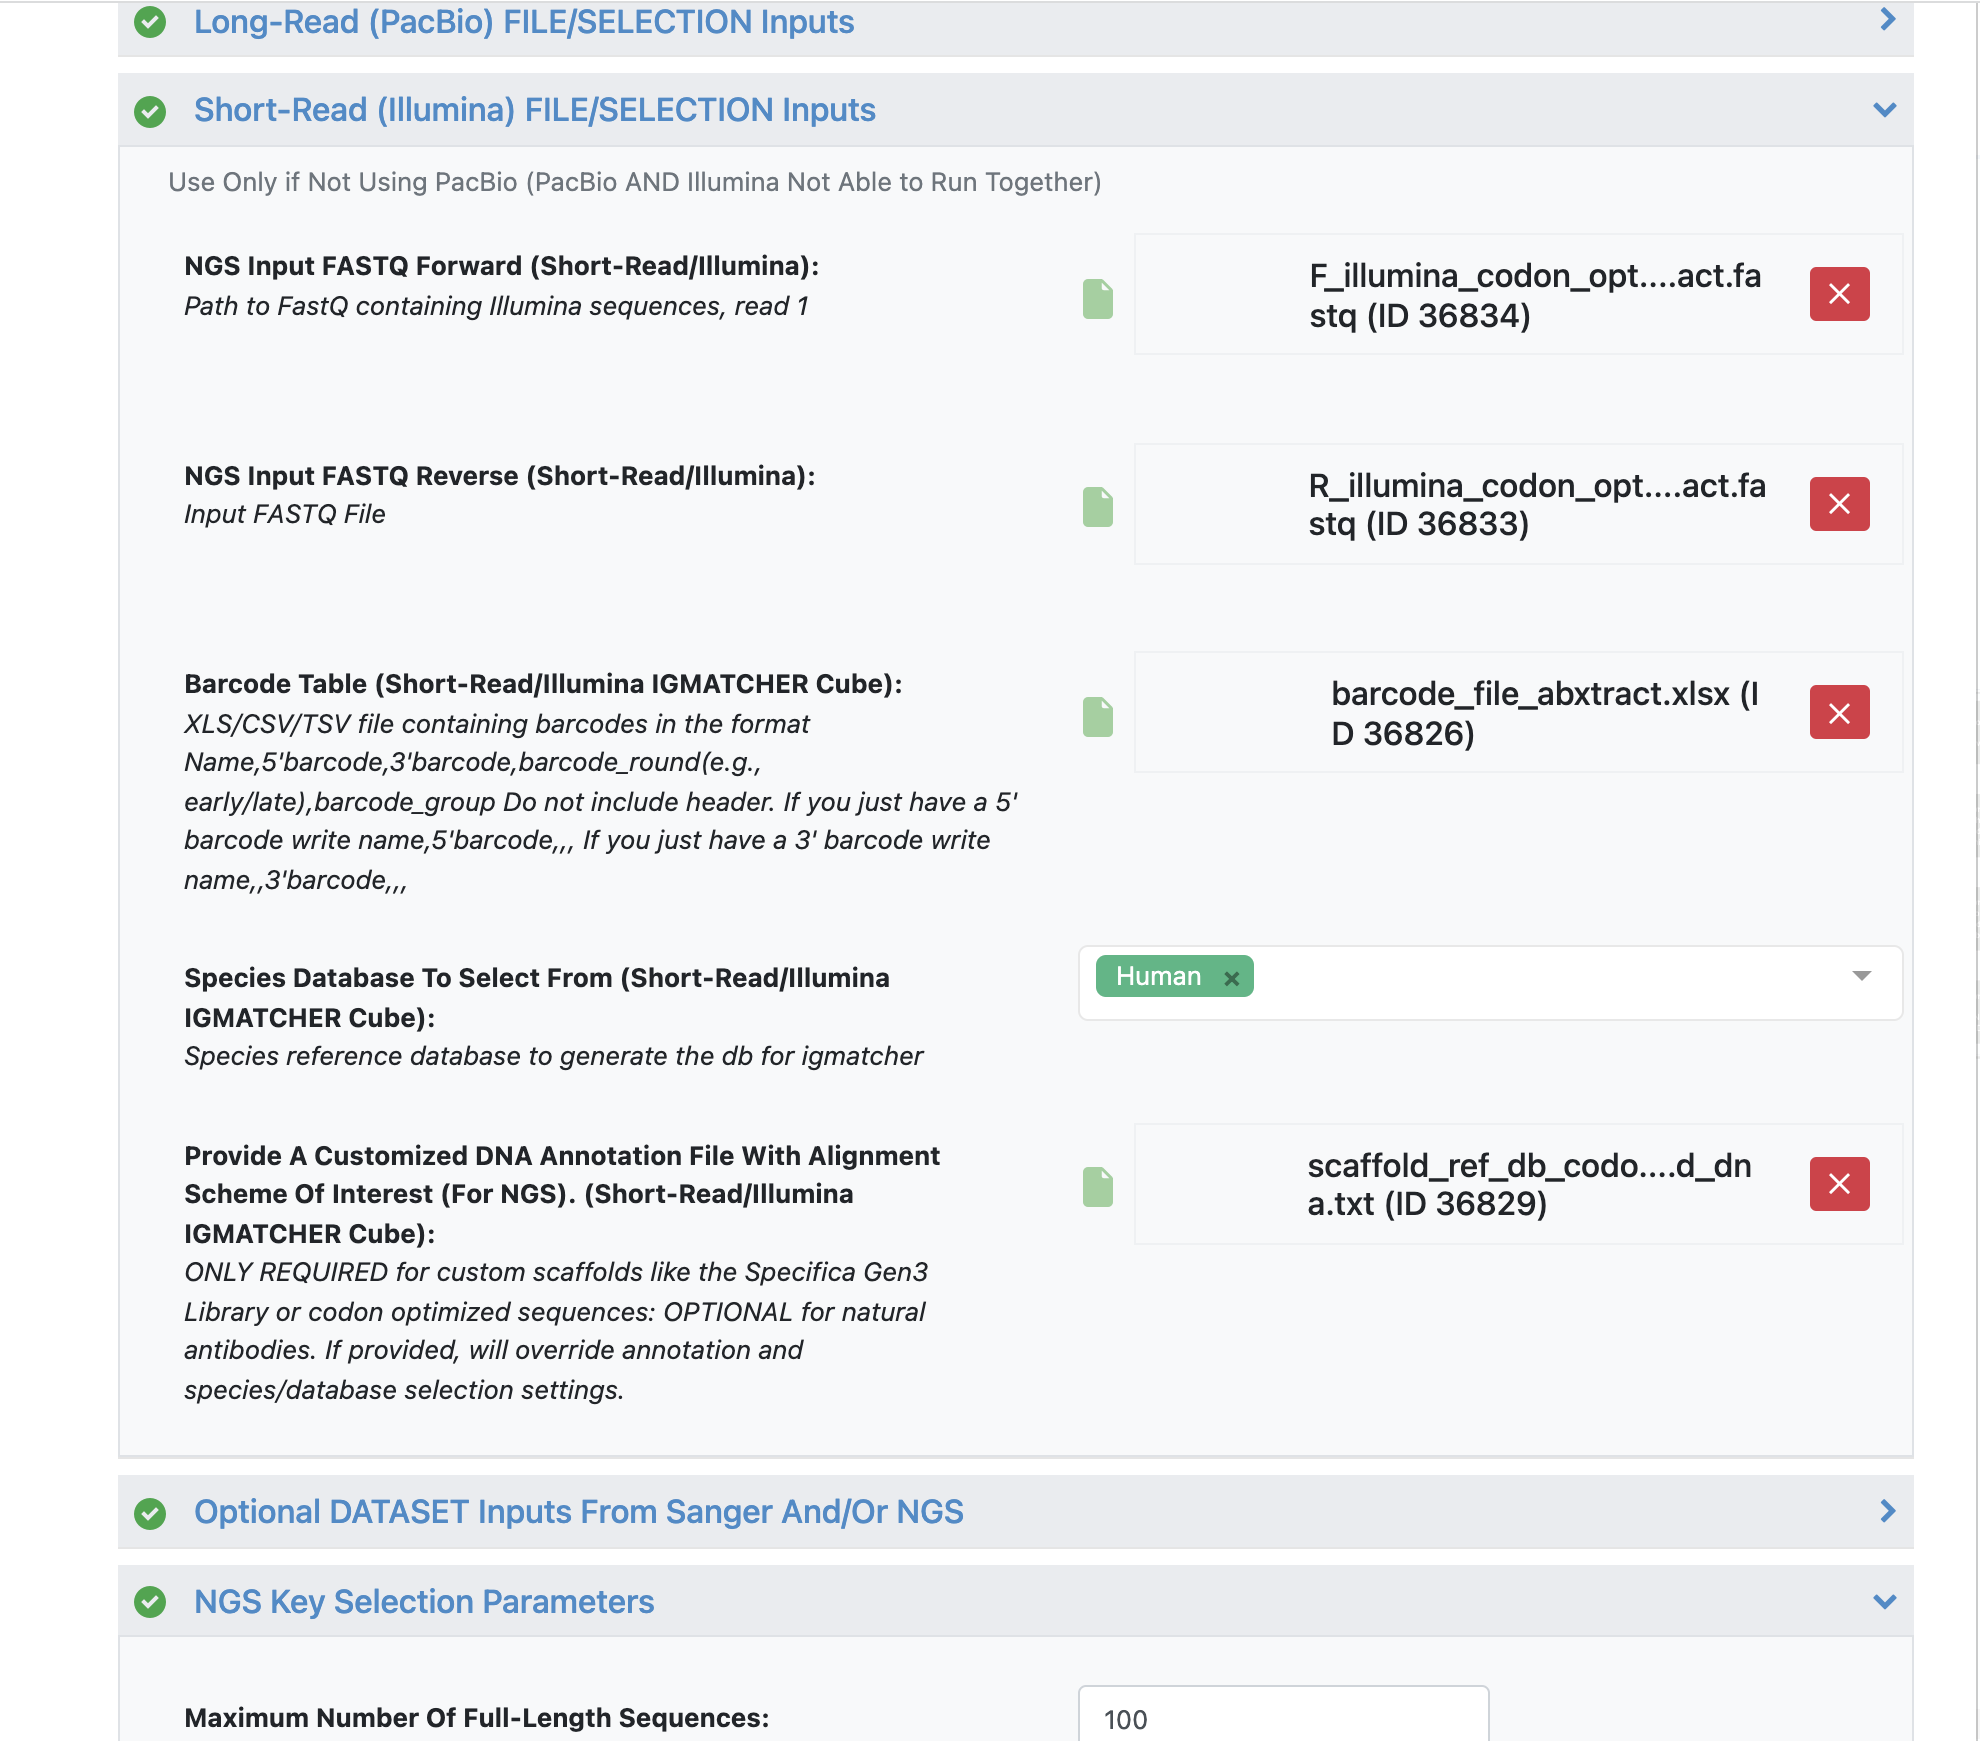
NGS Input FASTQ Forward - ‘F_illumina_codon_optimized_abxtract.fastq’.
NGS Input FASTQ Reverse - ‘R_illumina_codon_optimized_abxtract.fastq’.
Load barcode XLSX file - ‘barcode_file_abxtract.xlsx’.
Load alignment TXT file - ‘scaffold_ref_db_codon_optimized_dna.txt’.
Important Note
All the remaining parameters can be kept as the default values. Scroll through remaining “Promoted” parameters to get a sense of these parameters.
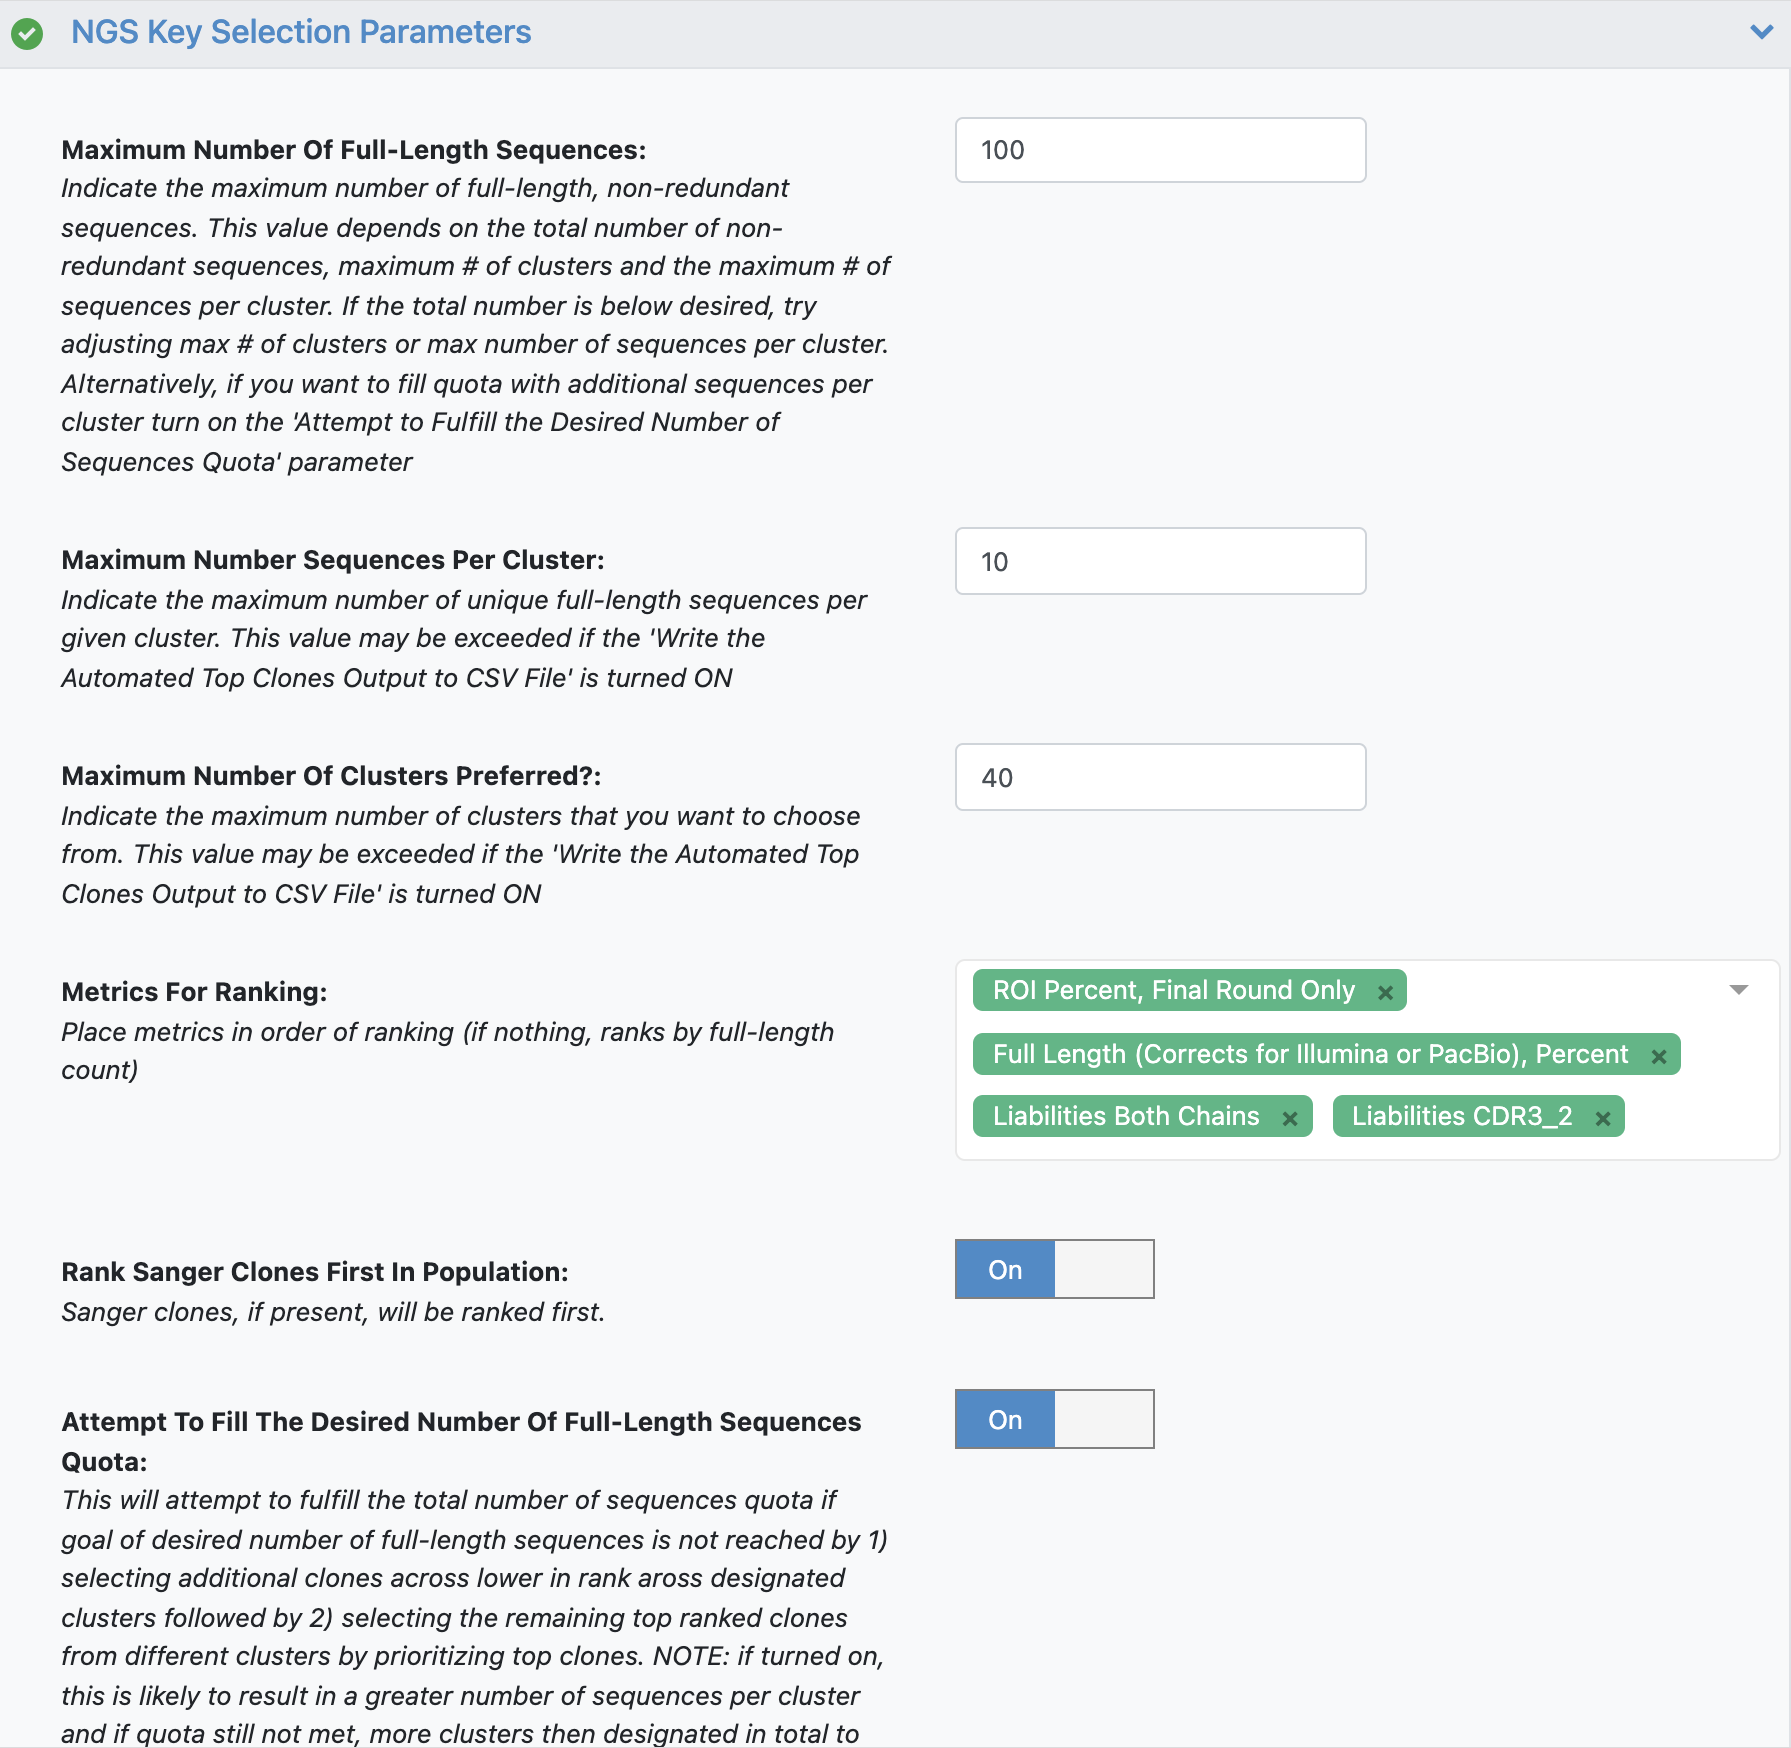
See tutorial 2 automated selection options for more details. Note the additional parameter:
Important Note
The additional parameter ‘Rank Sanger Clones First In Population’ will prioritize any clones identified by Sanger input by identifying clusters associated with these Sanger clones. The automated selection will still select across clusters but will place any Sanger clones at the top of the Metrics For Ranking list.
Click ‘Start Job’.
Follow the same instructions from tutorial 3, starting from STEP 5 onward