Search for Similar Binding Sites with SiteHopper
SiteHopper is a tool to superpose and compare protein binding sites. The input is a protein-ligand (or apo) complex where the binding site is converted to a searchable site called a patch. SiteHopper can efficiently compare this patch to other binding site patches, which are stored in a pre-generated database.
A search for similar binding sites can be useful for a number of different reasons, two of which are:
A similar binding site in a related or unrelated protein can indicate possible off-target risks. Finding and comparing these binding sites can be helpful for improving compound selectivity.
A ligand from a similar binding site can potentially be used as a tool compound or as an early stage hit for a target. Especially interesting are results where the binding site similarity is high while the ligand similarity is low - think of this as scaffold hopping based on binding site similarity.
In this tutorial, a dataset of binding site patches will be searched with a query structure from the CDK2 target using the SiteHopper Search Floe. The results will be visualized in both the Analyze page and the 3D viewer. The patch database preparation should only be run once and is afterwards shareable with others, and we have shipped a couple of large searchable databases as well.
This tutorial uses the following Floes
Create a Tutorial Project
Note
If you have already created a tutorial project, you can reuse the existing one.
Log into Orion and click the home button at the top of the blue ribbon on the left of the Orion Interface. Then click on the ‘Create New Project’ button and in the pop up window enter Tutorial for the name of the project and click ‘Save’.
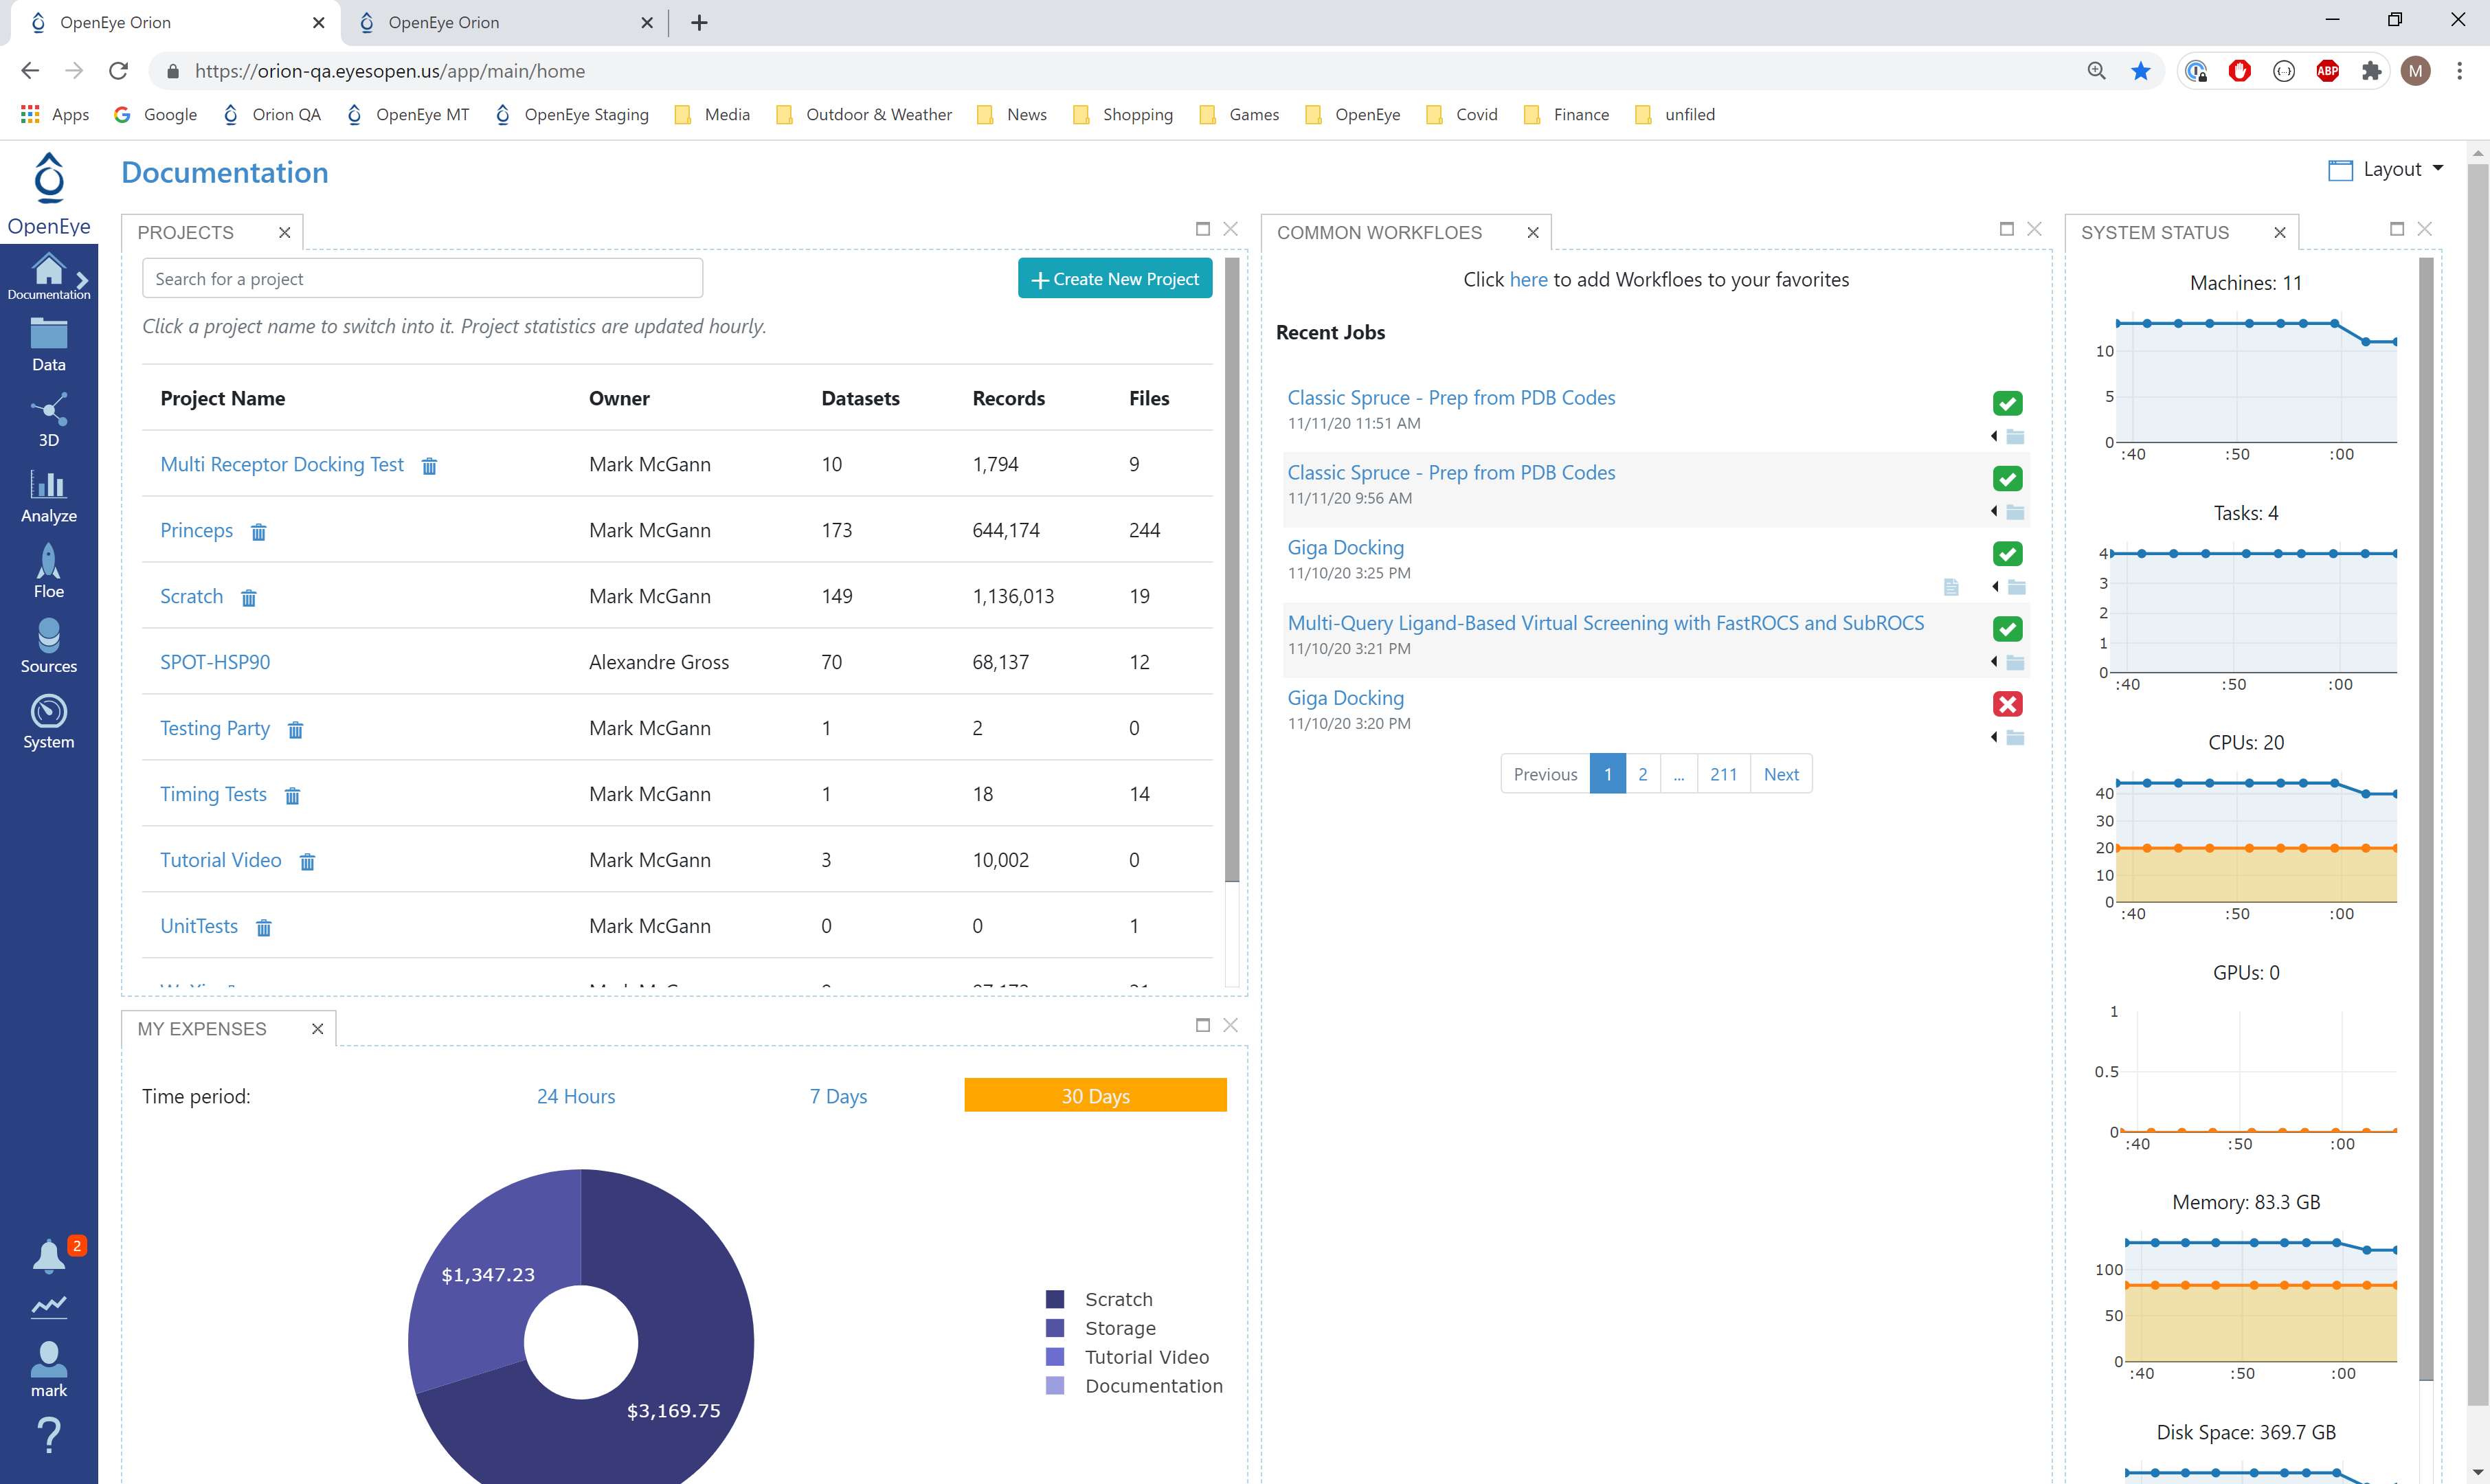
Orion home page
Prepare Patch Dataset
Note
If you have already created a patch collection, you can reuse it for search. OpenEye has pre-generated collections that uses design units in MMDS that are converted into SiteHopper searchable collections. The first collections contains patches from prepared design units using the ~107k PDB structures in the Guide to Pharmacology and other uncategorized MMDS target families; with biological unit expansion and alternate conformation enumeration that turns into over 200k prepared design units. A second collection of potential sites and alternate pockets has also been built that is just over 2 million patches.
OEDesignUnits must be converted to SiteHopper patches before they can be searched. The Make SiteHopper Patch Database Floe creates a searchable SiteHopper Collection and accepts design units prepared using the Spruce - Protein Preparation Floes.
Locate the Make SiteHopper Patch Database Floe as follows:
Click on the ‘Floes’ button in the left menu bar
Click on the ‘Floes’ tab
Set the ‘Browse Workfloes’ drop down menu to ‘Show all packages’
Select ‘All’ under Browse Workfloes
In the search bar enter Make SiteHopper Patch Database
The Make SiteHopper Patch Database floe will be visible to the right (see below)
Click on the Make SiteHopper Patch Database Floe to bring up the Job Form and set the following parameters.
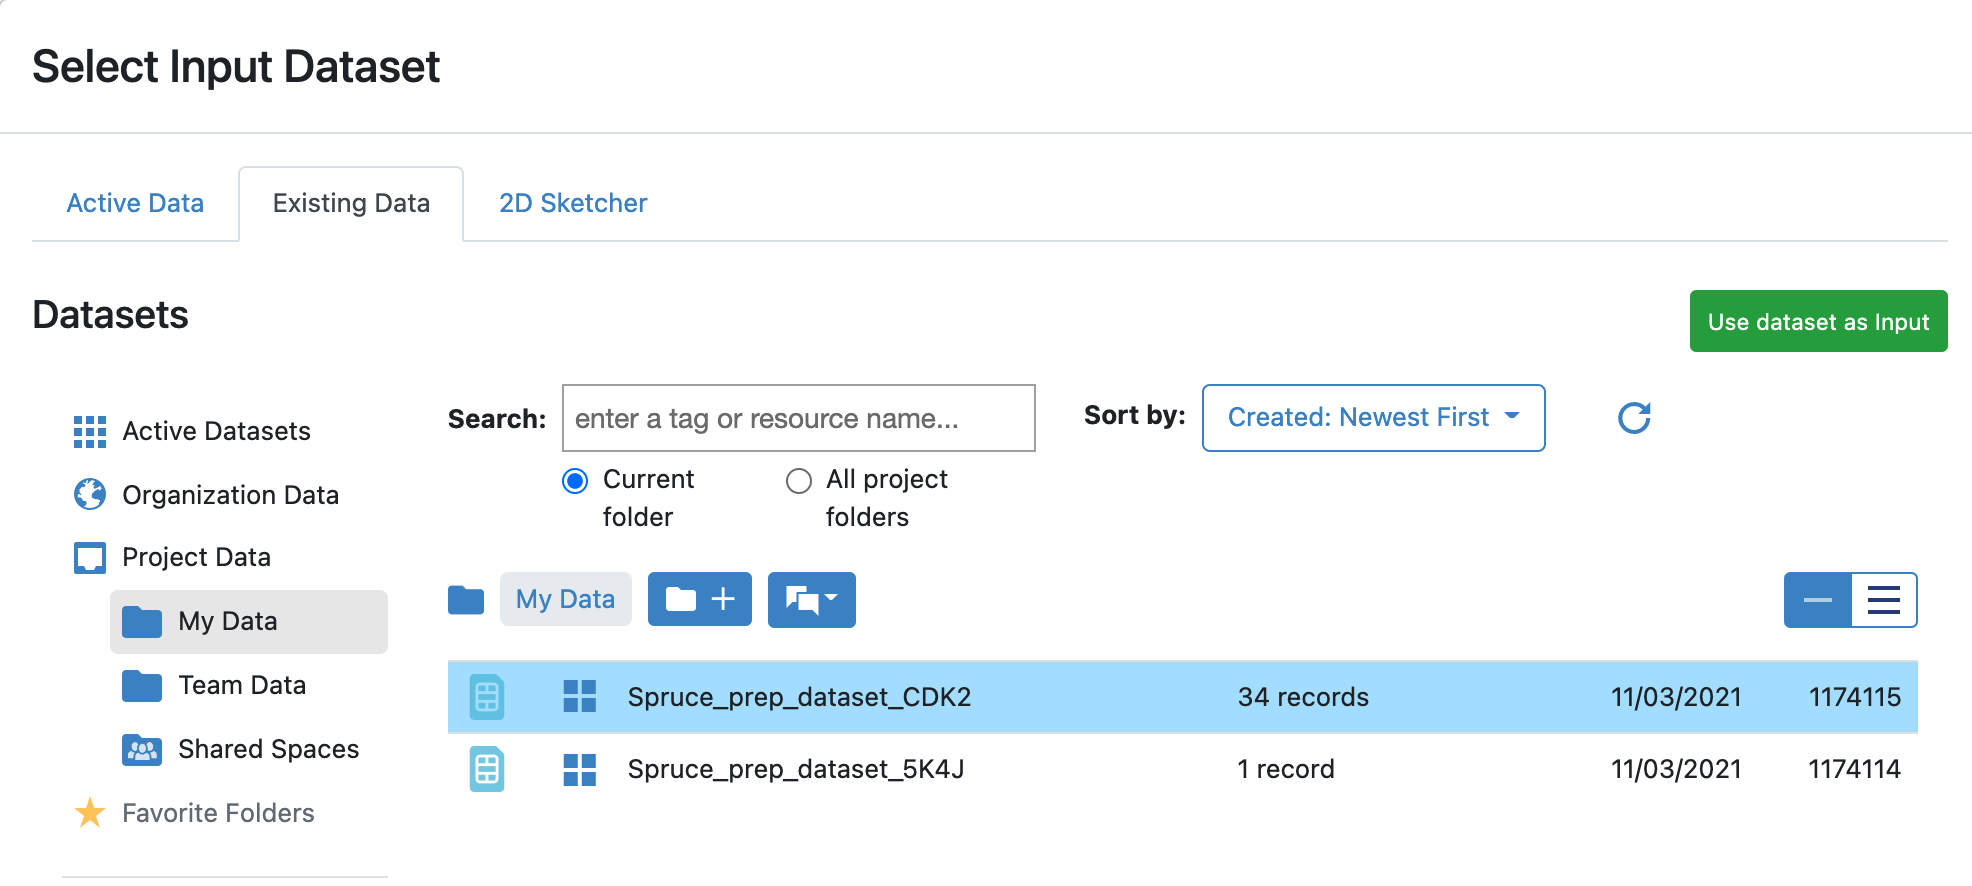
Inputs -> Input Dataset : Spruce_prep_dataset_CDK2.
To select this collection:
Click the ‘Choose Input Button’.
Click on ‘<Organization> Data’ under collections in the Select Input Collection modal. <Organization> is the name of your company/entity/organization. This name is set during Orion installation or configuration; however, an Organization admin can also change the name.
Select the Spruce Prep Dataset CDK2 dataset.
Click ‘Use Dataset as Input’.
Outputs
Type or enter CDK2 Patch DB Collection in the Collection Name output field.
Type or enter Failed Patch Dataset in the Failed Output Dataset output field.
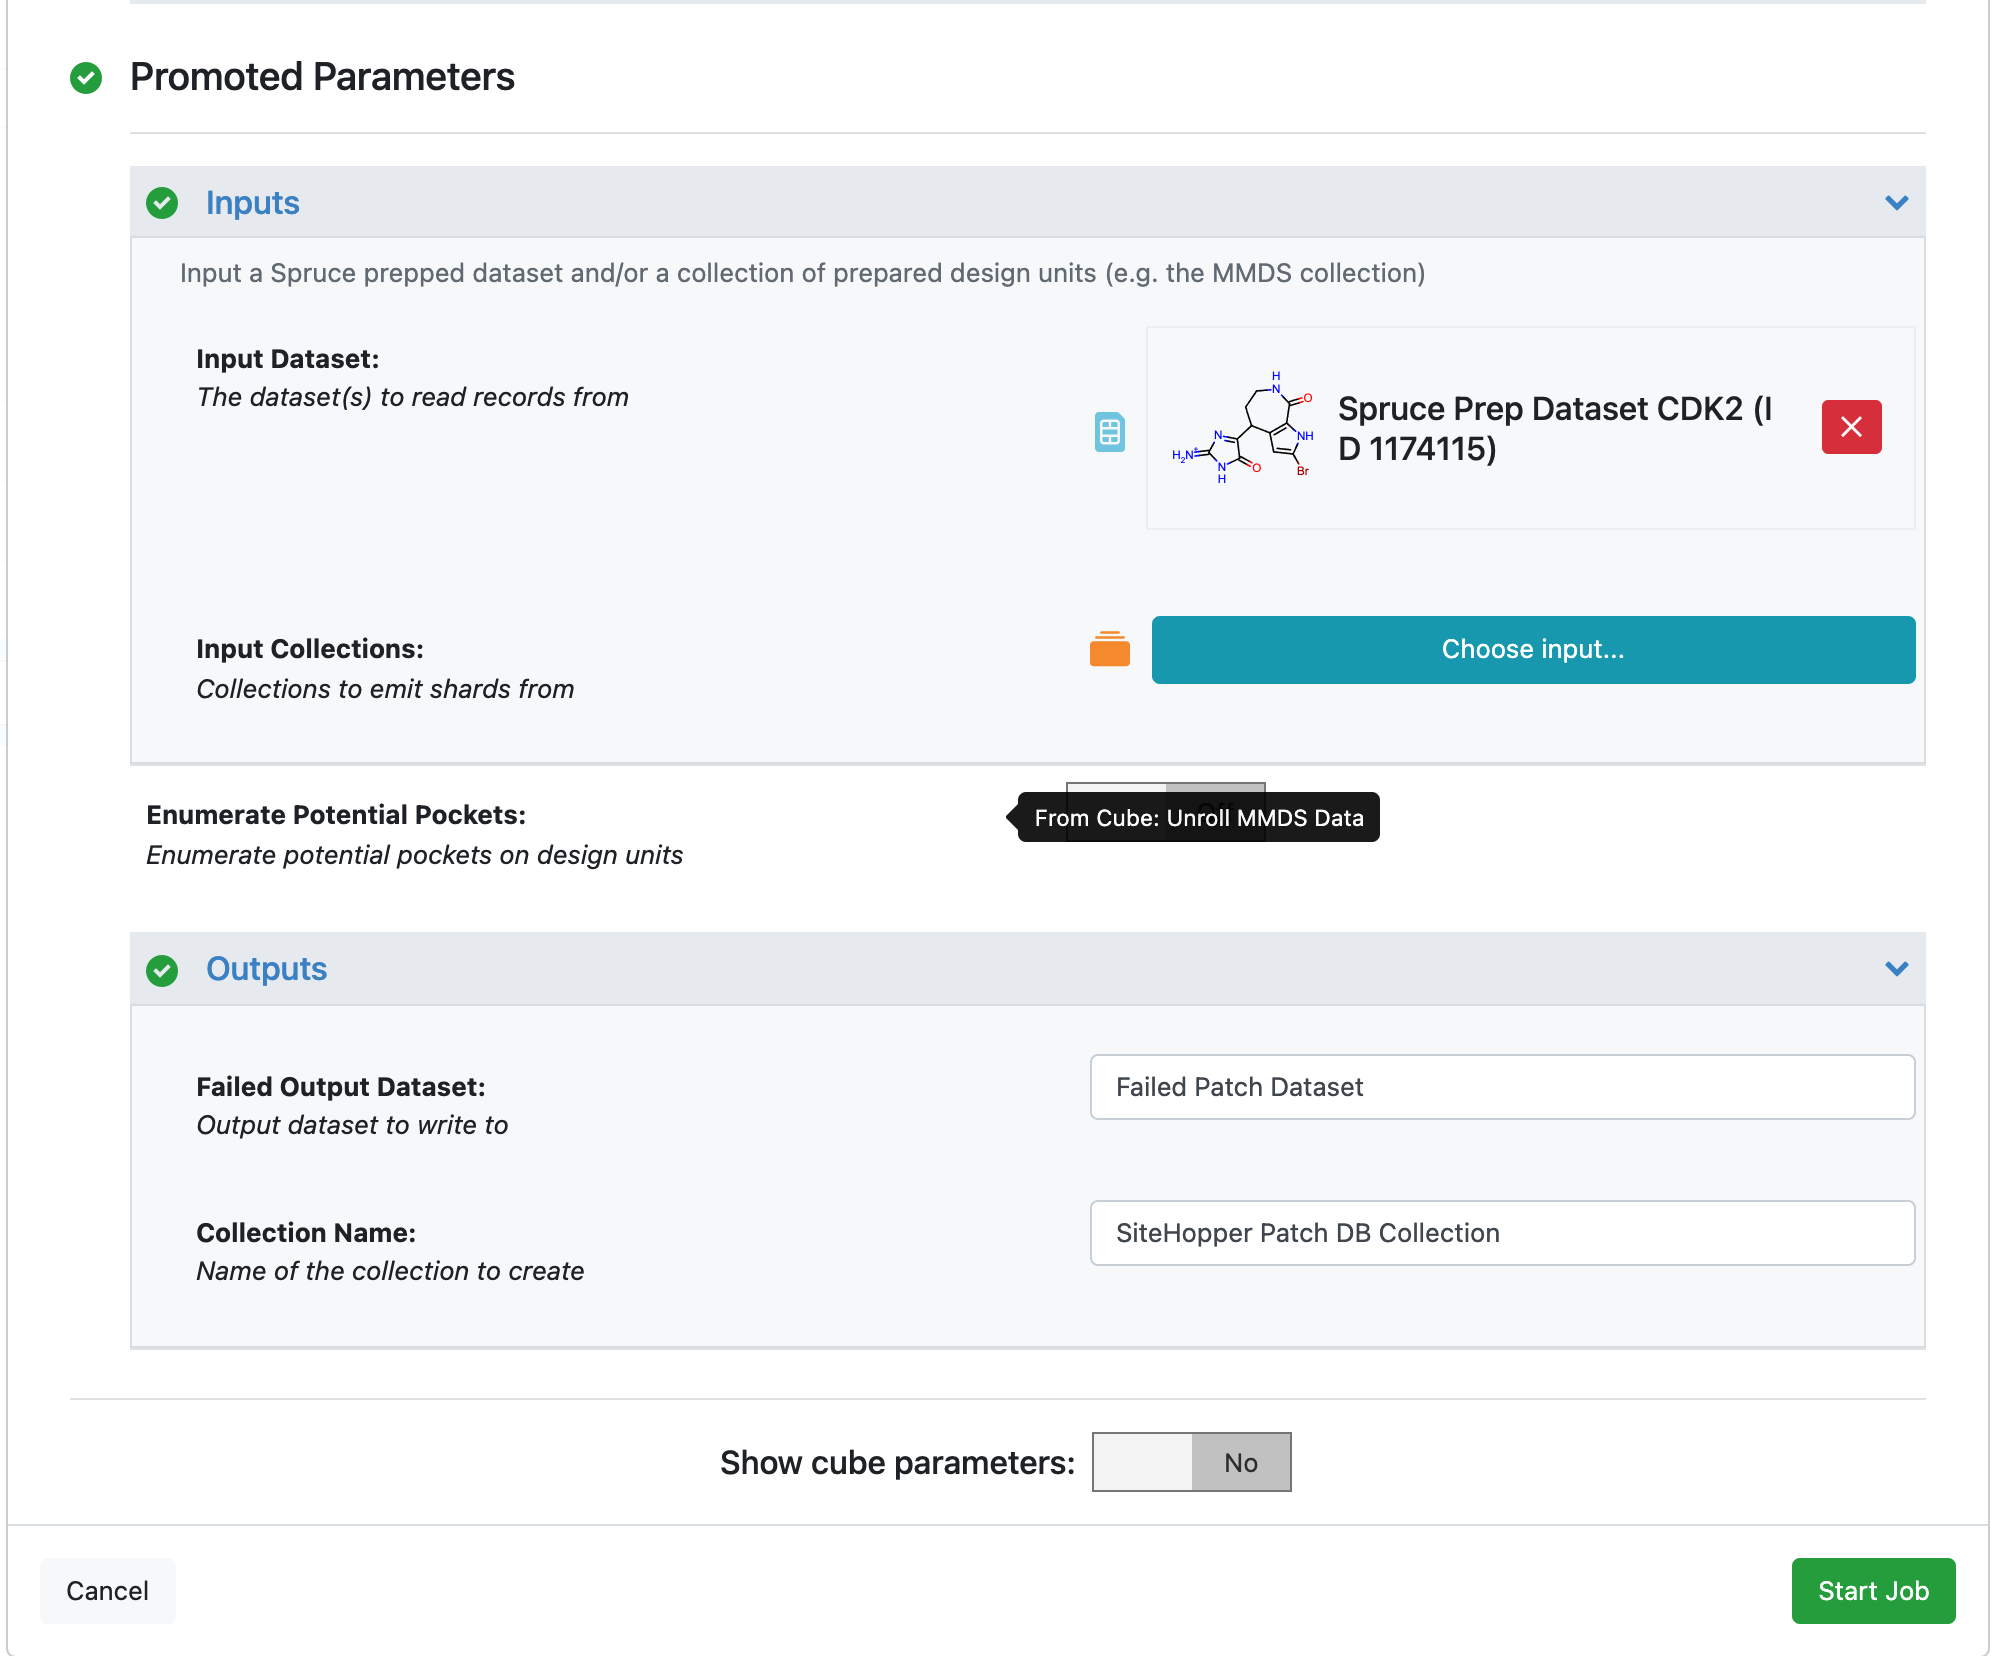
Scroll down to the bottom of the Job Form and click ‘Start Job’. The job will take about 5 minutes to run. Once the Floe has finished, move on to the next step of the tutorial.
Note
Switching Enumerate Potential Pockets to On creates a SiteHopper Database collection where liganded sites are skipped, but other potential binding sites are enumerated using pocket finding tools.
Prepare Query Protein
For this tutorial, use the CDK2 crystal structure 5K4J from the protein data bank. To import this structure into Orion and prepare it for docking, locate the SPRUCE - Protein Preparation in the Floes page as follows.
There is a tutorial detailing using that Floe here: Spruce Prep Tutorial.
This dataset can also be used as a reference against a list of other PDB codes, which is how the demo dataset Spruce_prep_dataset_CDK2 was created.
View Prepared Site
Once the Spruce - Protein Preparation job finishes, make the resulting dataset active as follows:
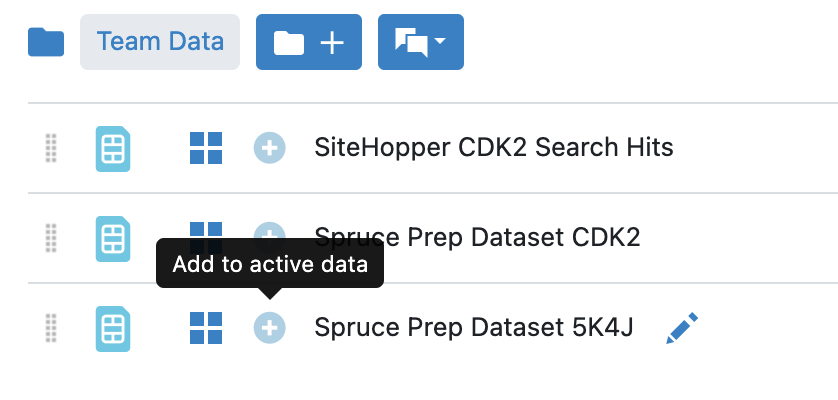
Go to the Project Data page by clicking on the blue Data button on the left menu bar.
Select ‘Organization Data’ from the list of options to the left of the page.
Set the ‘Type’ drop down menu to Datasets if it is not already.
Check to make sure you have no datasets set as active by clicking on ‘Active Datasets’ in the top right of the window.
Locate the dataset named Spruce_prep_dataset_5K4J and make it active by clicking on the Dataset Activation button in the ‘Active’ column next to the Spruce_prep_dataset_5K4J dataset name.
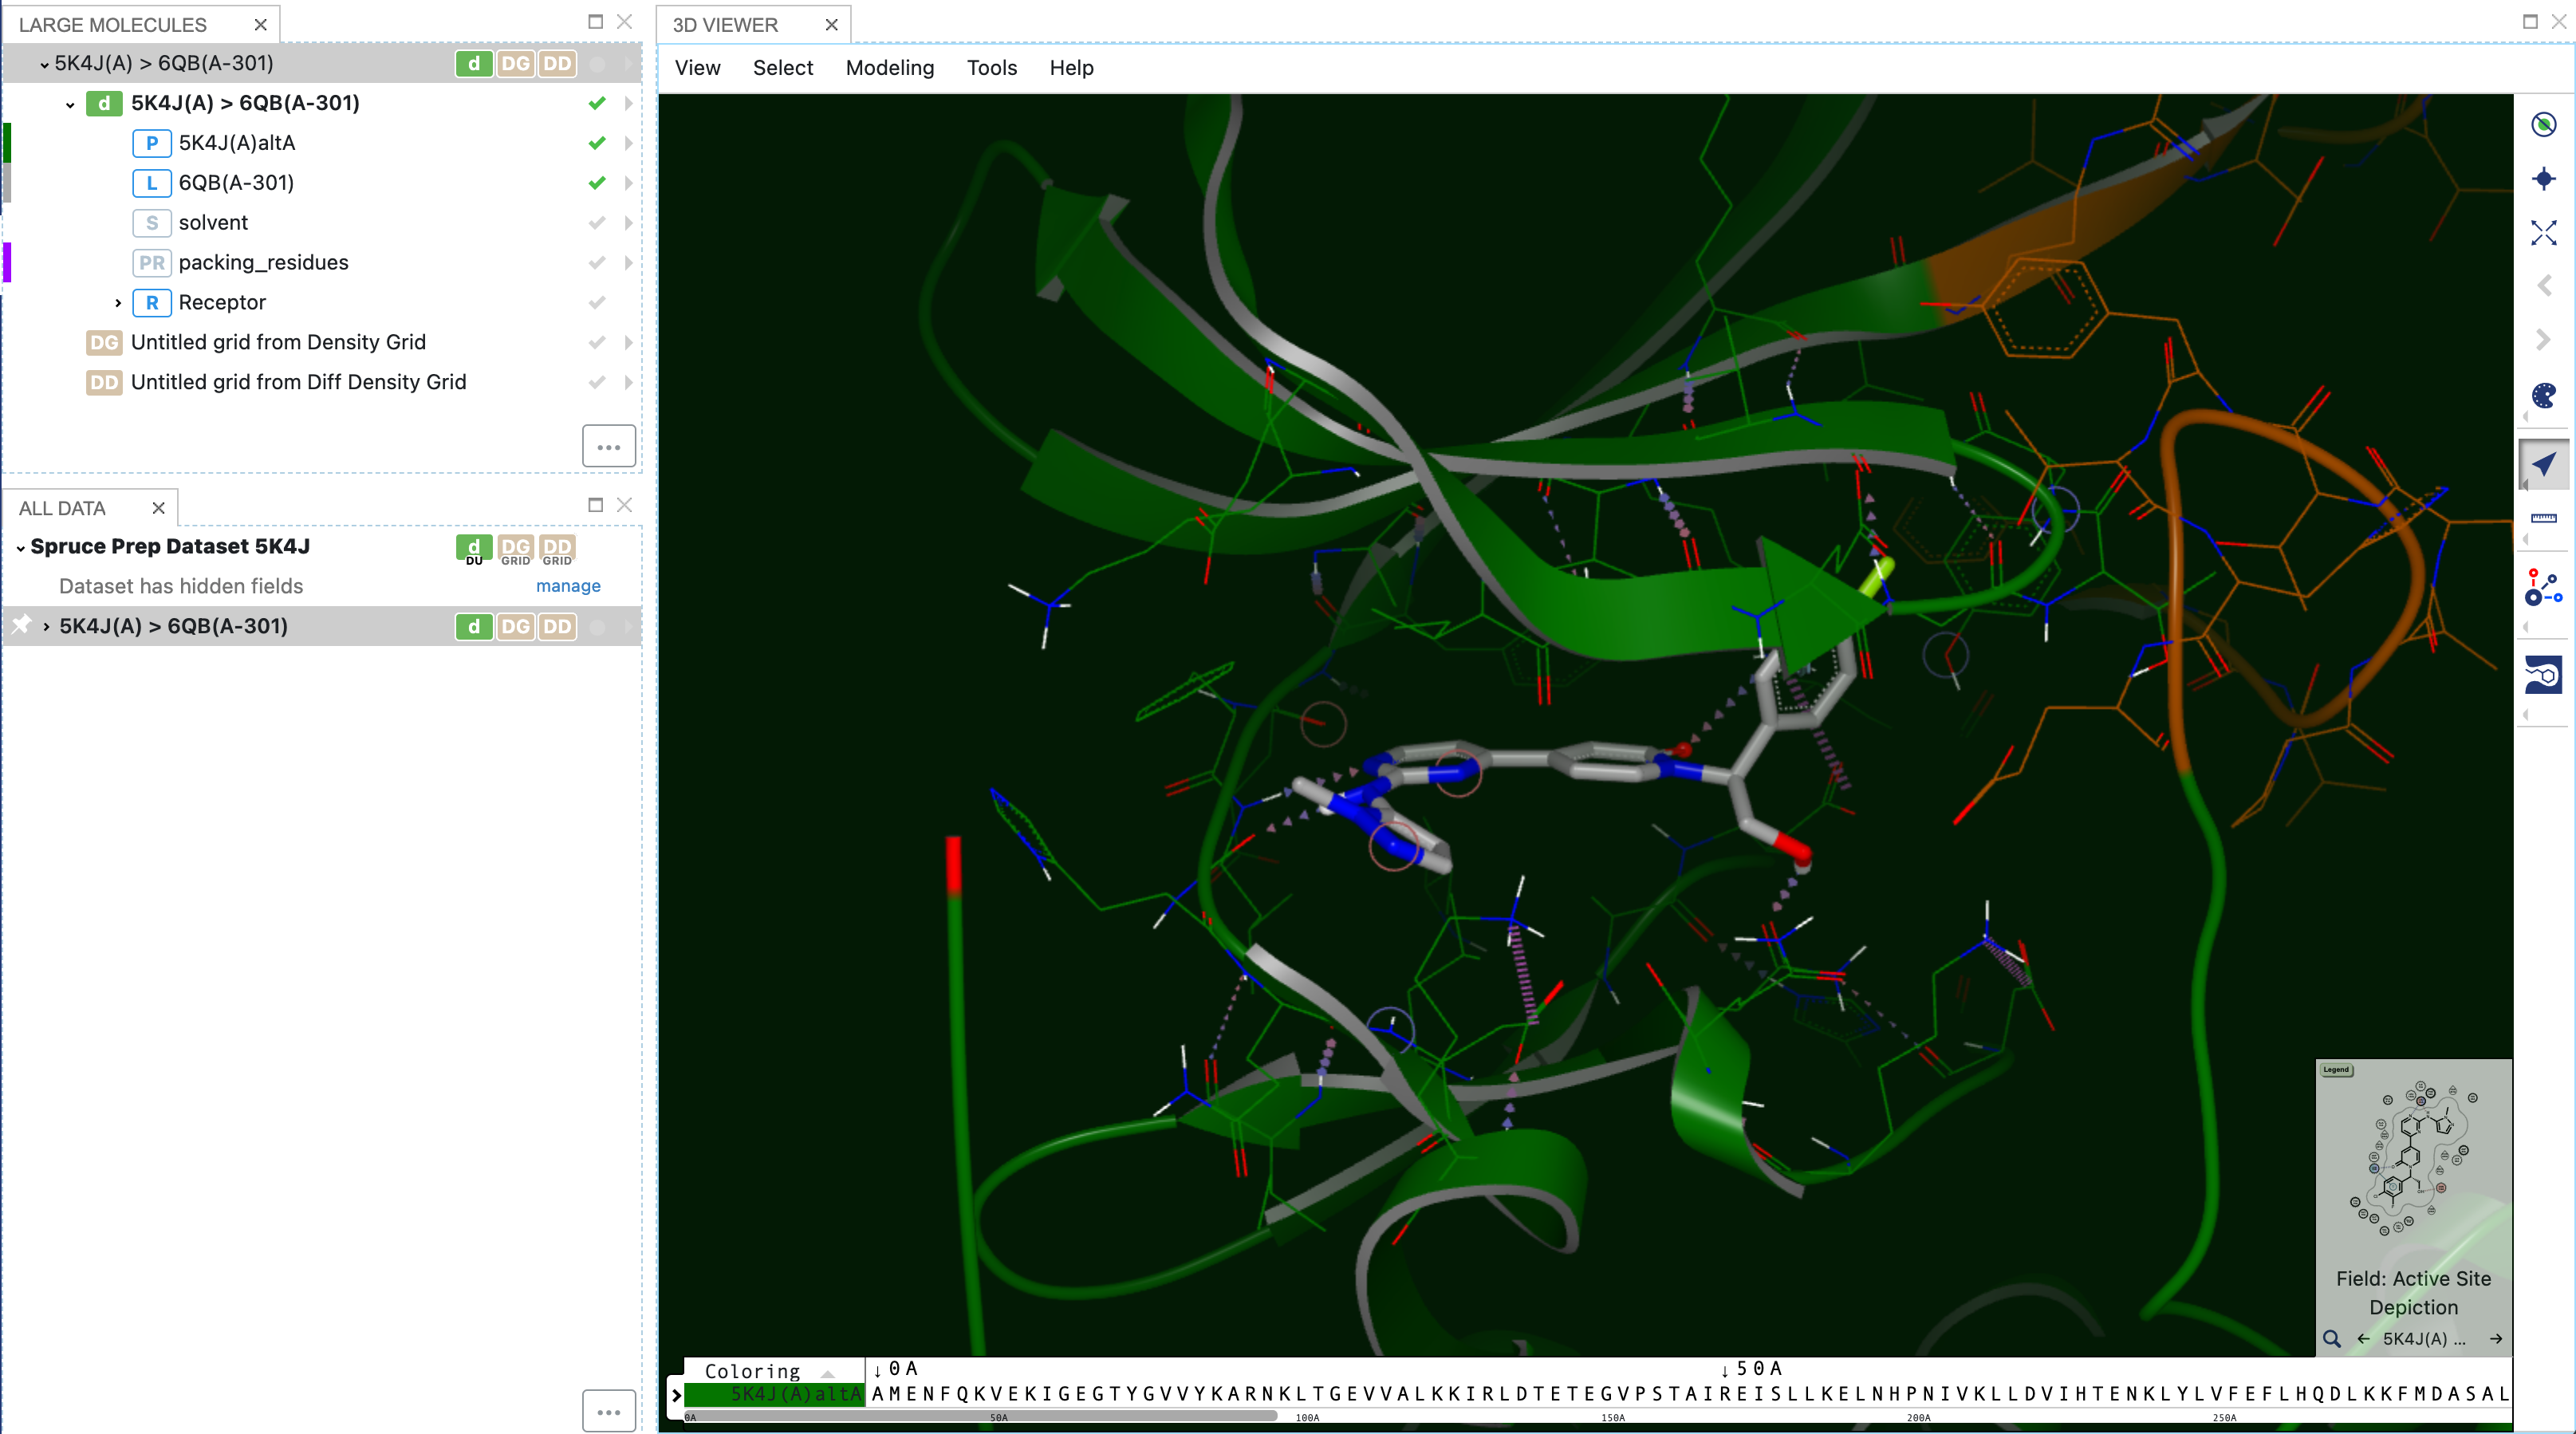
Now you can see the query in the 3D Viewer Panel.
Search Patch Dataset
Here we will search smaller CDK2 collection generated above, but there are also MMDS prepared patch databases available for searching in the Organization data.
Locate the SiteHopper Search Floe as follows:
Click on the ‘Floes’ button on the left menu bar.
Click on the ‘Floes’ tab.
Set the ‘Browse Workfloes’ drop-down menu to ‘Show all packages’.
Select ‘All’ under Browse Workfloes.
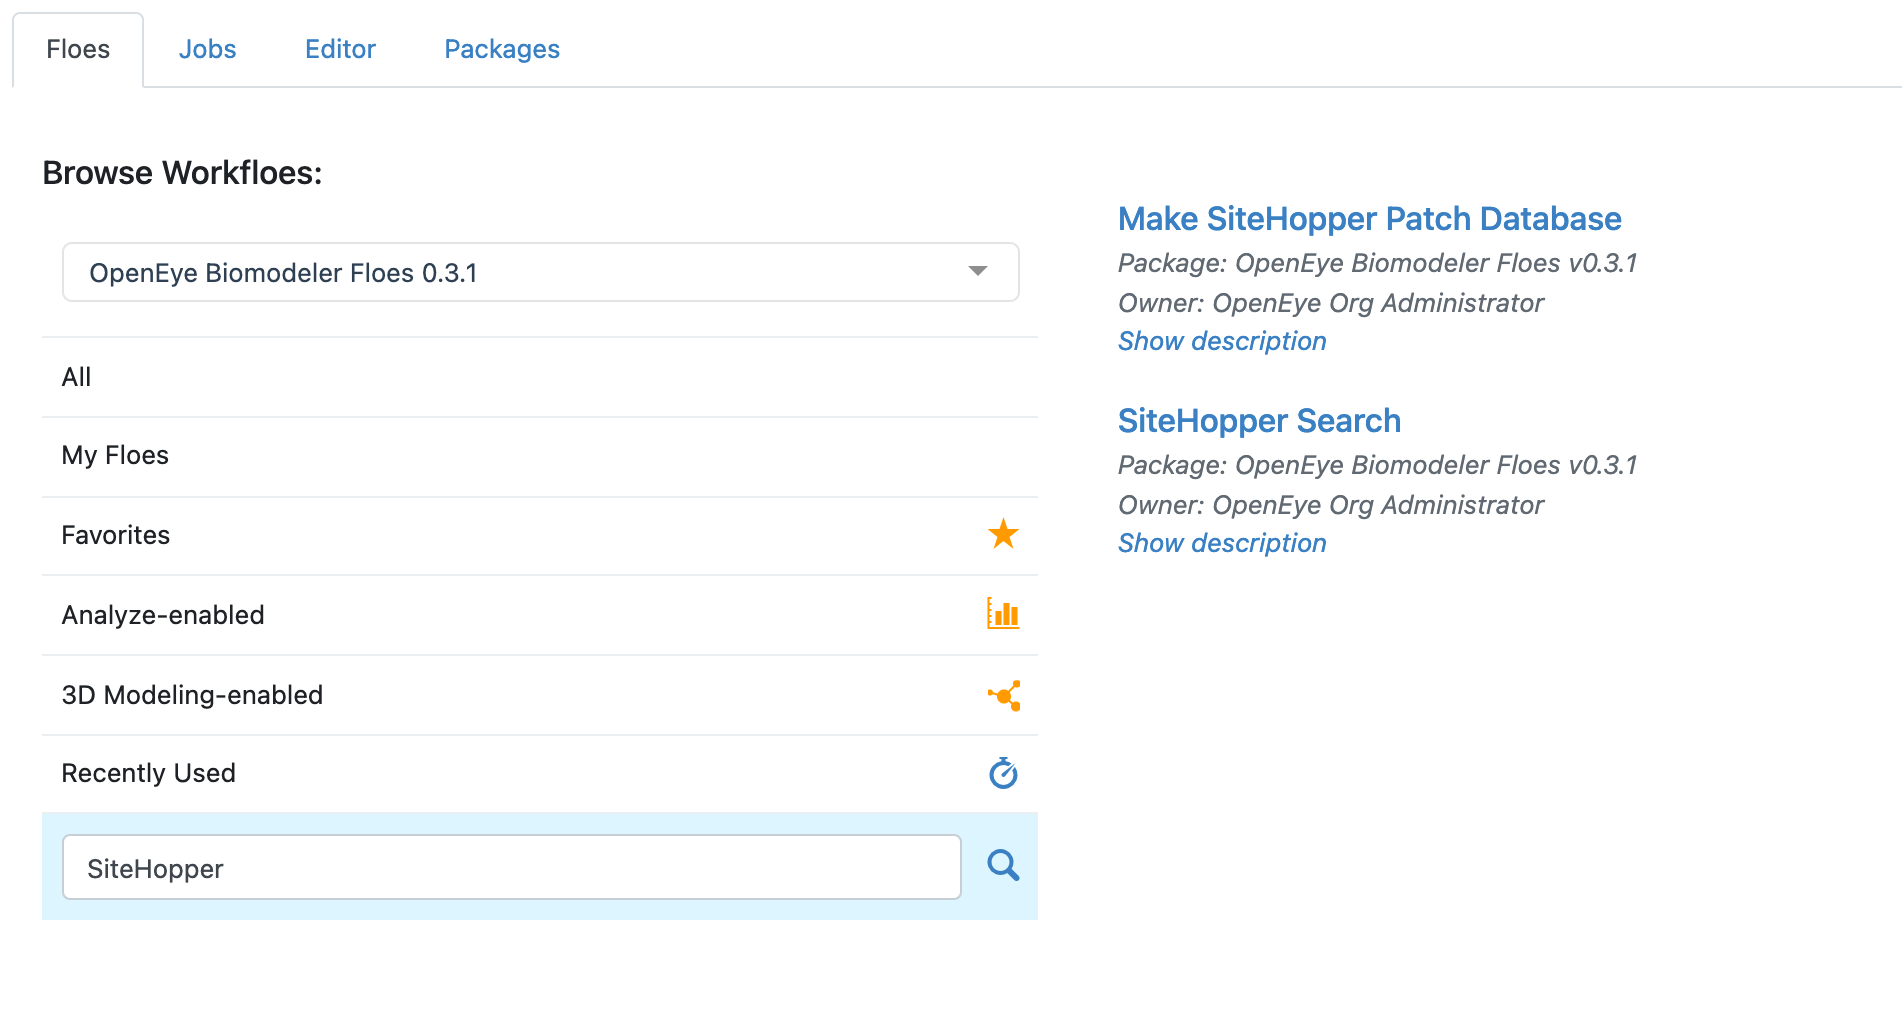
In the search bar enter SiteHopper Search.
The SiteHopper Search Floe will be visible to the right (see below).
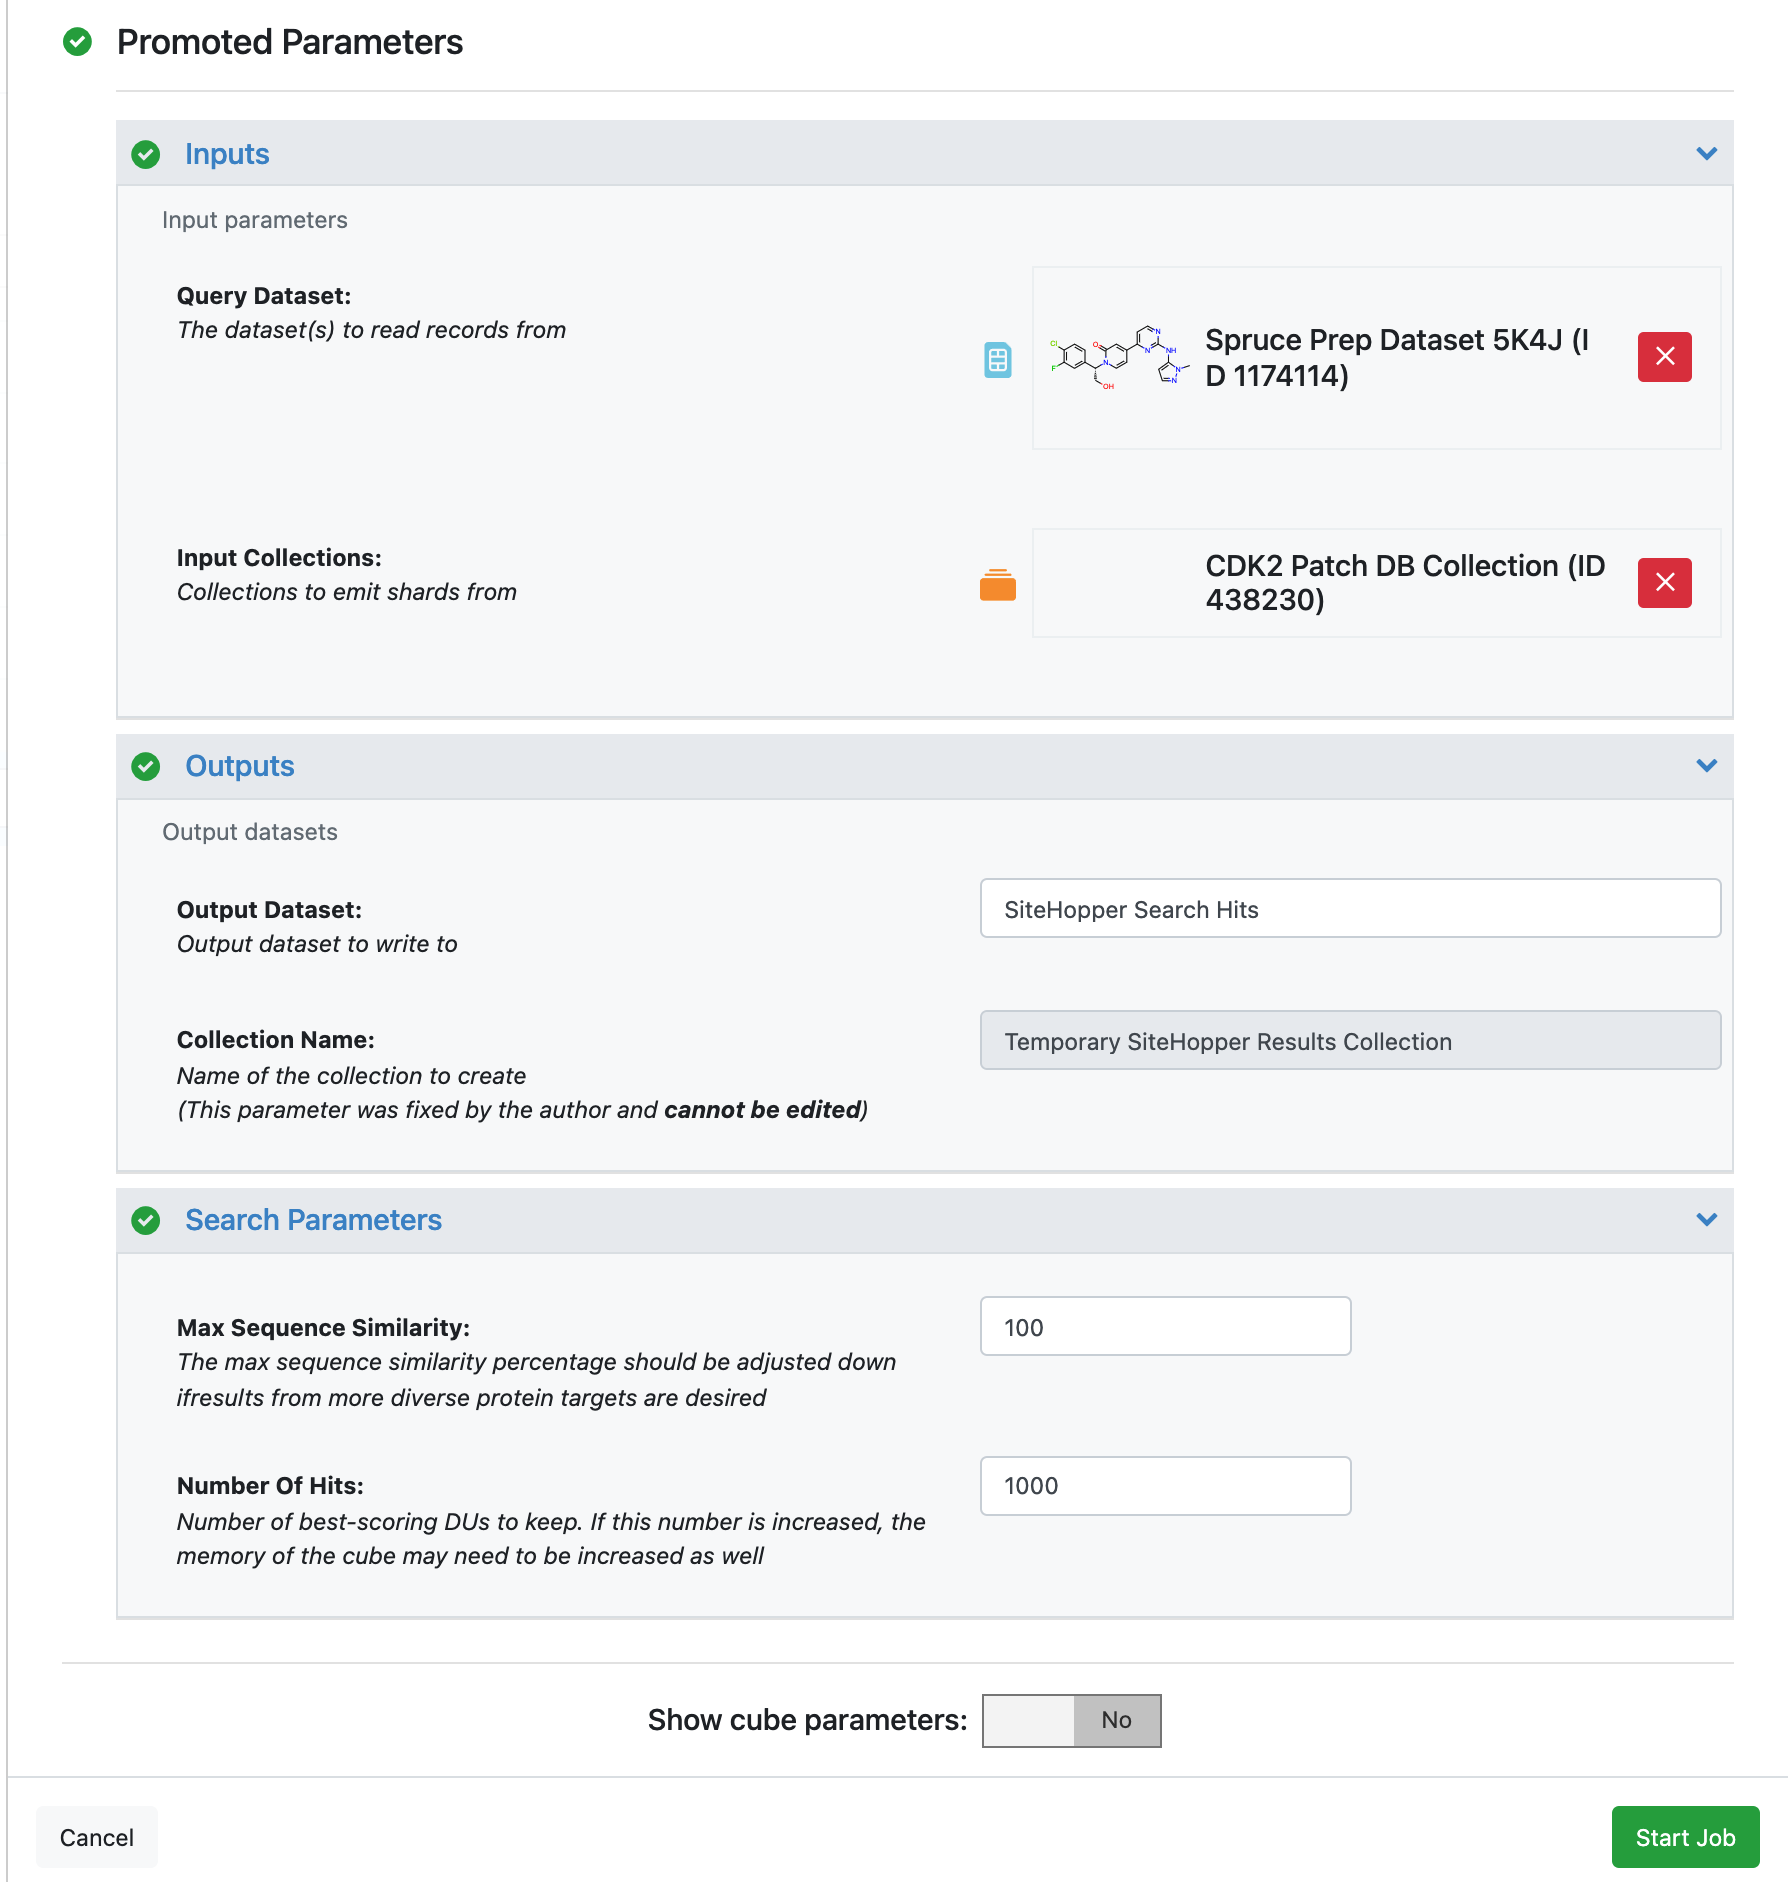
Click on the SiteHopper Search Floe to bring up the Job Form and set the following parameters.
Inputs -> Query Dataset: Spruce_prep_dataset_5K4J
This is the dataset with the protein we prepared.
Inputs -> Input Collections: CDK2 Patch DB Collection
This is the dataset with all the patches we created at the beginning of this tutorial.
Outputs -> Output Dataset: SiteHopper CDK2 Search Hits
Once the parameters are set, scroll to the bottom of the page and click ‘Start Job’. The job will take 5-10 minutes depending on the query, and potentially longer if the databases being searched are large.
View Results
Once the search job has completed, make the output datasets active as follows:
Press the ‘Project Data’ button in left menu bar.
Clear current active datasets by clicking on ‘Active Datasets’ and clicking ‘Clear All’ in the menu that pops up.
Make the output datasets active by clicking on the + icon in the Actives column.
Once the datasets are active, switch to the 3D viewer by clicking the 3D button in the menu bar. The 3D results will be overlaid to the input query, which is the first record in the resulting dataset. Here one of the top results is shown with the query. This is similar to how FastROCS results are shown for small molecules.

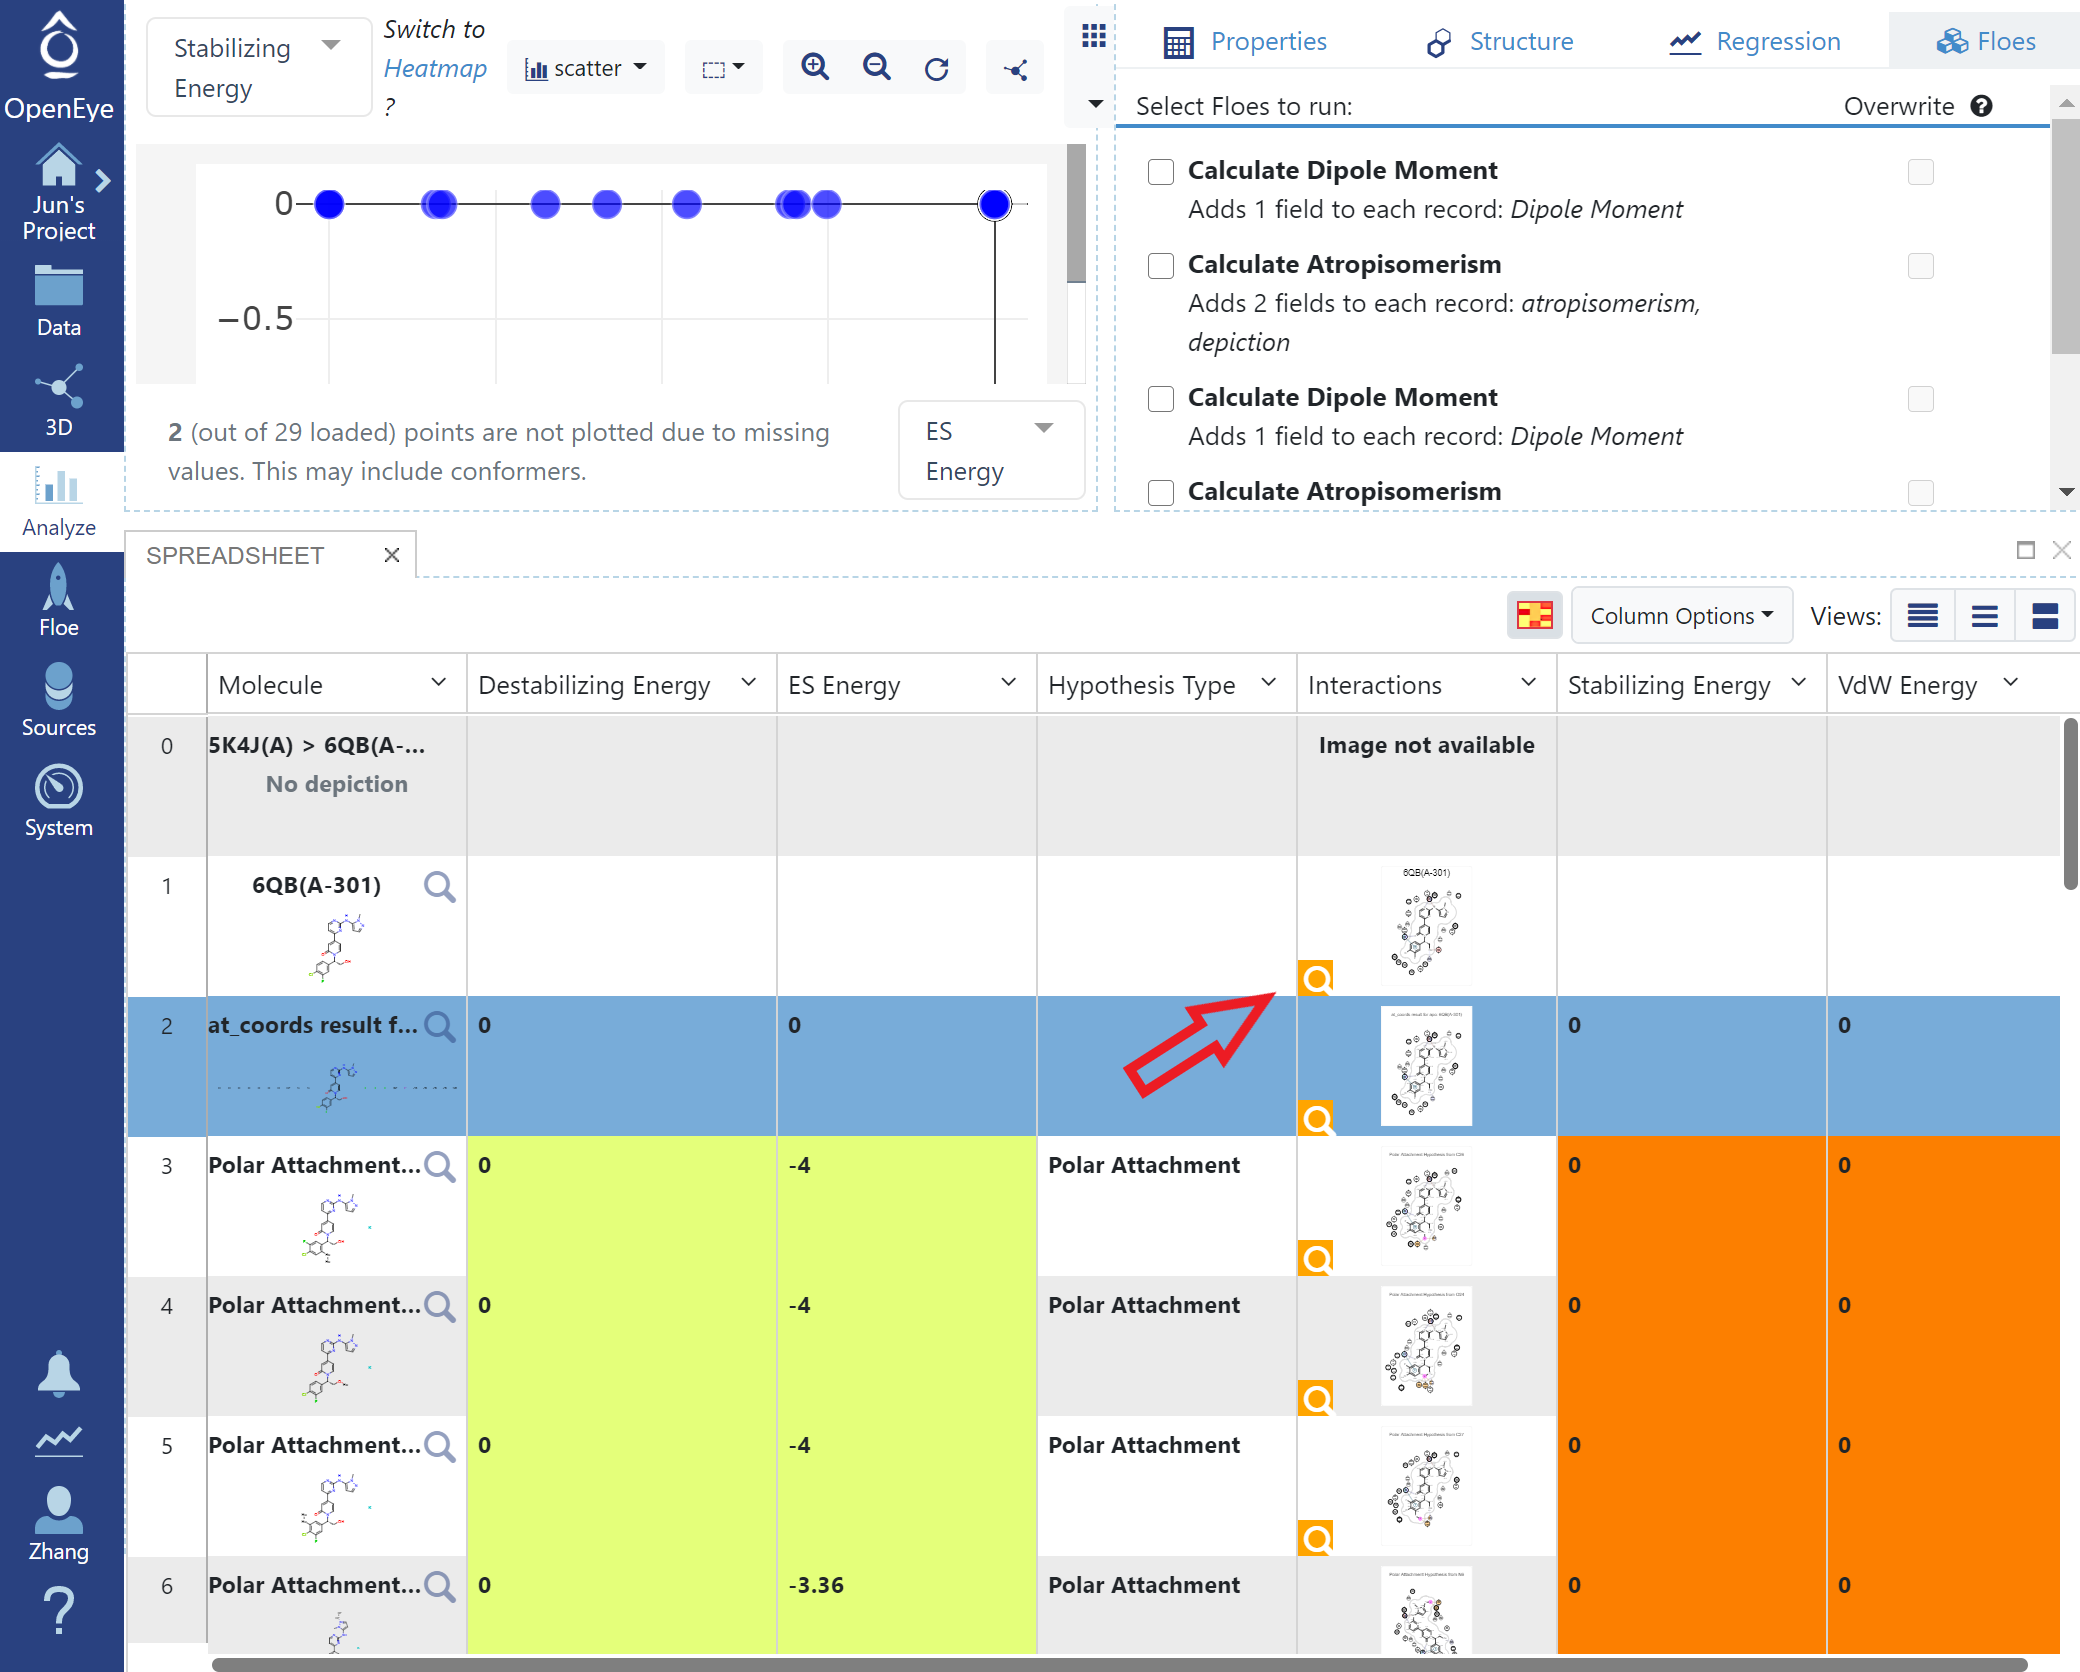
Analysis of the scores and drilling down to interesting results can also be done in the Analyze page based on SiteHopper scores and sequence similarity scores. Here, patch scores are plotted against sequence similarity. Of course, for a dataset of the same target, the sequence similarities are very high and perfect for most of the dataset. As larger databases are searched, this property becomes more interesting to explore.