Build a New Query
The process for building a query is as follows:
Load a molecule.
Select a fragment.
Modify the fragment to be replaced.
The workflow will stop after editing the fragment and allow you to save the query.
Loading a Molecule
The first step in creating a BROOD query is to load or create a source molecule. The molecule can be loaded from a file, entered by name, or sketched in the sketcher.
To load a molecule from a file, either click the folder in the Molecule text entry box or choose a recently loaded molecule from the drop-down menu, which can be accessed from the arrow in the text entry box.
To enter a molecule by name, type a structure name or a SMILES string in the text entry box. The 2D display will show a molecule if the entry is valid.
To sketch a new molecule, click the + in the text entry box. This opens the sketcher for input. Sketch a molecule and click “OK” when you are satisfied with the sketch.
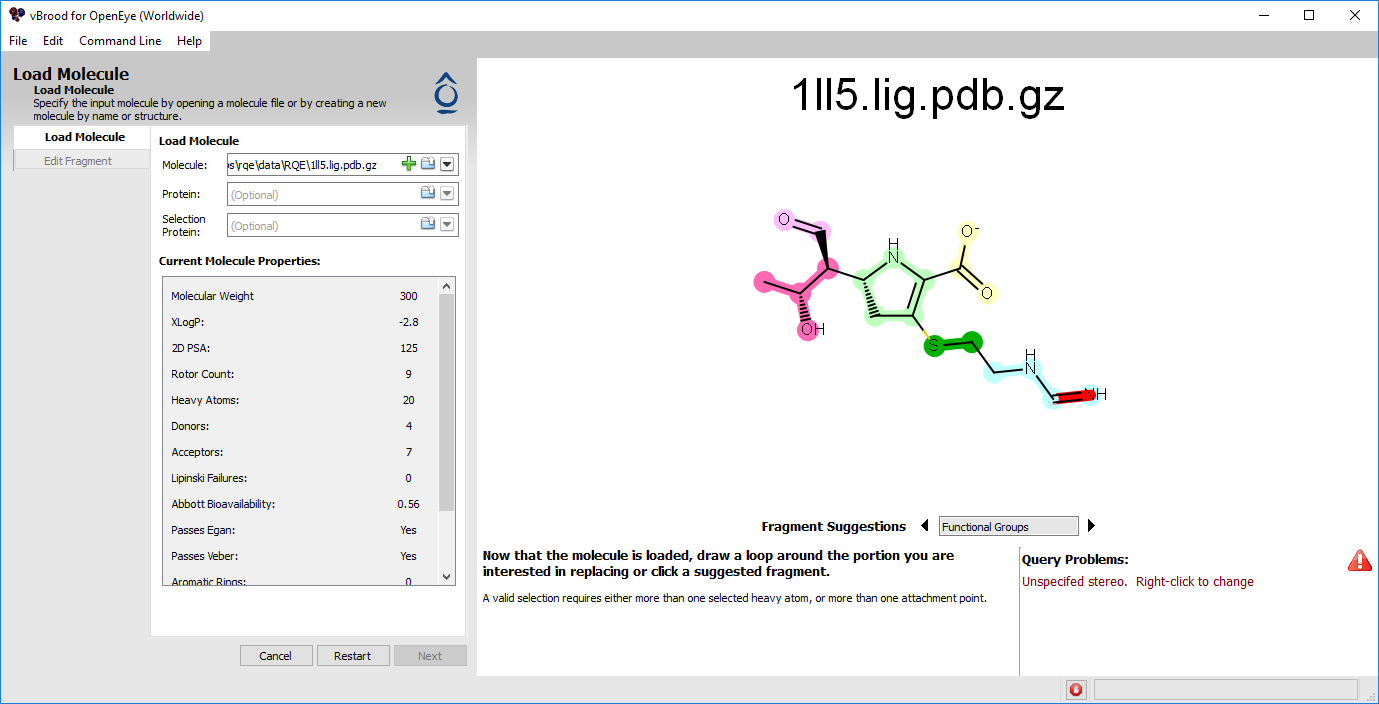
Figure 1. Loading a molecule into vBROOD.
A protein can be loaded to provide a bump-check for generated results, although protein chemistry is not used as part of the score. You can also specify a selection protein, which requires a protein atom to be close to the query as a simplistic screen for selectivity.
Below the protein text entry boxes, vBROOD displays the properties of the loaded molecule. Any properties that might need attention are highlighted in red.
Selecting a Fragment for Replacement
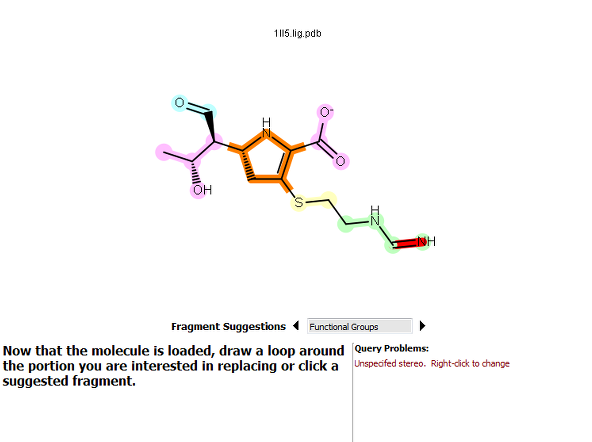
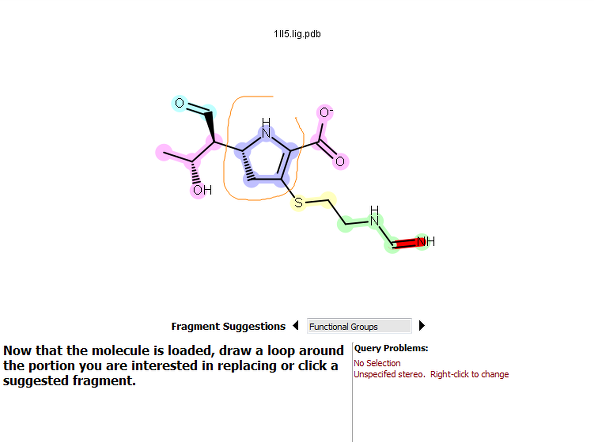
After loading or creating a molecule, vBROOD will display the 2D structure. You must then select some portion of the molecule for replacement. You can select the fragment to be replaced in two ways:
Click one or more of the highlighted fragments.
Select a fragment by lassoing it.
|
|
Fragment-based selection |
Lasso selection |
Figure 2. How to select a fragment. For the fragment-based option, clicking on the pyrrolidine ring fragment highlighted it in orange.
Fixing Issues with the Query Structure
Some molecules may need additional fixes for problems found when they are loaded or selected. vBROOD highlights any problematic atom or bond and displays a message in the lower-right corner. If the message is red, the problem must be addressed before you can continue to build the query. Messages in yellow can be ignored, but should be addressed as they may lead to unexpected behaviors.
The following examples show some common issues and how to fix them.
Unspecified Stereochemistry
BROOD requires the specification of certain types of stereochemistry. Ignoring this problem can result in issues with coordinate generation or with property filtering. To fix unspecified stereochemistry, right-click on the red highlighted atom or bond and select Set Chirality or Set Bond Stereo and choose the appropriate stereochemistry.
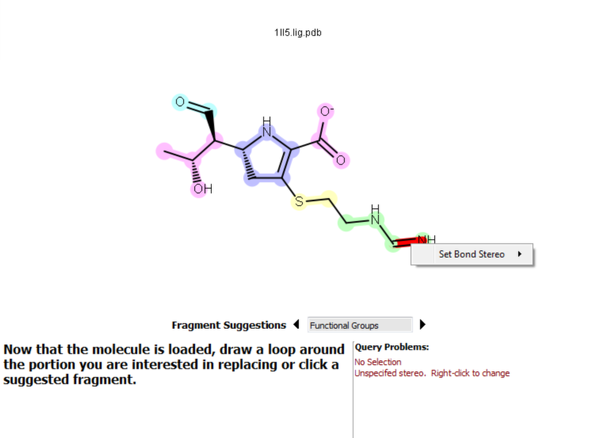
Figure 3. Fixing bond stereo.
Broken Double Bonds
BROOD does not allow double bonds to be broken by selection. To correct this problem, either click Select Bond or redo the selection.
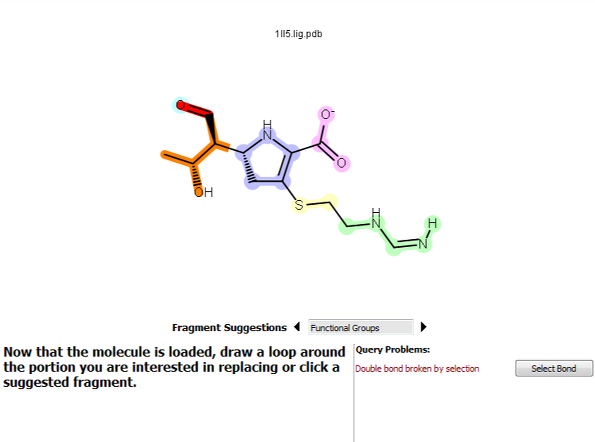
Figure 4. A double bond broken by the selection.
Partially Selected Rings
Broken aliphatic rings can be ignored (but will always be closed), but broken aromatic rings must be fixed. To do this, either click the Select Ring button or redo the selection.
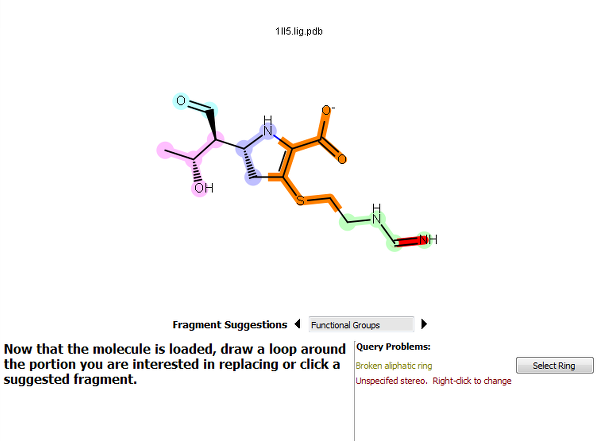
Figure 5. A ring broken by the selection.
More than Three Attachment Points
BROOD databases have fragments containing between one and three attachment points. Thus with BROOD will not produce any results when you use a query with four or more attachments. Redo the selection so that it has between one and three attachment points.
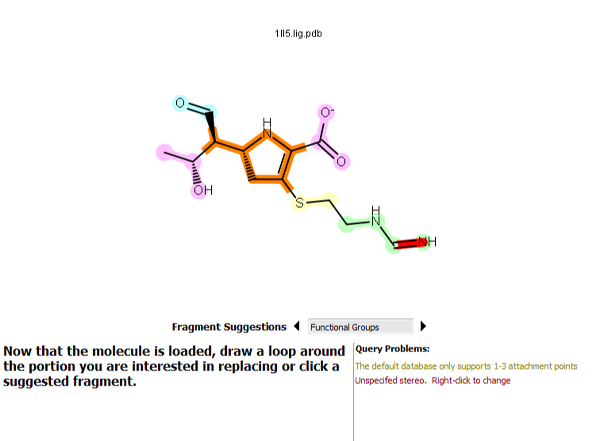
Figure 6. A selection resulting in four attachment points.
Overlapping Attachment Points
Selecting two atoms that are each bonded to a third, unselected atom results in two attachment points overlapping. To correct this, click Fix or redo the selection.
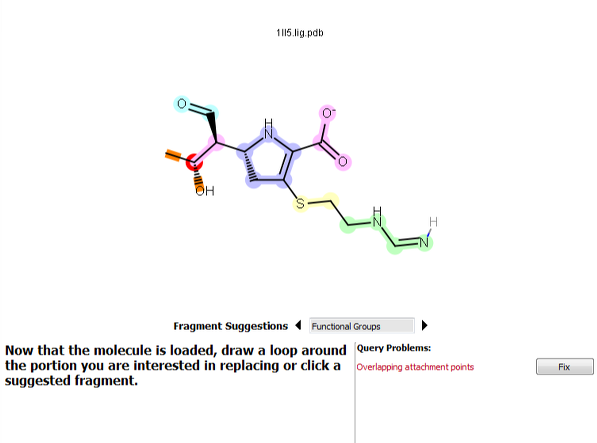
Figure 7. A selection resulting in overlapping attachment points.
No Selection
vBROOD requires you to select some fraction of the molecule or it will not continue. To fix this, select a fragment of the molecule.
Once a molecule has a valid selection and all problems have been resolved, the “Next” button will be enabled. Click “Next” to advance to the Edit Fragment step.
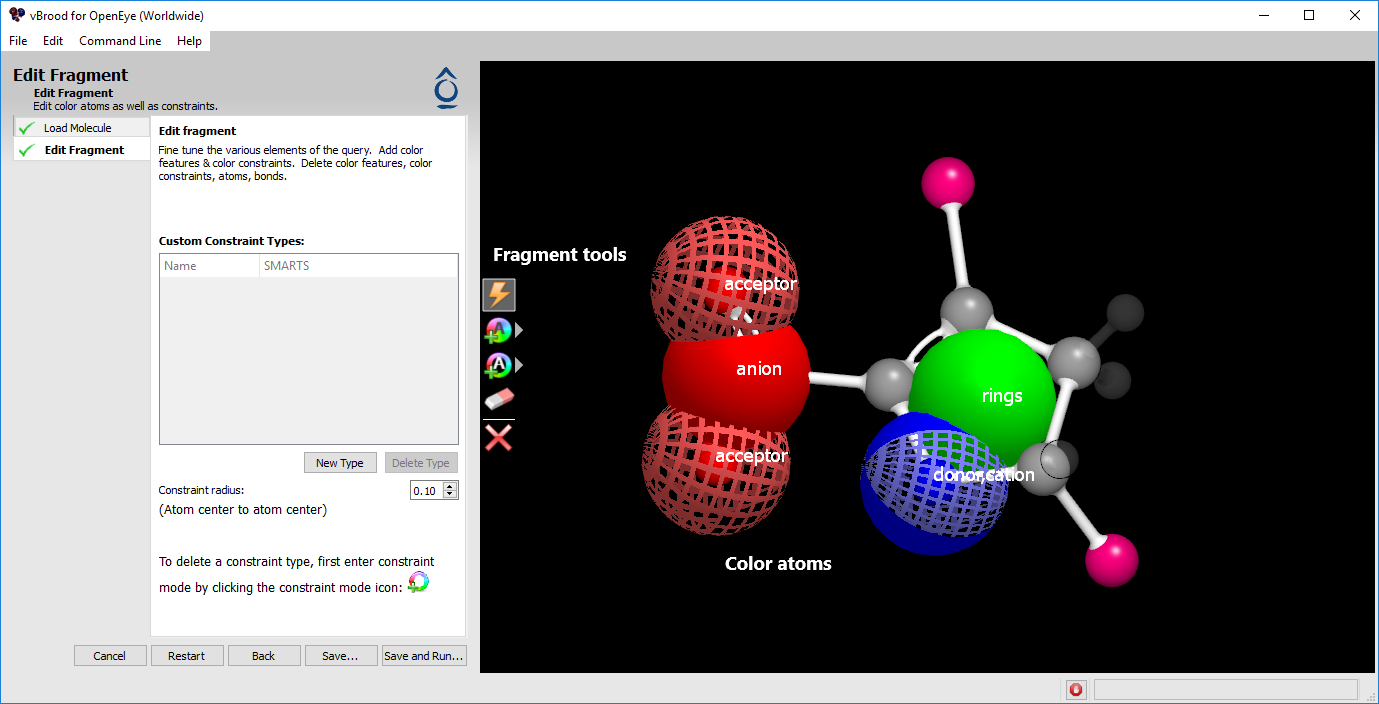
Figure 8. Edit fragment screen.
Editing fragments
The Edit Fragment step allows users to edit some aspects of the replacement query. You can add and remove color atoms, add and remove constraints, or remove atoms in the query. This step also displays the query structure in 3D and the attachment vectors as R-group atoms. Color atoms are displayed as large spheres patterned and colored according to the color atom type. Constraint atoms are displayed as colored and patterned rings with a diameter corresponding to the diameter of the constraint.
The Fragment Editor provides five tools for editing a query, shown as icons on the left side of the 3D window.
Select. This option can be used to select a group of atoms for deletion.
Add Color Atom. A drop-down menu is provided to select the color atom type.
Add Constraint Atom. A drop-down menu is provided to select the constraint type.
Eraser. This option can be used to erase an atom, color atom, or constraint.
Delete Selected. This option deletes all selected atoms.
If the query includes a protein, it is also possible to toggle the visibility of the protein with the Show Protein and Hide Protein buttons.
Adding a color atom
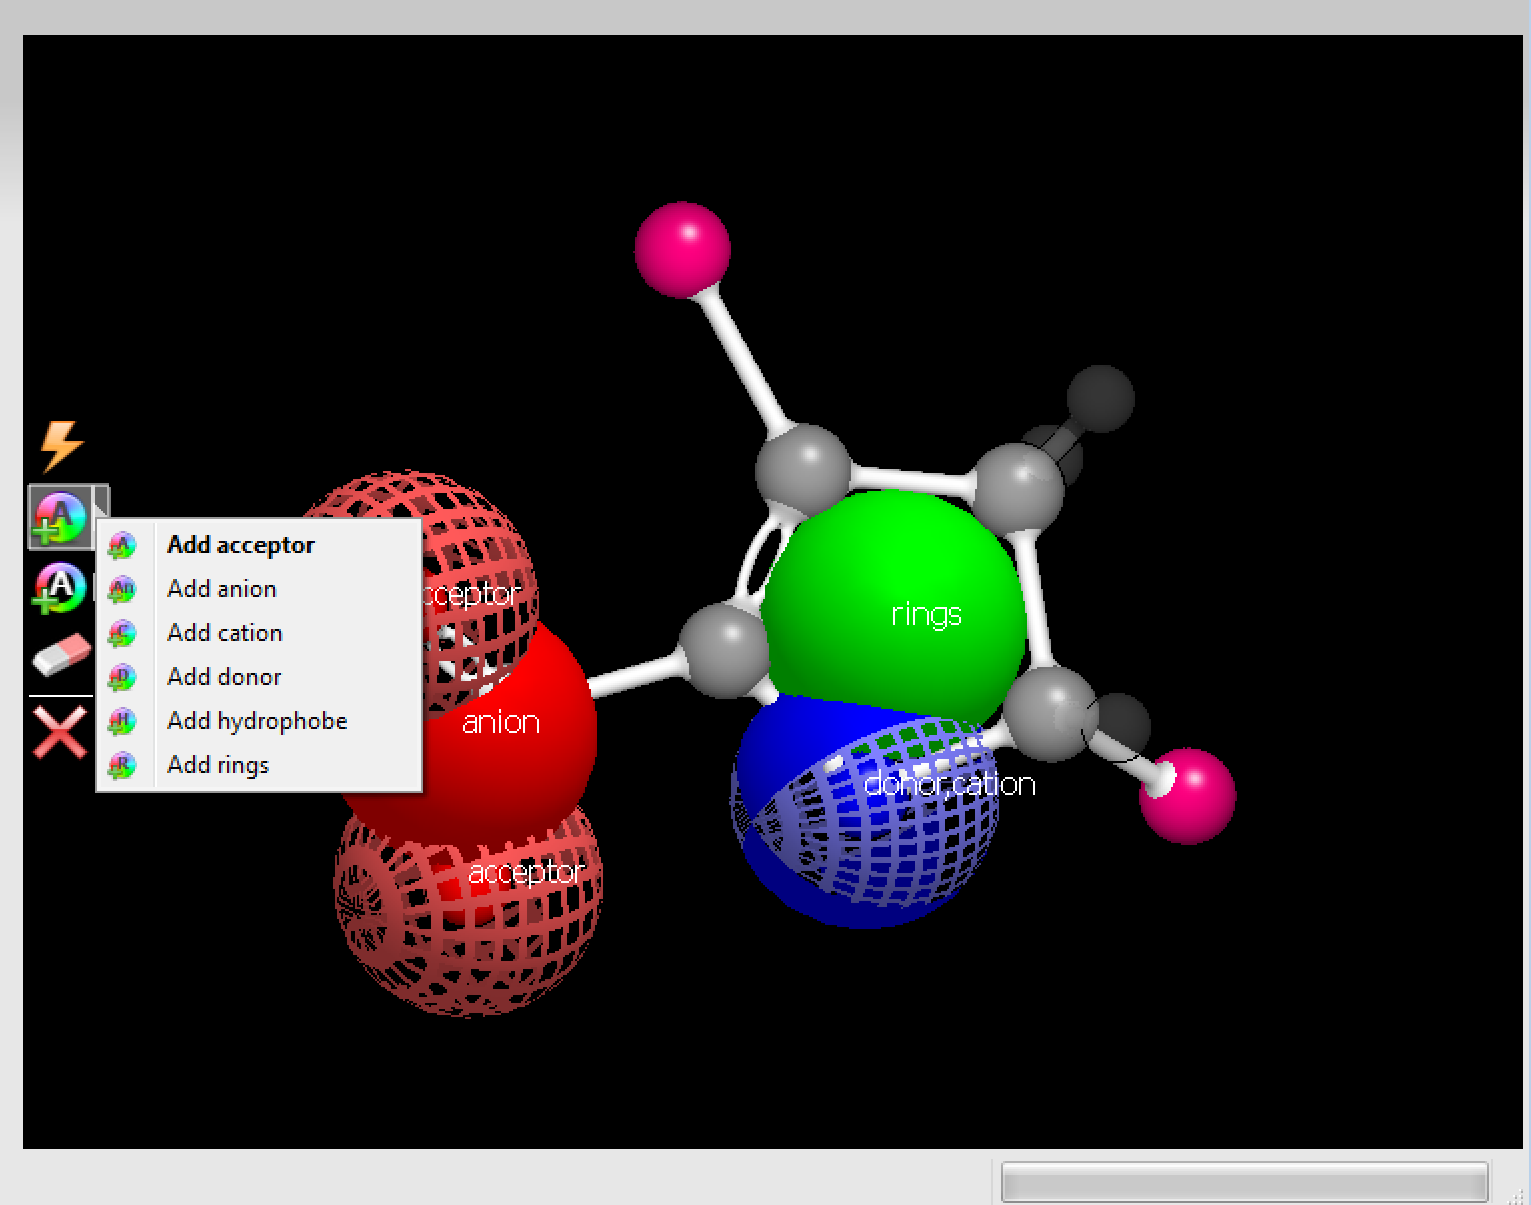
Figure 9. The menu to add color atoms.
Color atoms allow users to specify desired chemistry at specific places on the fragment. Adding a color atom to a molecule is simple.
Select a color atom type from the Color Atom menu in the Fragment Editing toolbar.
Click an atom.
Either color atoms or molecular atoms can be selected. Multiple color atoms placed in the same location are displayed as slices of the same color atom sphere. By placing the same type of color atom at the same location, color atoms may be weighted to increase their influence on the score.
To place a color atom in between one or more atoms, hold the Shift key while clicking additional atoms. The color atom will be placed at the center of mass of the selected group.
Adding a constraint
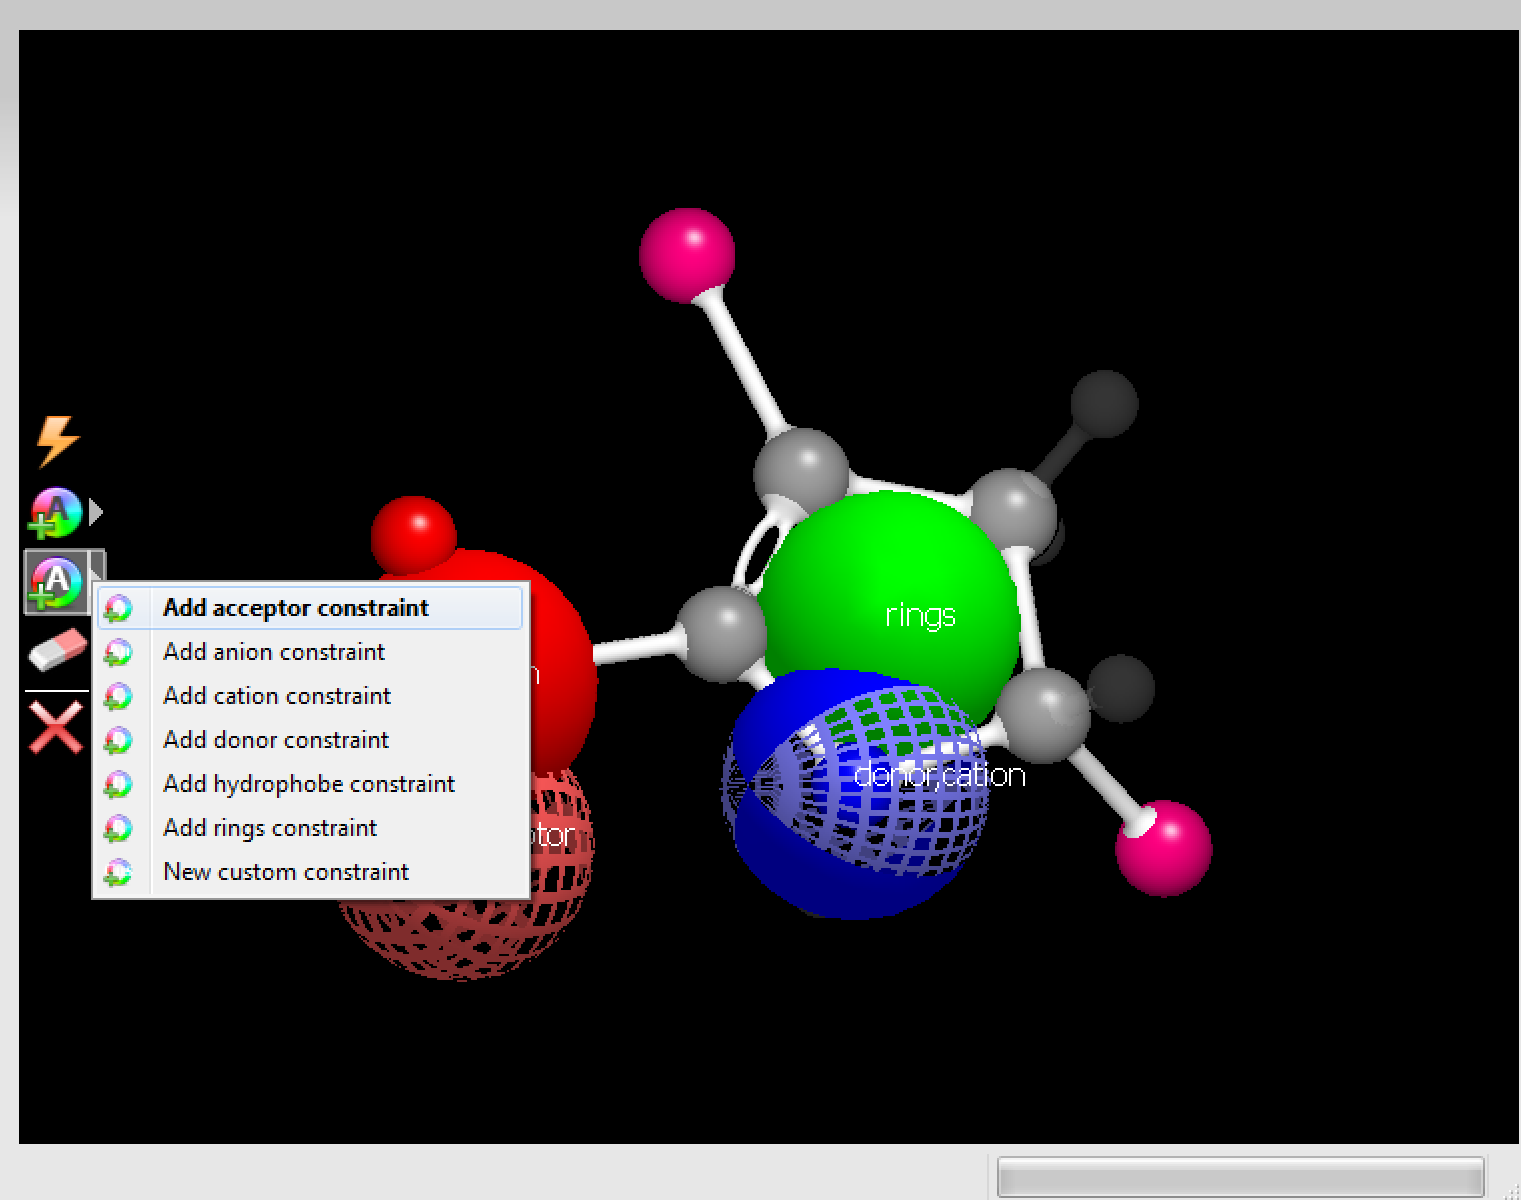
|
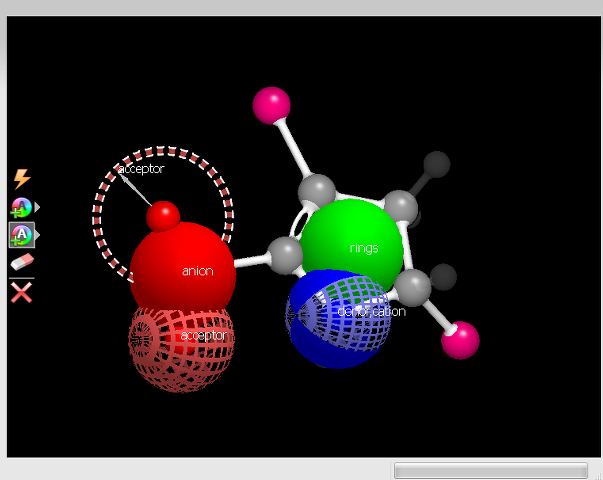
|
The constraint menu |
A constraint |
Figure 10. Constraint options and example.
A constraint is much like a color atom in that it represents desired chemical features. Unlike a color atom, however, a constraint is a requirement, not a component of the score. Adding a constraint to a molecule is largely the same as adding a color atom.
Select a constraint type from the constraint menu in the Fragment Editing toolbar.
Click an atom. Multiple constraints in the same location will be displayed as segments of the same ring.
As with color atoms, to place a constraint in between one or more atoms, hold the Shift key while clicking additional atoms. The constraint will be placed at the center of mass of the selected group.
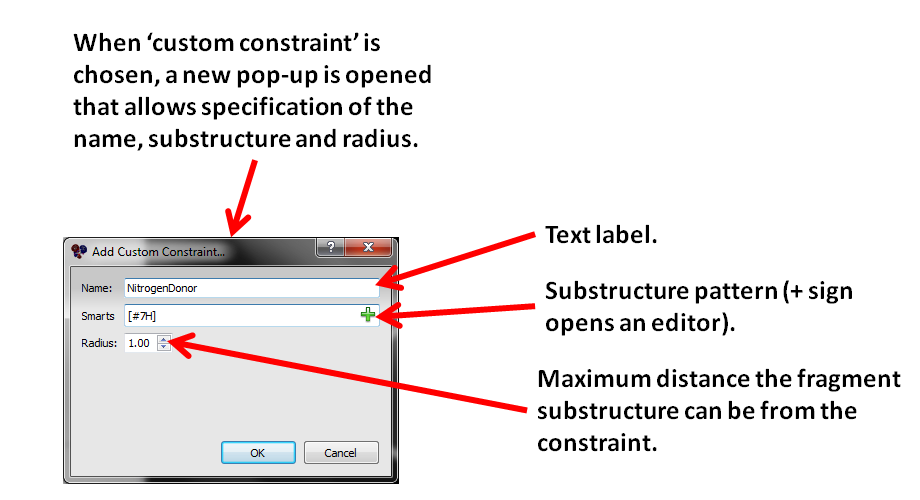
Figure 11. The custom constraint dialog box.
Custom constraints can also be defined with user-supplied SMARTS patterns. To define a new constraint type, select Add Custom Constraint. The Add Custom Constraint dialog prompts for a constraint name, a constraint SMARTS pattern, and a radius. SMARTS patterns can either be typed into the SMARTS text editor or selected from the SMARTS dialog by clicking the + button.
Once these steps have been completed, click “Next” to progress to the next page.
Finishing up
After editing the query, either click “Save” or “Save and Run.” “Save” will ask for the file name and return you to the task selection screen. “Save and Run” will ask for a file name, save, and then continue to the Run BROOD task.