Saving ROCS data
The vROCS interface provides multiple tools for saving data. Data that can be saved includes:
The query file
The entire set of results obtained from a simple or validation ROCS run
Data and statistics from a validation run in
.csvdelimited file formatScreenshots of the 3D window illustrating the query and/or aligned hit molecules
Screenshots of the ROC or Score Histogram plots
Query file: A query that is built or modified in vROCS can be saved for future use.
The default file type for saving a query is a ROCS Saved Query file with extension .sq or
.sq.gz. This file type is not compatible with older versions of ROCS.
Additionally, it contains information about the color force field used
and therefore cannot be used with an alternative color force field.
There are multiple ways to save a query file from the vROCS interface.
Firstly, using the File menu click on
File>Save Query...or use theCtrl+Sshortcut keys. This is a ‘Save As…’ action and will always prompt for a filename and a directory in which to save it. This action is performed on the query currently selected in the Query list of the Run Set-up Inputs dialog.There is also a right-click option. When viewing the results panel right-clicking on the run name tab opens a right-click menu in which the second option is Save Query from ‘Run Name’. This is a ‘Save As…’ action and operates specifically on the query associated with that run. Therefore, it allows the user to save an older version of a query that may have been subsequently modified by going back to activate the Results tab for the earlier run.
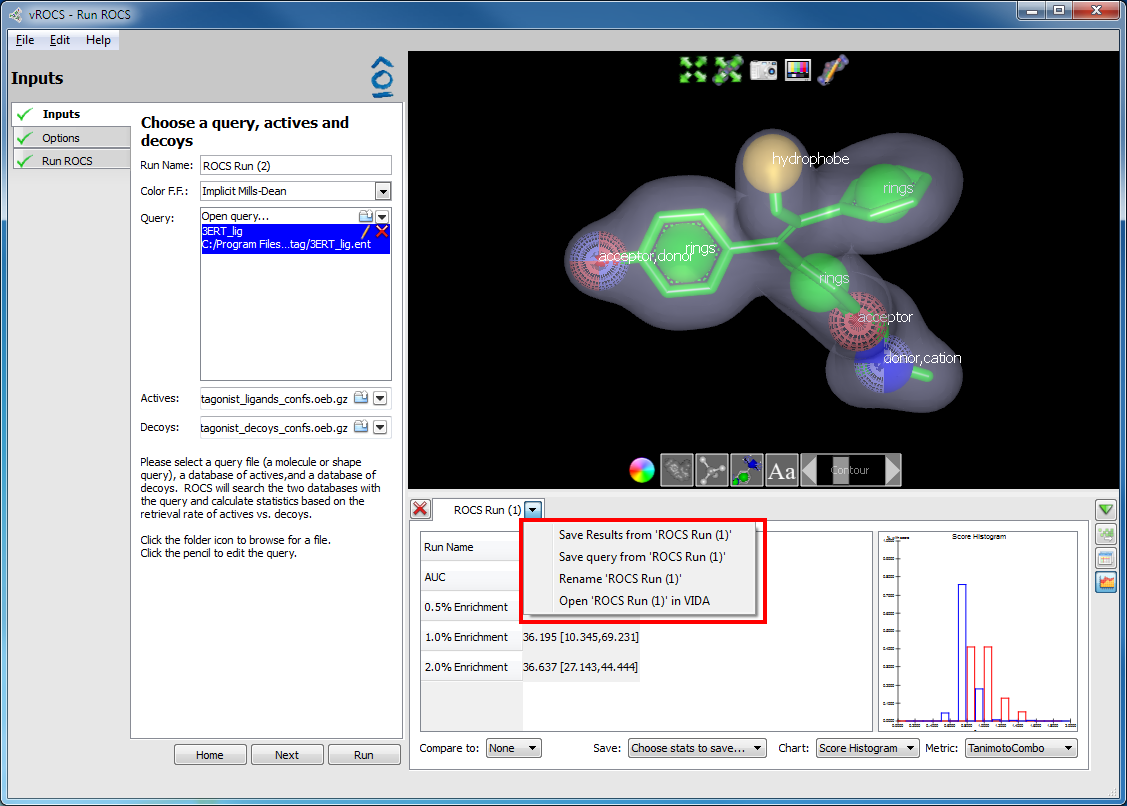
Right-click menu on results spreadsheet Run Name tab
Option |
Description |
|---|---|
Save results from ‘Run name’ |
Save the results for the active results set in a 3D structure and data file. The default file type is OE Binary (*.oeb, *.oeb.gz). |
Save query from ‘Run name’ |
Save the query for the active results set in a 3D shape query file (*.sq, *.sq.gz). The file contains information about both shape and color, as well as the color force field used to apply the color atoms. This is a Save As… action and will always prompt for a filename. |
Rename ‘Run name’ |
Rename the Results Name tab |
Open ‘Run name’ in VIDA |
Exports the structures and data for the active Run Name tab into VIDA. If VIDA is not already open a new session is opened. If VIDA is already in use the dataset is appended to the list of molecules already in the VIDA List Window. All the data is available to view in the VIDA spreadsheet. |
Results: From the results spreadsheet for either the simple or validation run the
user can right-click on the run name tab to open a right-click menu
in which the first option is Save Results from ‘Run Name’. This is a Save As…
action and operates specifically on the data for the run associated with that
spreadsheet. Having multiple spreadsheets available allows the user to save
results from either the current run or an older run by selecting the appropriate
run name tab. All the data points for the run are saved, not just the top 20
results visible in the spreadsheet. The sort order from the spreadsheet is
not retained. The compounds in the saved file are sorted by the Rank By
score selected during runs set-up. The results are saved in a variety of
possible molecule file types suitable for opening in the VIDA spreadsheet
or other third party applications. The default is the OpenEye OE Binary
file type with .oeb or .oeb.gz file extension. Since only the top 20 results
are visible in the vROCS spreadsheet users are encouraged to save the results
and use the VIDA spreadsheet, not the vROCS interface as the primary tool for
analyzing results.
Statistics data: From the statistics panel in a validation run three
different types of data - score data, plot data and spreadsheet - can be
exported and saved in a comma delimited format (.csv), suitable for loading
in text-based applications and other statistics packages.
These options are selected from the Choose stats to save... drop down menu in the
statistics panel.
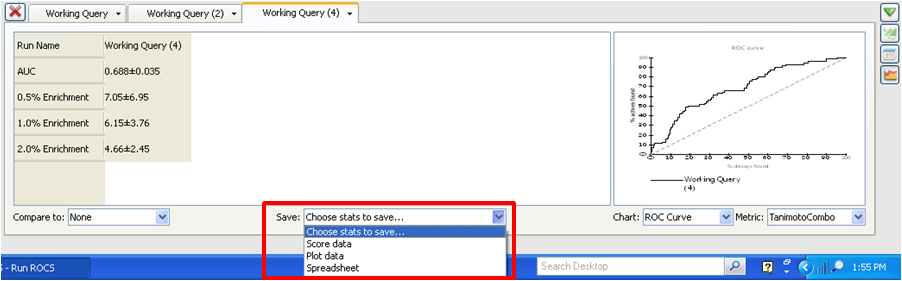
Choose stats to save drop-down in the statistics panel
Option |
Description |
|---|---|
Score Data |
Save a file containing the raw scores for the top scoring aligned conformer of each compound searched using each of the scoring functions of a validation run displayed. Data for all database compounds are exported. |
Plot Data |
Export the data points from either the ROC Curve or the Score Histogram. These are (x,y) datapoints from the curve or histogram created in vROCS, not raw data. Note that this export is context sensitive upon the plot that is currently displayed (i.e. when the ROC curve is displayed the plot data output will have (x,y) values to recreate the ROC curve and when the Score Histogram is displayed the data output will have (x,y) data for both actives and decoys to recreate a histogram). |
Spreadsheet |
Save the data displayed in the vROCS statistics panel spreadsheet (AUC and enrichment values with error bars). If a second run has been selected to compare against the currently active run then data for both runs and the associated p-values are exported in a single file. |
ROC plot/Score Histogram: Exporting the data to recreate the
ROC plot (or Score Histogram) to a .csv delimited file (described above)
provides the opportunity to rebuild the plots in a third party graphing application
and combine plots from different ROCS sessions.
However, this can prove somewhat cumbersome and it is frequently
useful to take a
screenshot of the current plot (either of a single run or a comparison of multiple runs)
for inclusion in a report, presentation or publication. To do this,
right click on the plot and choose “Save Image…”.

Save an image file of the ROC plot or score histogram
3D window screenshot: A screenshot can be useful for insertion into presentations and publications. A camera icon at the top of the 3D window allows for taking a single click screenshot of the view in the 3D window. It is a WYSIWYG (what you see is what you get) screenshot of the 3D window with the exception that the surrounding buttons are not included. See the figure below.
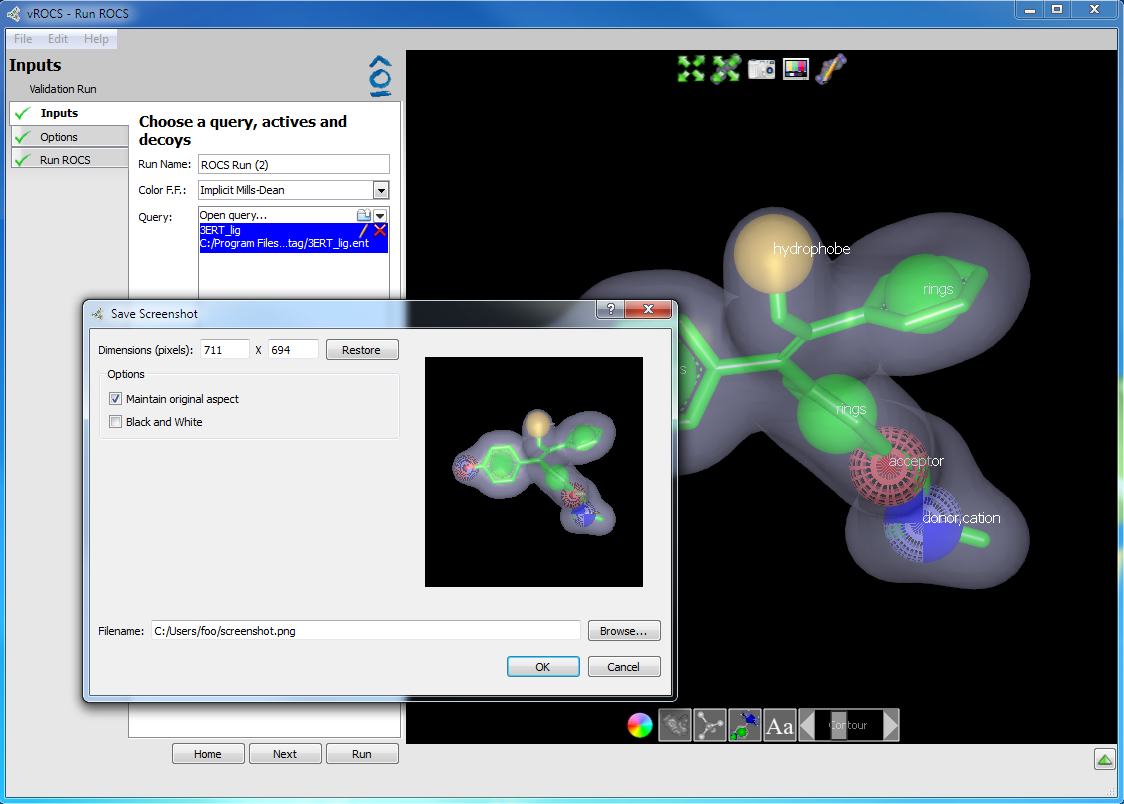
3D Window screenshot option