Build/edit a query manually
Background information
In this tutorial the user will learn to manually create a new query either for saving or for use in ROCS. It also covers the steps required to edit or modify a saved query.
A grid shape query is available that describes a protein binding pocket. To improve the quality of results obtained for alignment to the query you wish to add some color features that are known to be important for protein-ligand binding. This tutorial will guide the user through the basics of adding color atoms and saving the resulting ROCS query file.
The tutorial will require approximately 15 minutes of personal time to complete.
Build and edit a new query
Open a new ROCS session. At the Welcome screen select
the option to Create or Edit a Query Manually. Click
File > Open and browse to the file
OPENEYE_DIR/data/vrocs/edit/erantag_shape.grd.
This is a grid-based shape file that represents the shape of
the binding pocket for the estrogen antagonist receptor, 3ERT,
that can be downloaded from the PDB (see ID for the estrogen antagonist receptor in the [PDB-IDs] citation). The file will be listed in the
Shape Inventory list as “unnamed”. The grid shape will
display in the 3D window as an opaque shape. Click and
drag the file up to the Current Query list. It is
renamed as “Shape from ‘erantag’”. The representation
in the 3D window becomes transparent.
Note
To use this query as-is in vROCS click the Use in ROCS button to return to the Welcome screen. The grid shape will be imported into the query list as the active query for either a simple or validation ROCS run
Several active estrogen receptor antagonists have a similar color pattern, consisting of two phenol moieties, which can act as either donor or acceptor, and a cation on a flexible chain, as shown in Annotated OEDepict TK depiction of generalized estrogen receptor active ligand. These are the color atoms that will be added to the query.
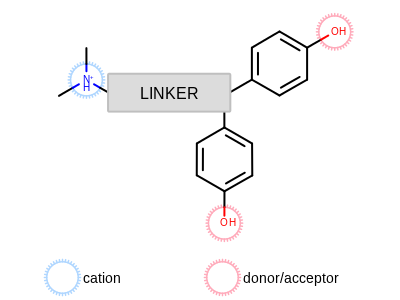
Annotated OEDepict TK depiction of generalized estrogen receptor active ligand
Rotate the shape in the 3D window until it resembles the orientation in Profile orientation.
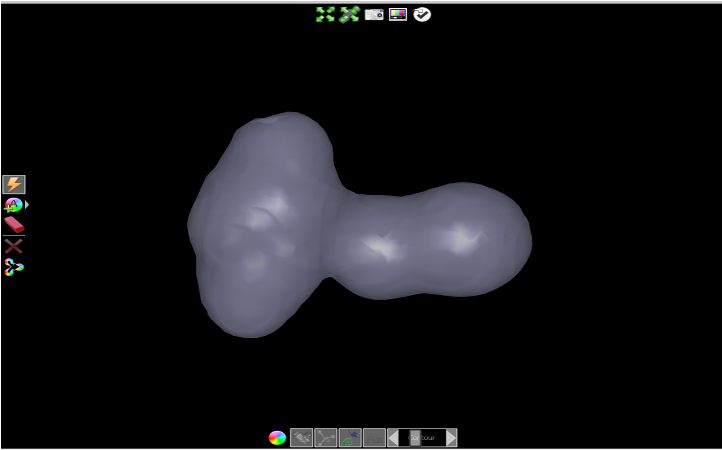
Profile orientation
Use the Contour slider at the bottom of the 3D window to
raise the contour display threshold to 1.25. Click on the
Add color atom button at the left of the 3D Window (See
Add acceptor atoms) and
select Acceptor from the dropdown. Click on the contour surface
to add two acceptor atoms, as shown in Add acceptor atoms.
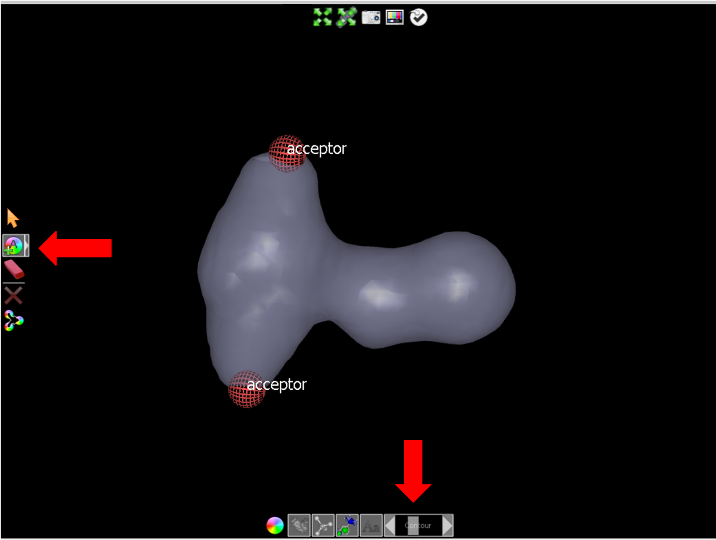
Add acceptor atoms
Click on the Add color atom tool at the left of the 3D Window and select Donor from the dropdown. Click on each of the acceptor features to add two donor atoms at the same point, as shown in Add donor atoms.
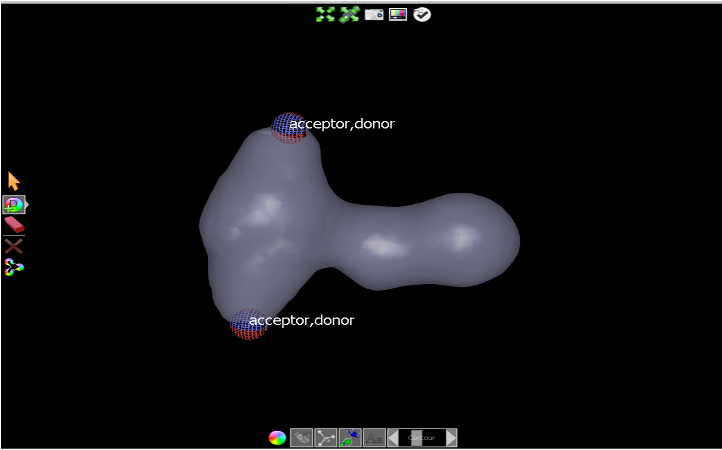
Add donor atoms
Adjust the Contour slider back to a contour level of 1.0. Click on the Add
color atom button at the left of the 3D Window and select Cation from the
dropdown. Click on the contour surface to add a cation atom as shown in
Initial cation placement.
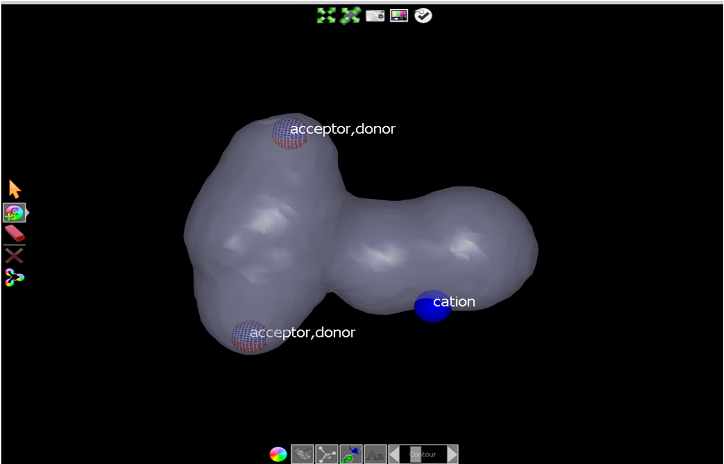
Initial cation placement
Then CTRL-click on the surface twice more, as indicated by the orange dots in Final cation placement, to move the cation color atom mid-way between the three surface points.
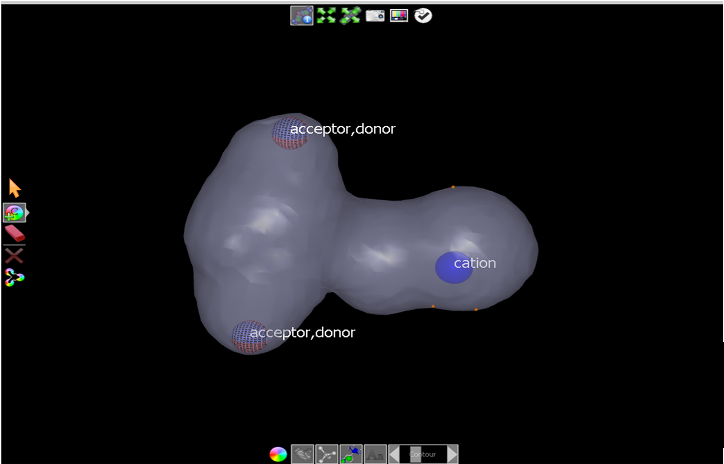
Final cation placement
This completes adding the color points to the query. If you make any errors use the Delete tool (eraser icon) at the left of the 3D window to delete a color atom and try again.
Save query
In the Current Query area right–click on the query name and
rename the query as “erantag_shape_color”. This is the query
name that will be displayed in the Query list for any ROCS runs.
To save the edited query click the Save Query button or use the menu
item File > Save Query… Choose a directory in which to
save the query and give it the name erantag_shape_color.sq.
To use this query in ROCS click on the Done editing icon in
the 3D window or the Accept button to return to the
Welcome screen.
Conclusions
This concludes the tutorial “Create or edit a query manually”. In this tutorial we modified a shape grid by adding color atoms to build a more complex ROCS query containing information about known binding interactions. This query can be further validated before use, as described in Tutorial 3: Perform a ROCS validation run.