Layout
The layout of the application should be relatively familiar to most users. VIDA provides a menu bar with many standard as well as specific menus, a toolbar for common operations, a central main window, and a number of peripheral windows. An example of the layout can be seen in Figure: Docked Layout.
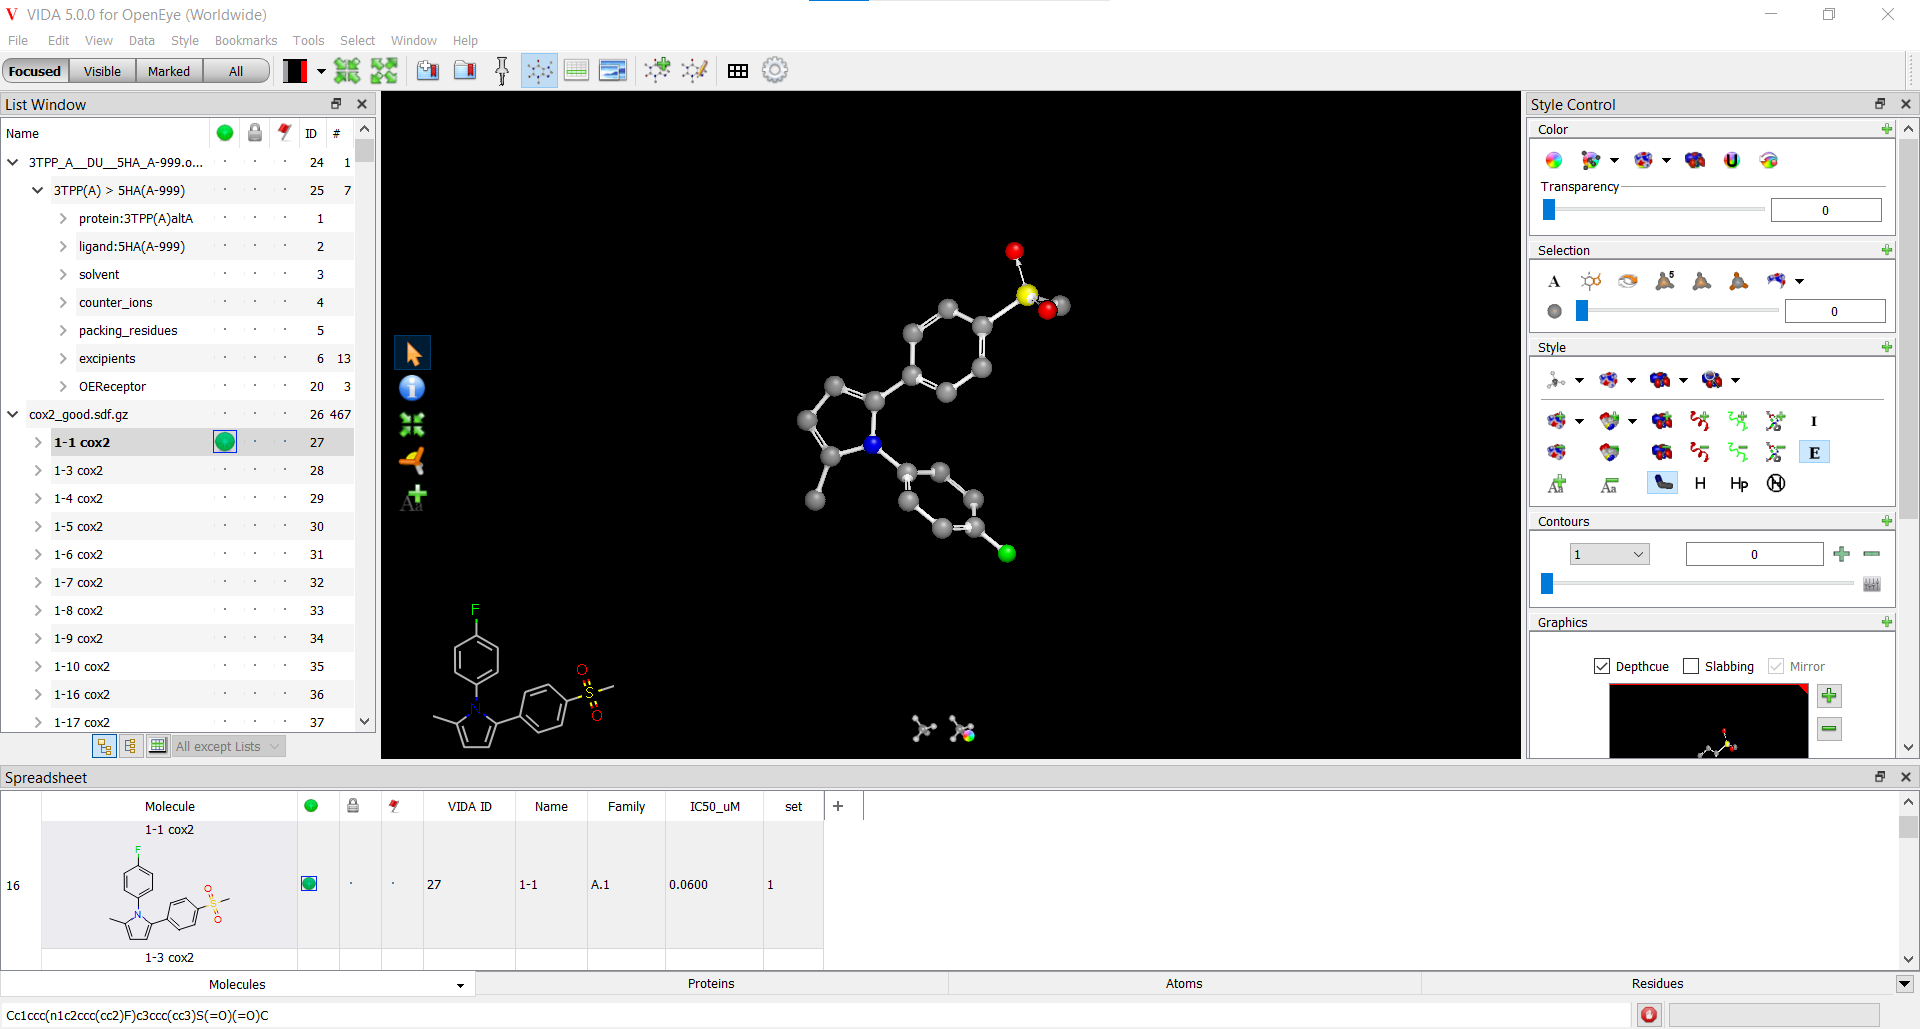
Docked Layout
The layout including the position and visibility of the main and peripheral windows is saved on exit and will be restored the next time the application is run. The layout of the windows can be changed by clicking on the title bar of the individual window and dragging it to the desired location. A placeholder window will appear when the mouse is over an area where the dragged window can be placed as seen in Figure: Dragging Windows.

Dragging Windows
Furthermore, multiple windows can be tiled on top of each other into a tab controlled area as can be seen in the bottom window in Figure: Docked Layout. This example shows tabs for “Spreadsheet” and “Scripting Window”.
Custom Layouts
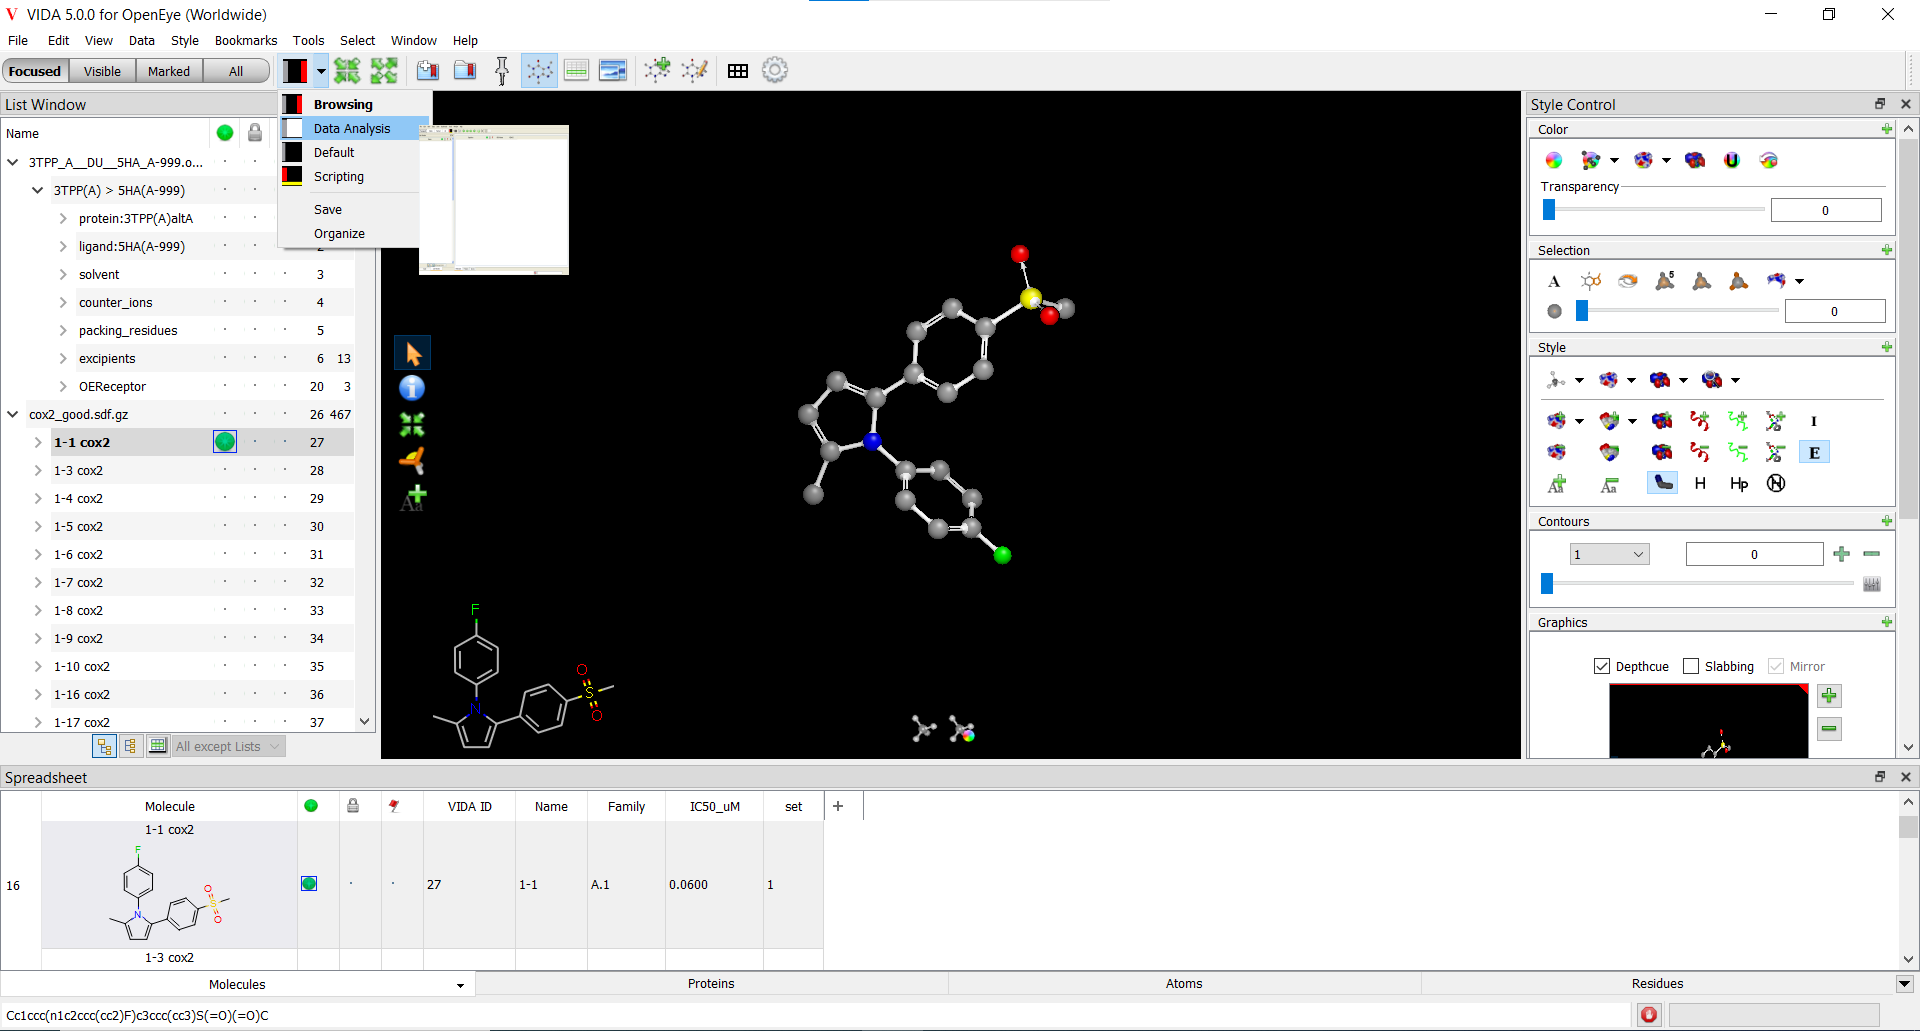
In addition to manually changing the layout, there are a number of predefined layouts which are accessible via a drop down button on the toolbar as can be seen in Figure: Custom Layouts. The colored icon associated with each option indicates which peripheral windows will be shown and where. Hovering the mouse over any given option for about one second will generate a preview image of the resulting layout. The “Save” option allows for the creation and storage of custom layouts. The “Organize” option enables the reorganization of the ordering of the layouts.
Main Window
The main window is the window that occupies the central area of the application on the screen. At any given time, there can be only one main window; however, there are multiple windows which are capable of being the main window if desired. The choice of main window can be controlled by selecting the desired option from the “Main window” submenu in the top-level Windows menu. In Figure: Docked Layout, the 3D display (see display_3d) is serving as the main window.
Currently, there are three different main window options: the 3D display, the 2D display, and the spreadsheet. More details about the individual windows can be found in their relevant chapters.
Fullscreen
In addition to the standard layout described above, the main window can optionally be displayed in fullscreen mode, by selecting the “Fullscreen” option in the top-level View menu. Pressing the “Esc” key will exit fullscreen mode (please note that clicking the mouse on the screen may be required before hitting the “Esc” key in order to ensure that the key press is registered).
When in fullscreen mode, the main menu bar and status bar are hidden by default. However, they can be toggled on or off by hitting the “F1” and “F2” keys respectively.
The 3D display normally contains popup toolbars around the edge of the window. These toolbars remain when in fullscreen mode to allow for easy access to display functionality. For more details on these toolbars see display_3d.
Peripheral Windows
In addition to the main window, there can be multiple peripheral windows docked around the edges of the main window or as separate floating top level windows. Furthermore, multiple windows can be placed on top of each other in a tabbed region.
Currently, multiple peripheral windows (including the potential main windows) are available:
2D Display
2D Preview
3D Viewer
Builder
List Window
Scripting Window
Spreadsheet
Style Control
The display of peripheral windows is controlled by toggling the desired window options in the Windows menu. Currently visible windows are indicated by the presence of a check mark next to their names. Peripheral can also be hidden by clicking on the ‘X’ in the upper right hand corner of the window. As mentioned above, the layout of the peripheral windows can be controlled by dragging the individual windows to their desired locations (see Figure: Dragging Windows).