GUI Layout
|
Make Receptor Layout |
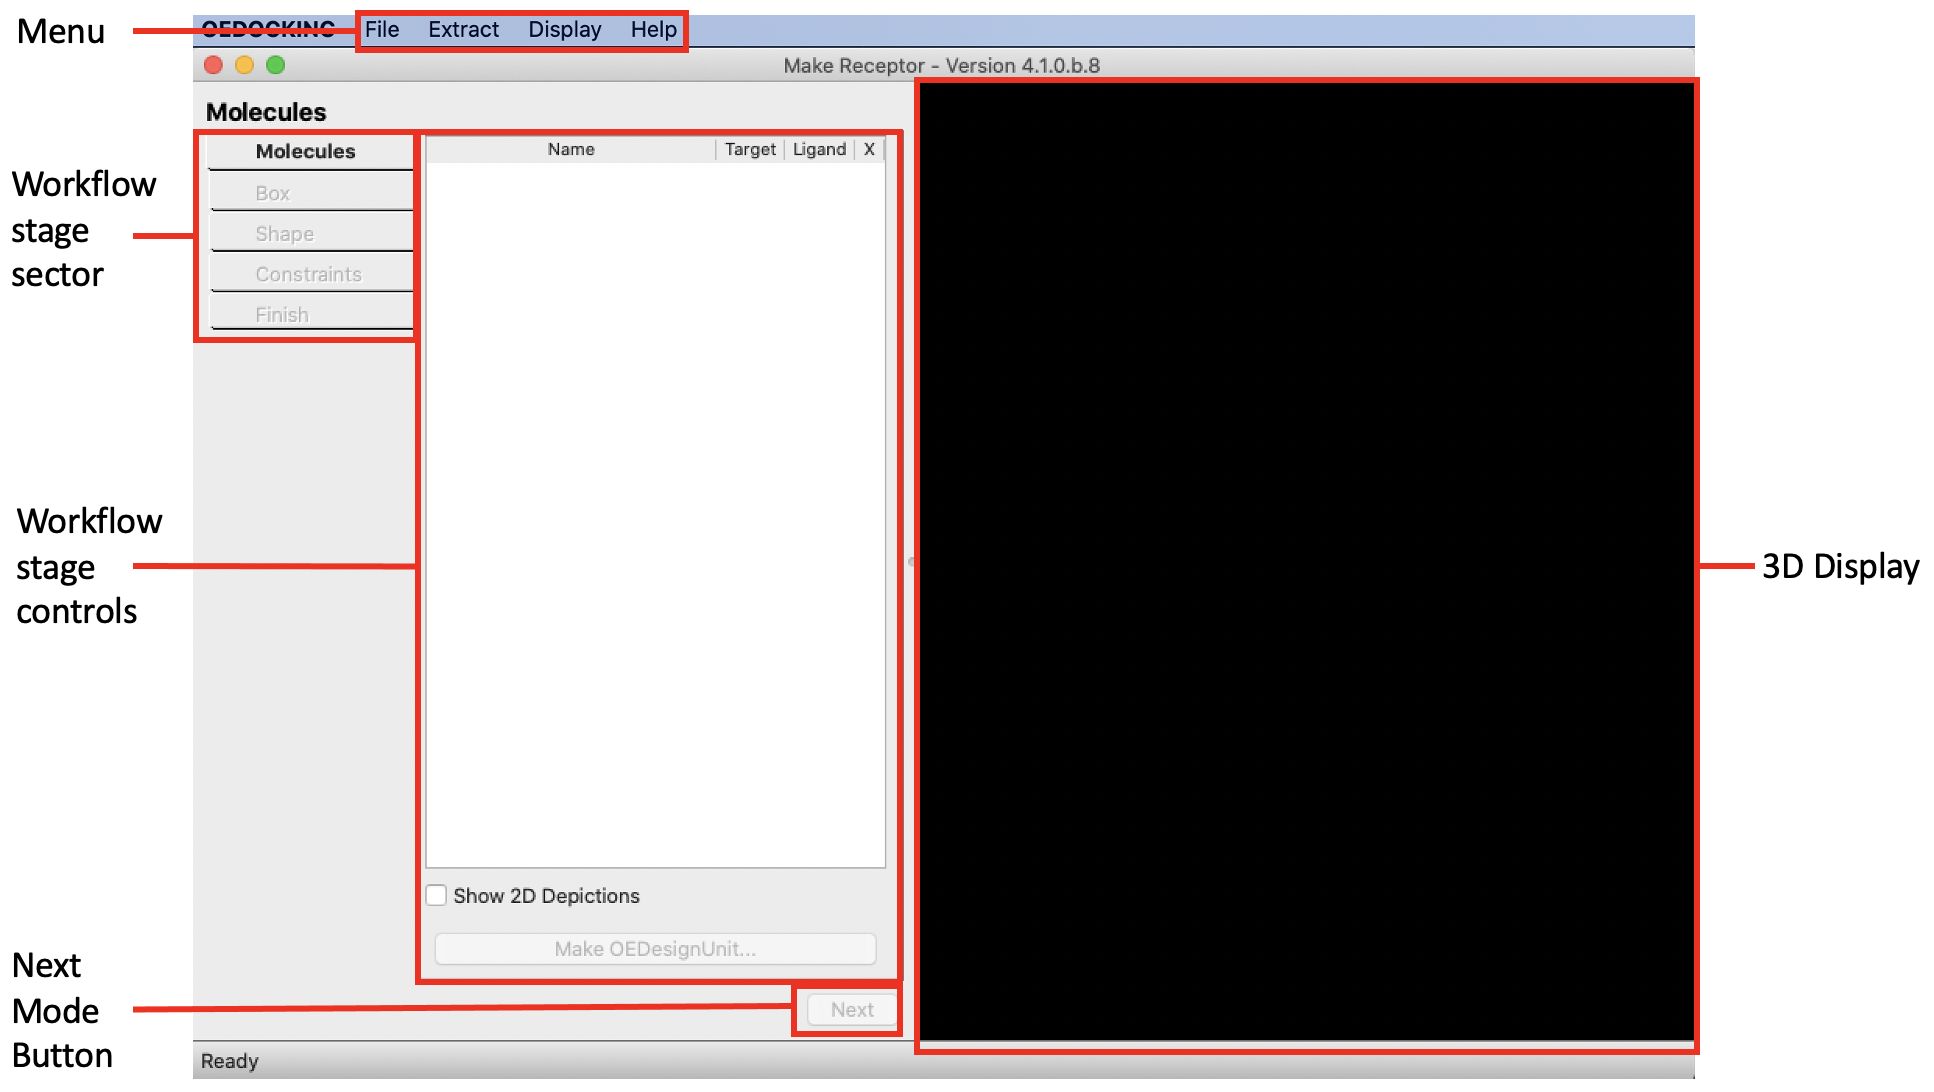
The layout of the Make Receptor GUI, shown above, is divided into five general areas.
Menu
File
- New
Open molecule file(s) to create a new design unit receptor.
Open Design Unit/Receptor: Open an existing design unit or receptor.
Open Recents: Opens a recently opened OEDU file.
Save Receptor: Saves the receptor to a file. The receptor shape must be defined before this option can be used.
Save DU: Saves the design unit(s) to a file. A design unit must exist before this option can be used.
Clear :Deletes all receptor data and molecules and opens the molecules edit mode.
Quit: Quits Make Receptor.
Extract
Target
Extract the receptor target into a molecule file.
Protein
Extracts the protein structure from the design unit into a molecule file.
Ligand
Extracts the bound ligand from the design unit into a molecule file.
Box
Extracts the box enclosing the receptor site into a molecule file. The molecule file will have eight carbon atoms, one at each vertex of the box.
Display
These options all relate to the 3D display window.
Hydrogens
Turn on and off display of hydrogens in the 3D window.
Protein
Sets the protein display mode.
Ligand
Sets the ligand display mode.
Box
Sets the box display mode.
Outer Contour
Sets the display mode of the outer contour.
Inner Contour
Sets the display mode of the inner contour.
Constraints
Sets the display mode of the constraints.
Disable Hardware Rendering
Disables OpenGL hardware rendering. Useful for Windows machines experiencing driver-related 3D graphical issues.
Help
About
Reports the version of the program.
Documentation
Opens a browser window to OpenEye’s web documentation.
Workflow Stage Selector
These buttons control the overall workflow to set up a receptor. Most stages of the workflow must be finished before progressing to the next stage. When the next stage of the workflow is available, its button will highlight here and the next button (described below) will become available. The workflow for setting up a receptor is described in detail in the setting up a receptor section.
Workflow Stage Controls
The controls for each stage of the workflow setup are located in this area. As you progress through the stages of the setup process, controls for each stage will appear here. The workflow for setting up a receptor is described in detail in the setting up a receptor section.
3D Display
A 3D display of the current state of the receptor and its associated data.
Next Mode Button
Selects the next stage of the setup receptor workflow once the current stage has been properly setup.