List Management
The organization of molecules into lists and the ability to easily browse through these lists is an extremely important and central concept to VIDA. As such a List Window is provided to aid in the navigation and organization of lists. Furthermore, there exist many mechanisms to create, modify, and delete lists which will be discussed in more detail later in this chapter.
Introduction
The List Window is one of the primary navigation and organization mechanisms in VIDA. It displays all of the currently loaded files and their contents (molecules, grids, surfaces, etc.) into hierarchical lists for easy browsing and organization.
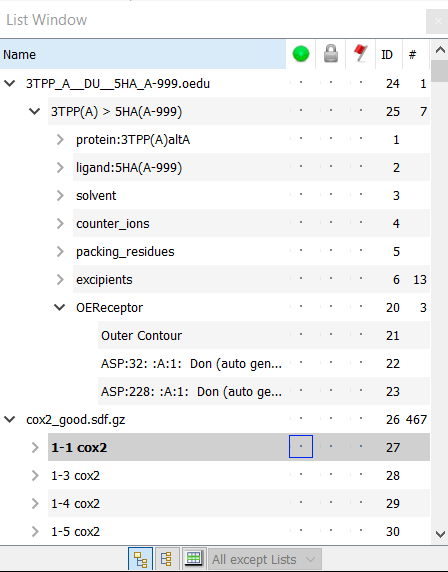
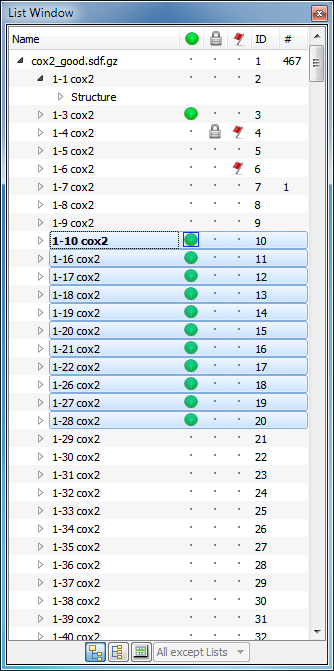
The List Window can be seen in Figure: List Window and contains multiple columns for controlling the various states and properties of the associated objects. The first column displays the name. The second column (with the green sphere icon at the top) is the Visible state column . The third column (with the padlock icon at the top) is the Locked state column. The fourth column (with the flag icon at the top) is the Marked state column. The fifth column contains the unique identifier assigned to that object. The sixth and last column contains the number of entries that are contained below that entry (e.g. number of molecules in a list, number of conformers in a molecule, etc). More details on the List Window columns are provided in the List Columns section.
List Window
Browsing
Every list in the List Window, as well as many of the other objects, can be expanded in the List Window to reveal further detail or the members contained within them. A small box with a “+” sign inside to the left of an object’s name indicates that that object can be expanded. Molecules, for example, may be expanded to reveal conformers, molecular structure, or potentially other related children objects such as surfaces or grids. A single mouse click on the box will expand that object to reveal its contents. Double-clicking on the object name will turn on in-place renaming of that object.
Views
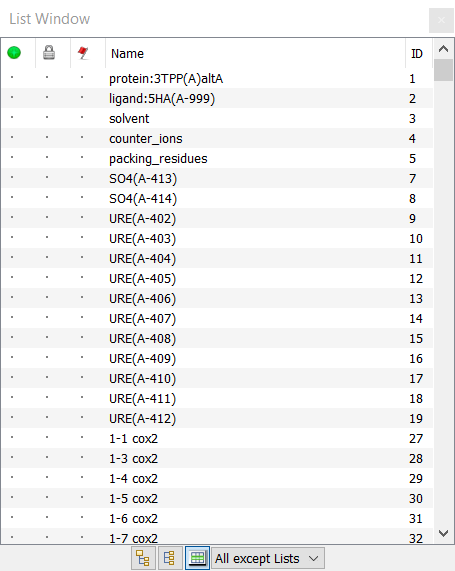
Flat View
Spreadsheet View
The List Window provides three different views onto the loaded data. Which view is shown is controlled by the three buttons at the bottom of the List Window. The first view is a traditional hierarchical view, described above, and seen in Figure: List Window. The second view is a flat view (see Figure: Flat View) in which the list hierarchy has been removed, but all the contents are shown in the same original order. The third view is a spreadsheet view (see Figure: Spreadsheet View) which shows only those objects that appear within the associated spreadsheet (as specified by the drop down box next to its button). Furthermore, the order of the objects in this view parallels the current sorting order in the application spreadsheet.
List Columns
There are multiple columns available for each object in the list. Some columns are simply informative, such as the unique identifier, while others are functional as well as informative.
Clicking on an object’s name will make that object the Focused object. In the List Window, the Focused object’s name is displayed in bolded text and there will be a small blue box around the dot in the second column (the Visible column). An example of this can be seen in Figure: List Window, where the molecule “1-1 cox2” is Focused.
The second column is the Visible column. The Visible column has a green dot icon in its column header. This column displays and controls the Visible property for objects. If an object is Visible there will be a green dot identical to the one in the column header present in that object’s Visible column. If that object is also the Focused object, there will be a small blue box around the dot in that column as well. Clicking on the icon in the header of this column will make all lists visible.
If a given object has children, the visibility of its children can also be controlled in this column. Child objects have an additional layer of control regarding visibility in that they can be hidden, visible, or can mimic its parent’s visibility. If an object is set to mimic’s its parents visibility, an upright triangle is shown instead of the standard green dot (as can be seen in Figure: Mimic Visibility. Clicking in this column cycles through these three states in the following order: hidden, mimic, visible. Please note that molecular structure (atoms, residues, chains, etc) are not considered children objects and as such always mimic the parent molecule’s visibility if they are marked visible with a green dot.
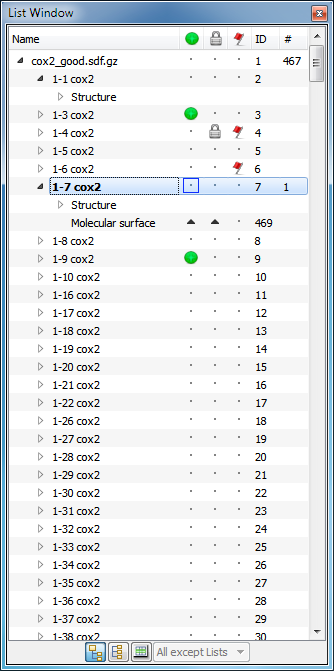
Mimic Visibility
The third column is the Locked column. The Locked column has a small, grey padlock icon in its header. If an object is Locked there will be a grey padlock identical to the one in the column header present in that object’s Locked column. Clicking on the lock icon in this column’s header will lock all objects.
The fourth column is the Marked column. The Marked column has a red flag icon in its header. If an object is Marked there will be a red flag identical to the one in the column header present in that object’s Marked column. Clicking on the flag icon in this column’s header will mark all objects.
The fifth column is the ID column. An object’s ID is simply a unique identifier that can be useful to identify specific objects when running various commands. Each top level object has its own unique ID, but child objects like conformers and atoms are all a part of their parent molecule’s ID.
The sixth and final column is the Number column. This column contains the number of entries available beneath the current object. For lists, this will display the number of molecules in that list. For molecules, this will display the number of conformers (if there is more than 1).
Columns can be shown or hidden as desired by right-clicking in the header of the List Window. These changes will be remembered in the Preferences and thus persist between sessions.
Multiple Objects
The Visible, Locked, and Marked properties can be toggled by clicking on their associated columns in the List Window. If multiple objects are highlighted simultaneously and the click occurs in a column associated with the highlighted region, that change will apply to all of the highlighted objects. In Figure: Multiple Objects, the highlighted objects have been made Visible by clicking in that column. The Focused object has changed as a result as well.
Visible, Locked, and Marked properties of the Focused object can be toggled using the V, L, and M keys, respectively.
List Manipulation
The List Window operates on the basic concept that every potentially viewable object is placed inside a list. As a result, the root items in the List Window are always lists. These lists can be combined, subsetted, and manipulated into new lists. The properties of all the objects in a list can be set together by clicking in the columns of their containing list. Finally, objects can easily be removed from and inserted into lists.
Creating Lists
New lists can be created in several ways. The simplest way is to select some number of molecules from a list and drag them to the top of the List Window.
The “New List” submenu in the File menu provides a number of list creation methods, including using the AND of two or more lists (intersection), the OR of two or more lists (union), the XOR of two lists (union - intersection), or from the currently Marked set of objects.
The AND list contains only those objects which are in all of the source lists. The OR list contains all of the objects contained in its individual source lists. The XOR list contains the objects which are in only one of the source lists, but not both. Finally, the Marked list creates a new list which contains all of the currently Marked objects.
Another way to create a new list is by right-clicking on an individual list and selecting the “Subset” submenu from the popup menu. This menu contains four entries – “By Marked”, “By Query”, “By Not Marked” and “By Not Query”. The “By Marked” option creates a new list containing all of the Marked objects from within the list. The “By Not Marked” option creates a list with all of the objects from the list which are not Marked. “By Query” generates a dialog which prompts for a substructure query that if the objects match, those objects will be placed in the new list. The “By Not Query” behaves the same way, except that it puts the objects that do match the query into the new list.
The last way to create a new list is from the “Find” menu entry in the Edit menu. This mechanism searches all of the currently loaded molecules by either Amino Acid Sequence, SMARTS, a regular expression against the molecule title, or by a Query molecule (as a substructure search). After clicking the “Search” button, the matching results will be displayed on the right-hand side of the dialog. The entire set or just specific individual results can be selected within the dialog to populate the new list.
Reorganizing Lists
The List Window supports “drag and drop” of lists and the items they contain. This allows lists to be reordered, molecules to be reordered within a list, and molecules to be dragged from one list to another. New lists can be created by dragging molecules out of a list to the List Window’s top level.
Note
OEDesignUnit entries cannot be edited at this time
Deleting from Lists
As previously mentioned, objects can also be removed from lists. There are two ways to remove an object from a list. The first mechanism is to delete the object (by selecting the “Delete” option from the right-click menu). Deleting an object will remove it from ALL of the lists to which it belongs. Choosing the “Remove from List” option from the same right-click menu will remove the object from the specified list only, leaving it perfectly intact in any other lists that it might belong to. When the last object is removed from a list, the list itself will be removed.